Below is an overview of all screens that are part of our digital mock up. We used Figma to design the interfaces. These screens will be uploaded to InVision to make them interactive. Overall our digital mockup is consistent with our final paper prototype. The only additional feature added was a pop up indicating an event has been successfully created when users are directed back to the homescreen after completing that task.
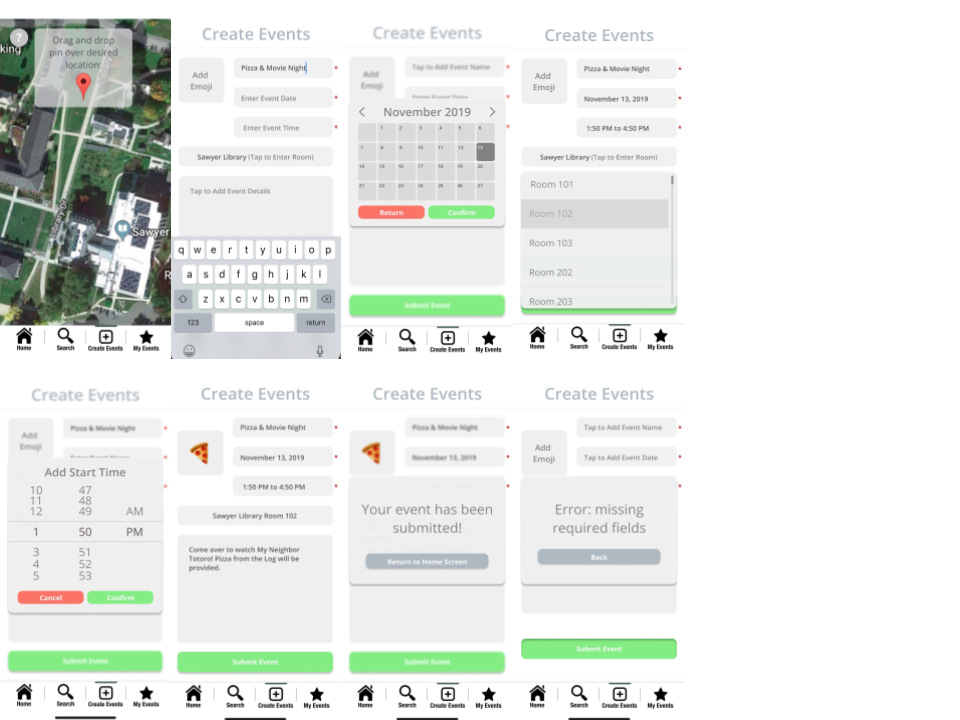
Task 1: Creating an event.
First the user logs into the app as a student using their school email address and password.
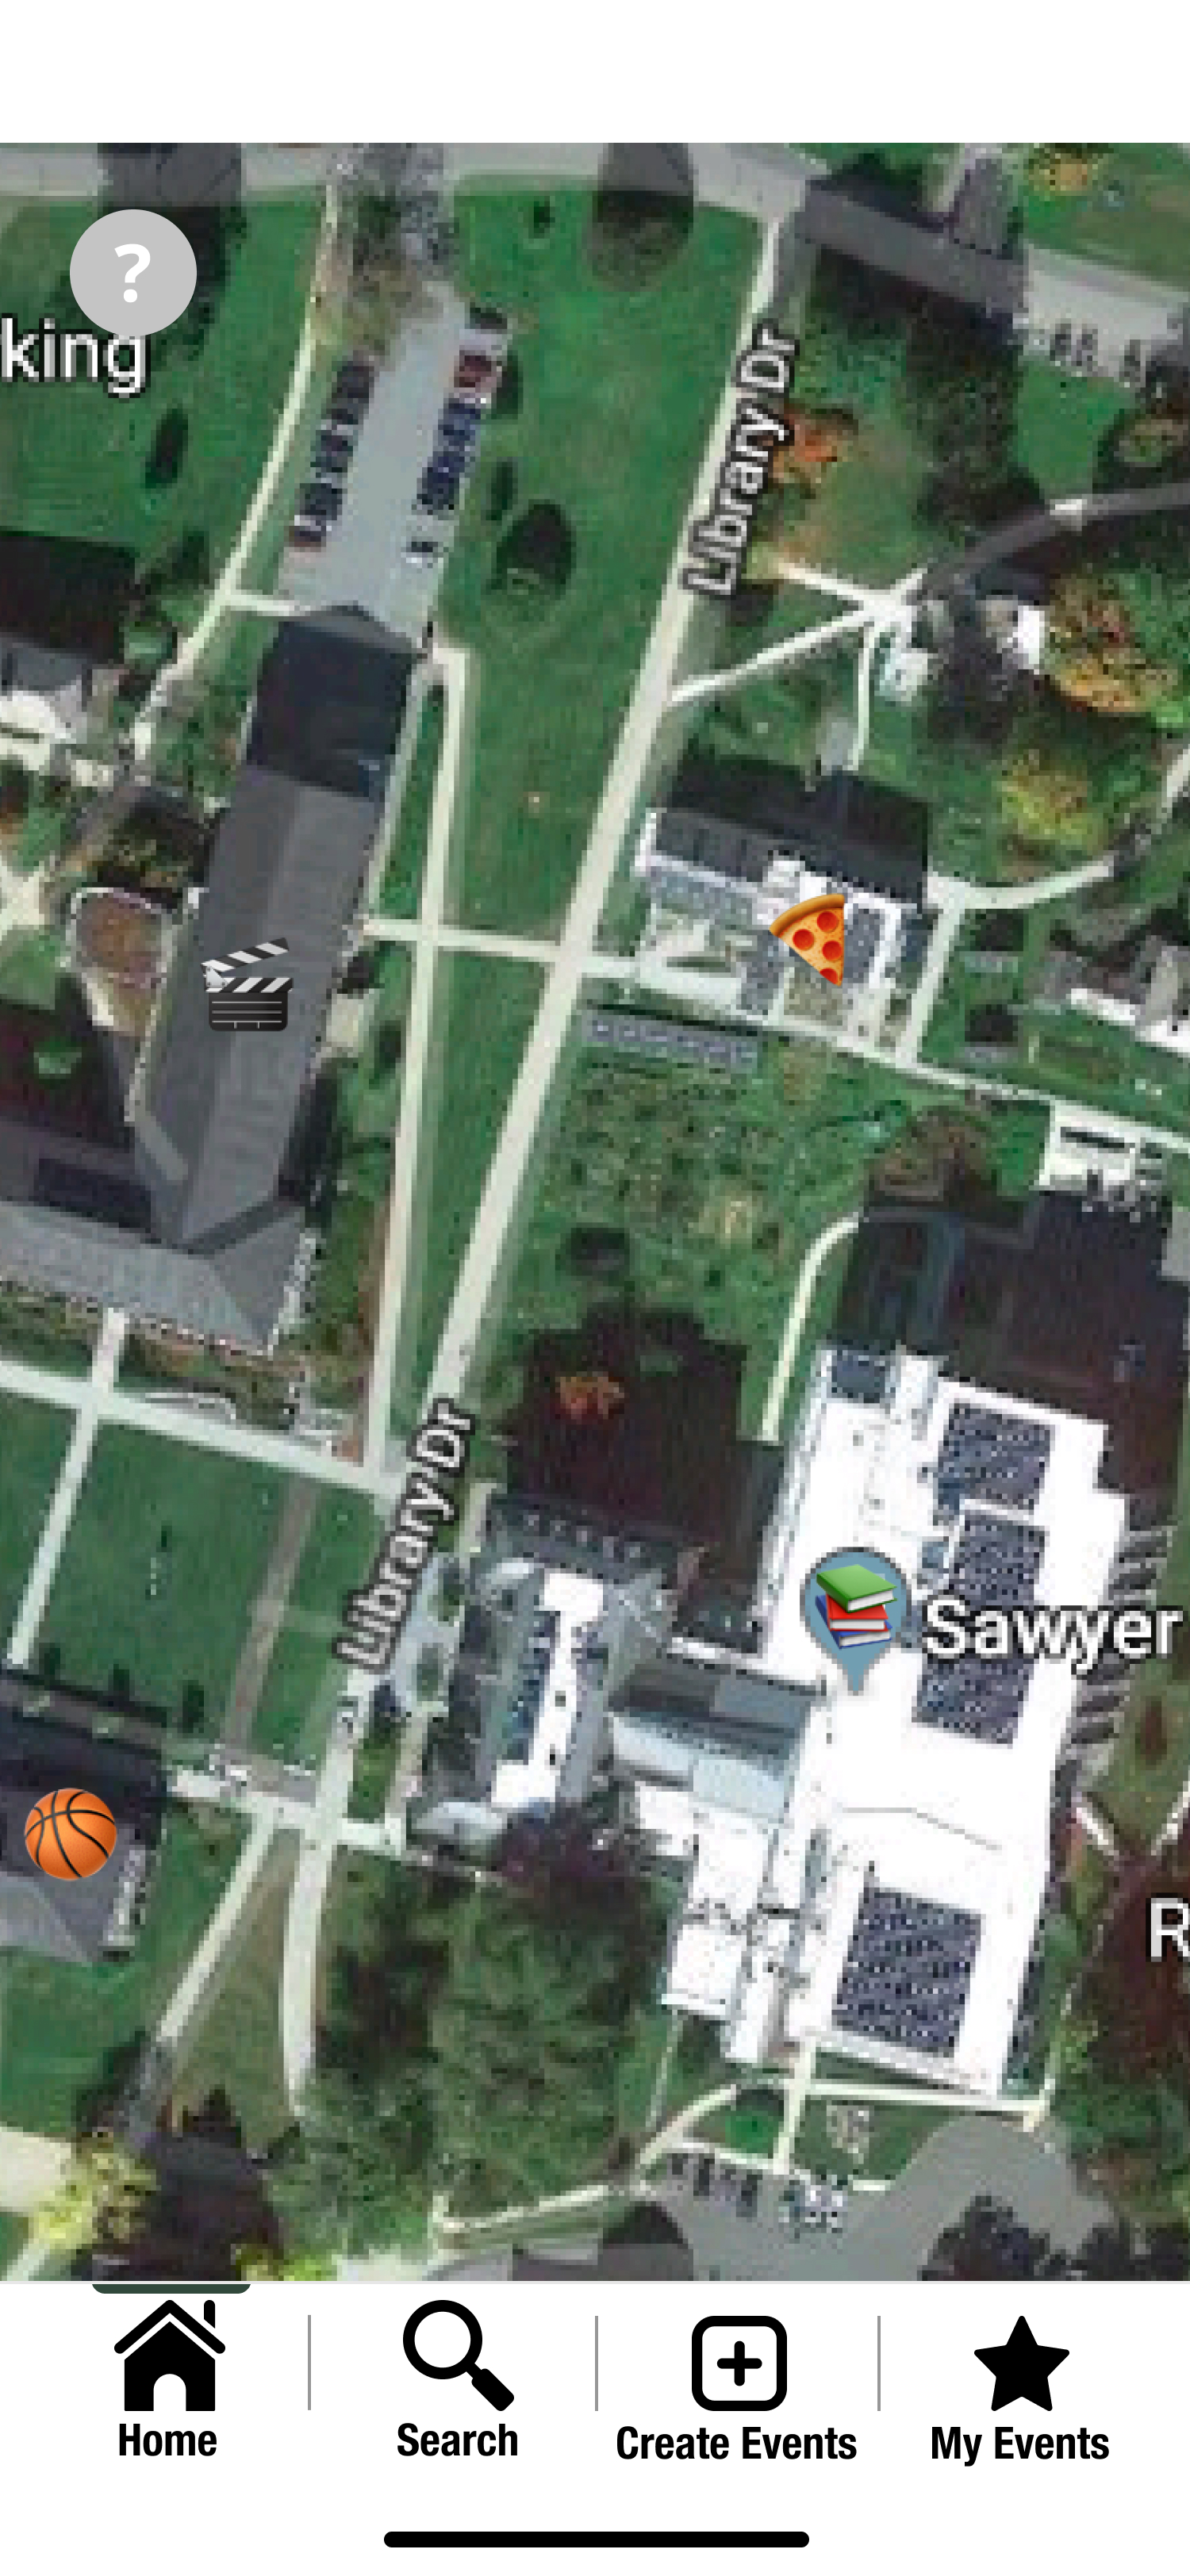
The user is then immediately taken to the homescreen of the interactive emoji map, and can click on “Create Event” on the menu bar near the bottom of the screen
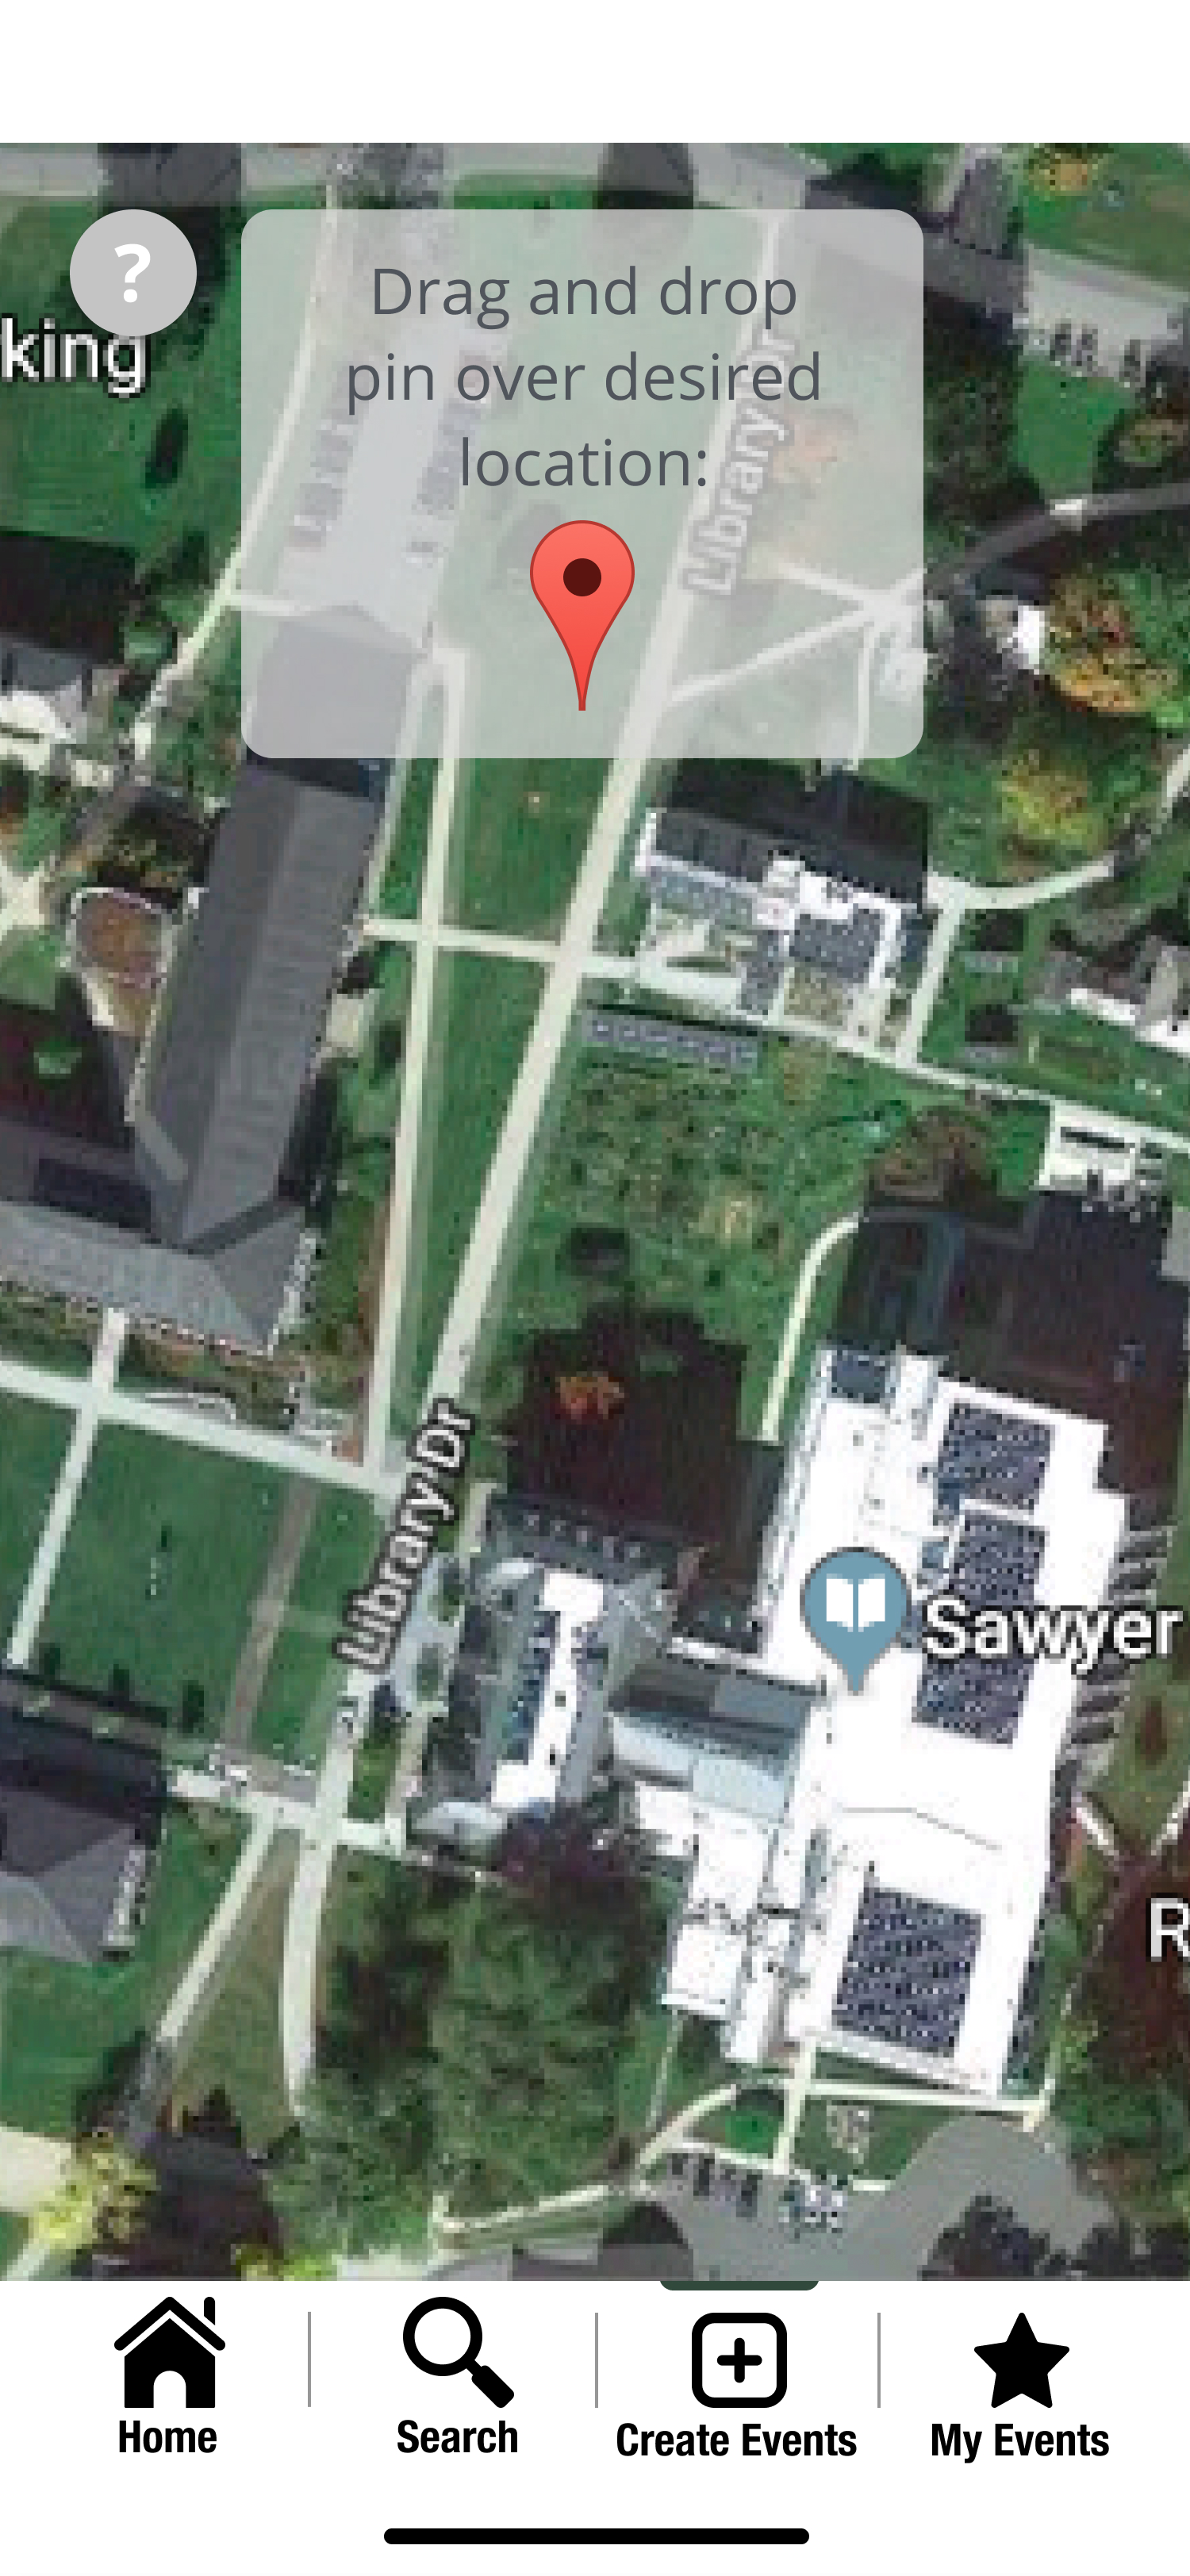
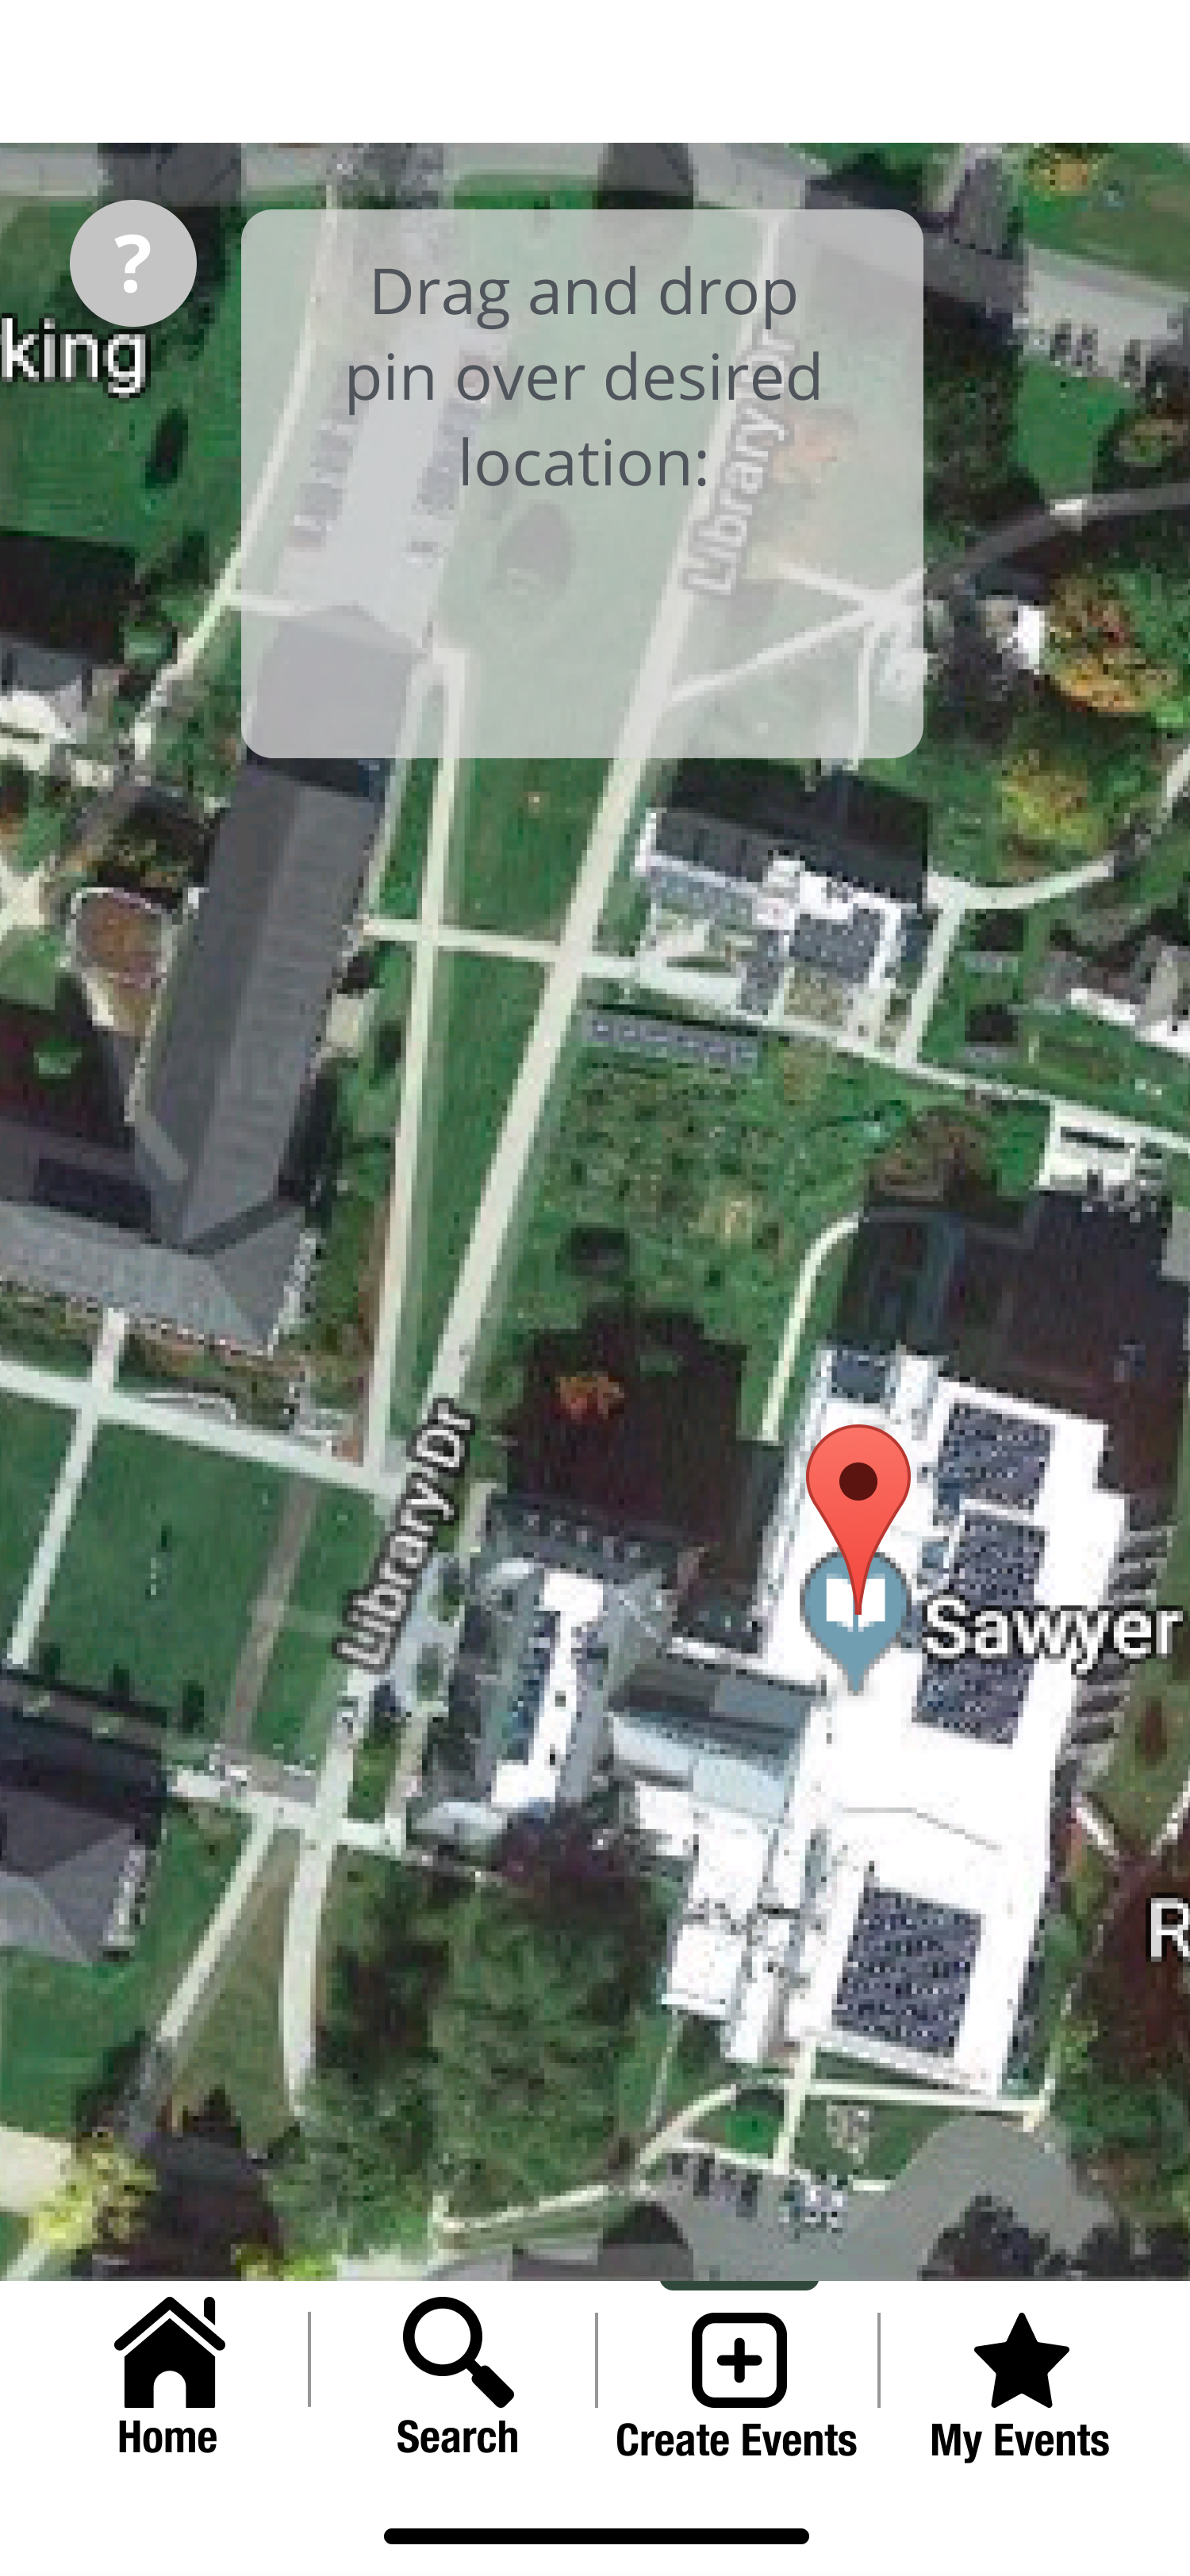
The user is then prompted to drag and drop a pin on the map to indicate the desired location of the event that they will be creating.
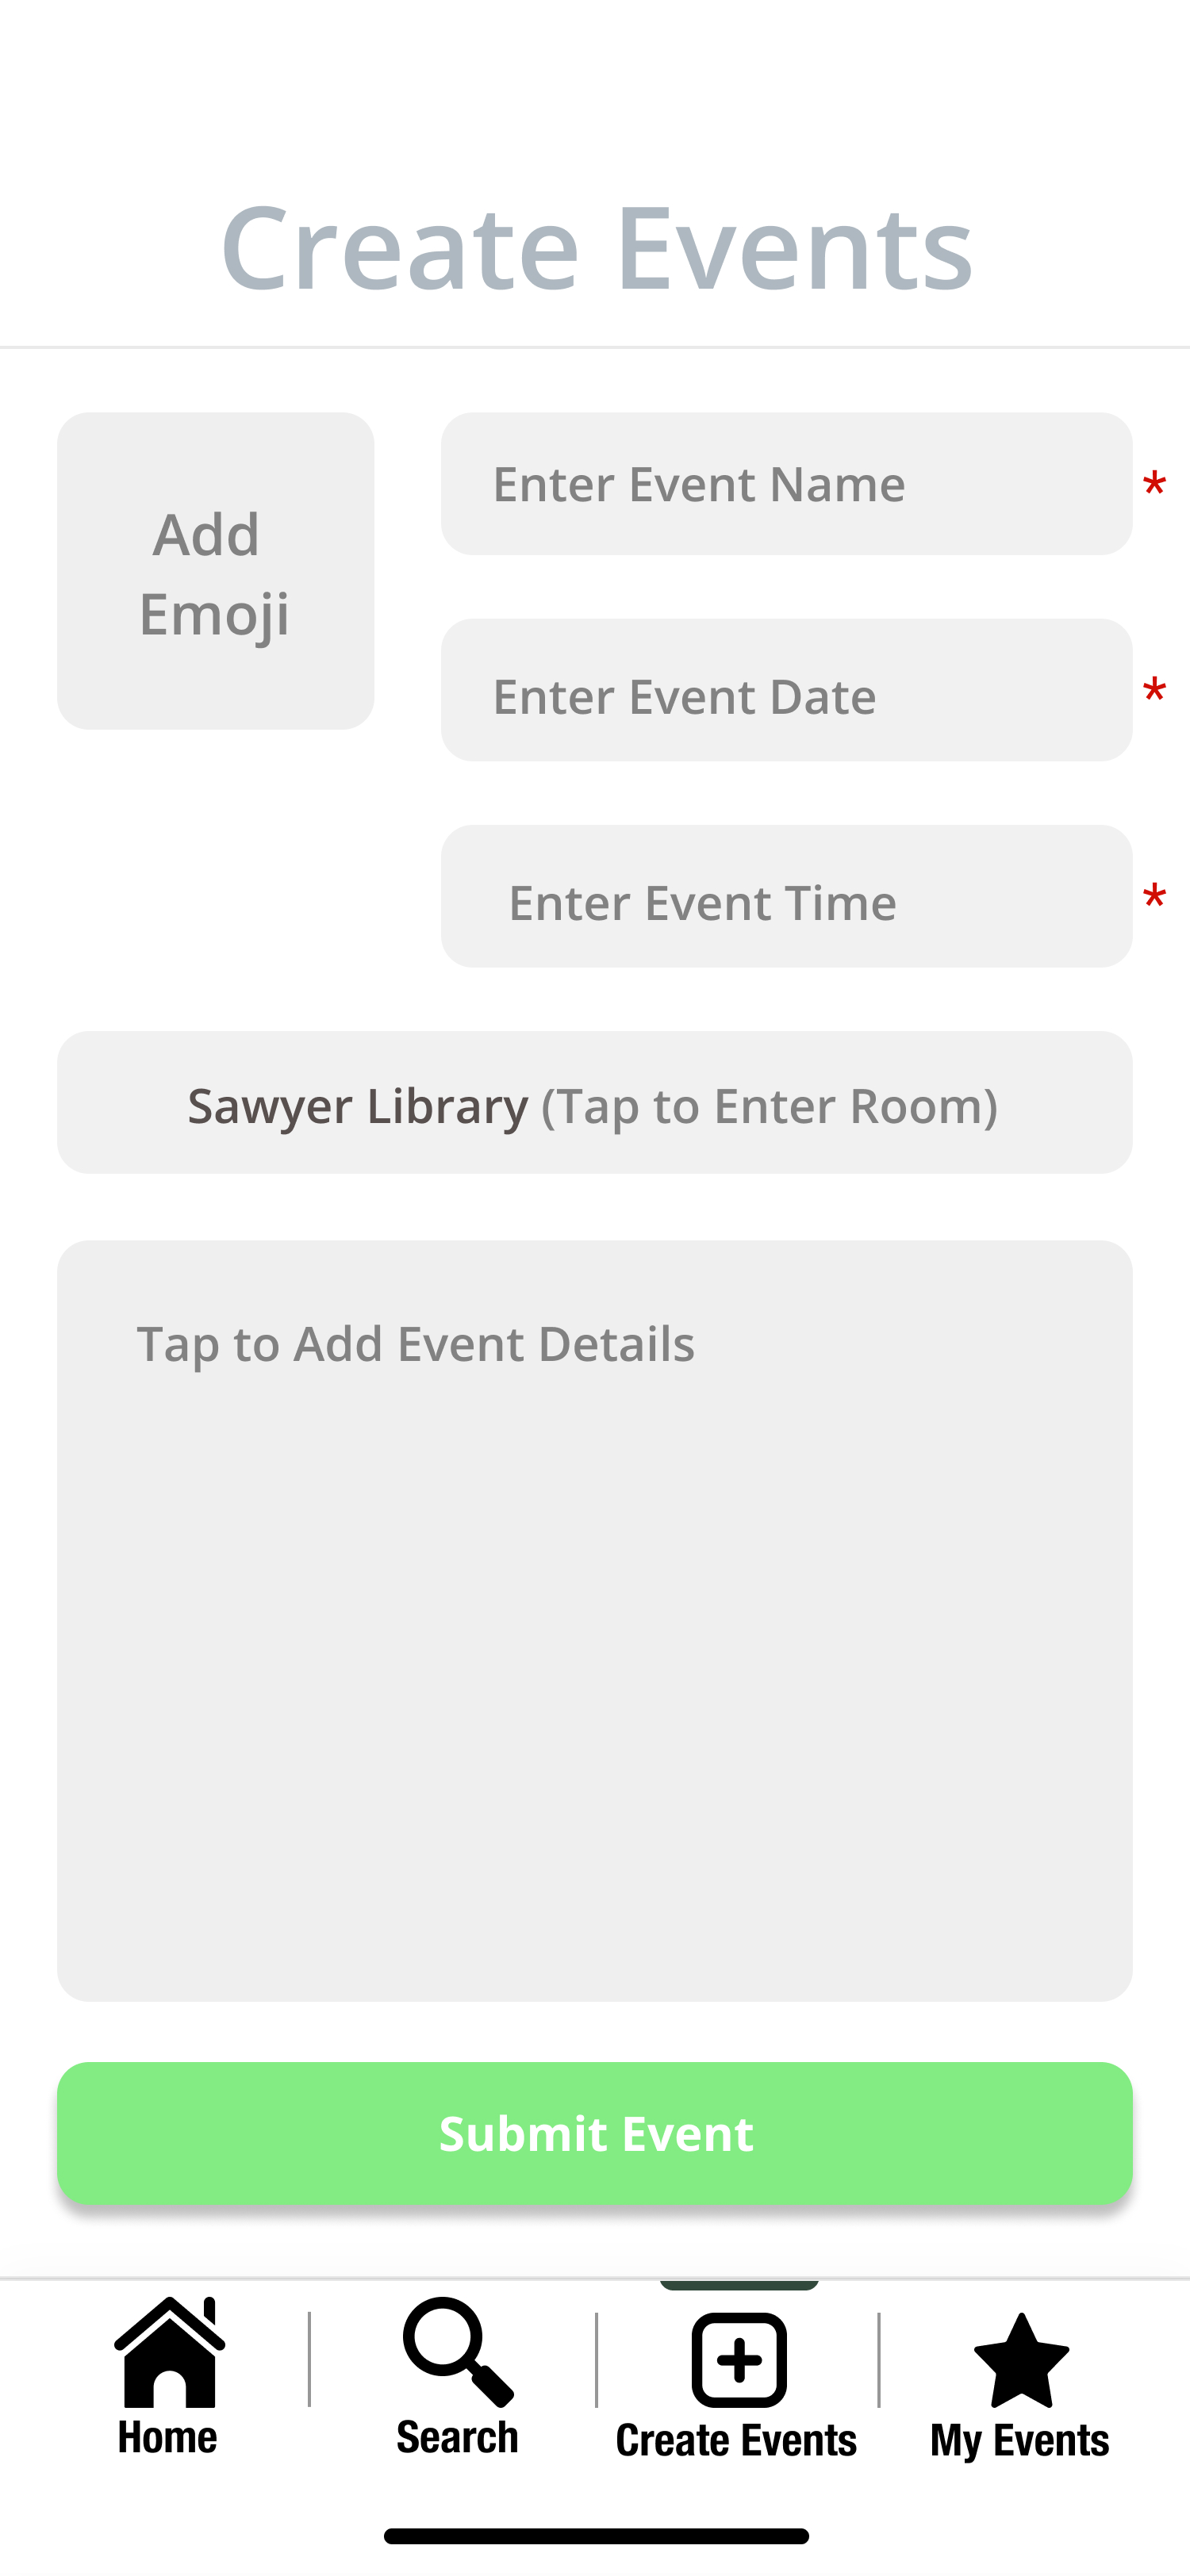
Once the user drops a pin, a screen in which they can input and submit information regarding the event pops up.
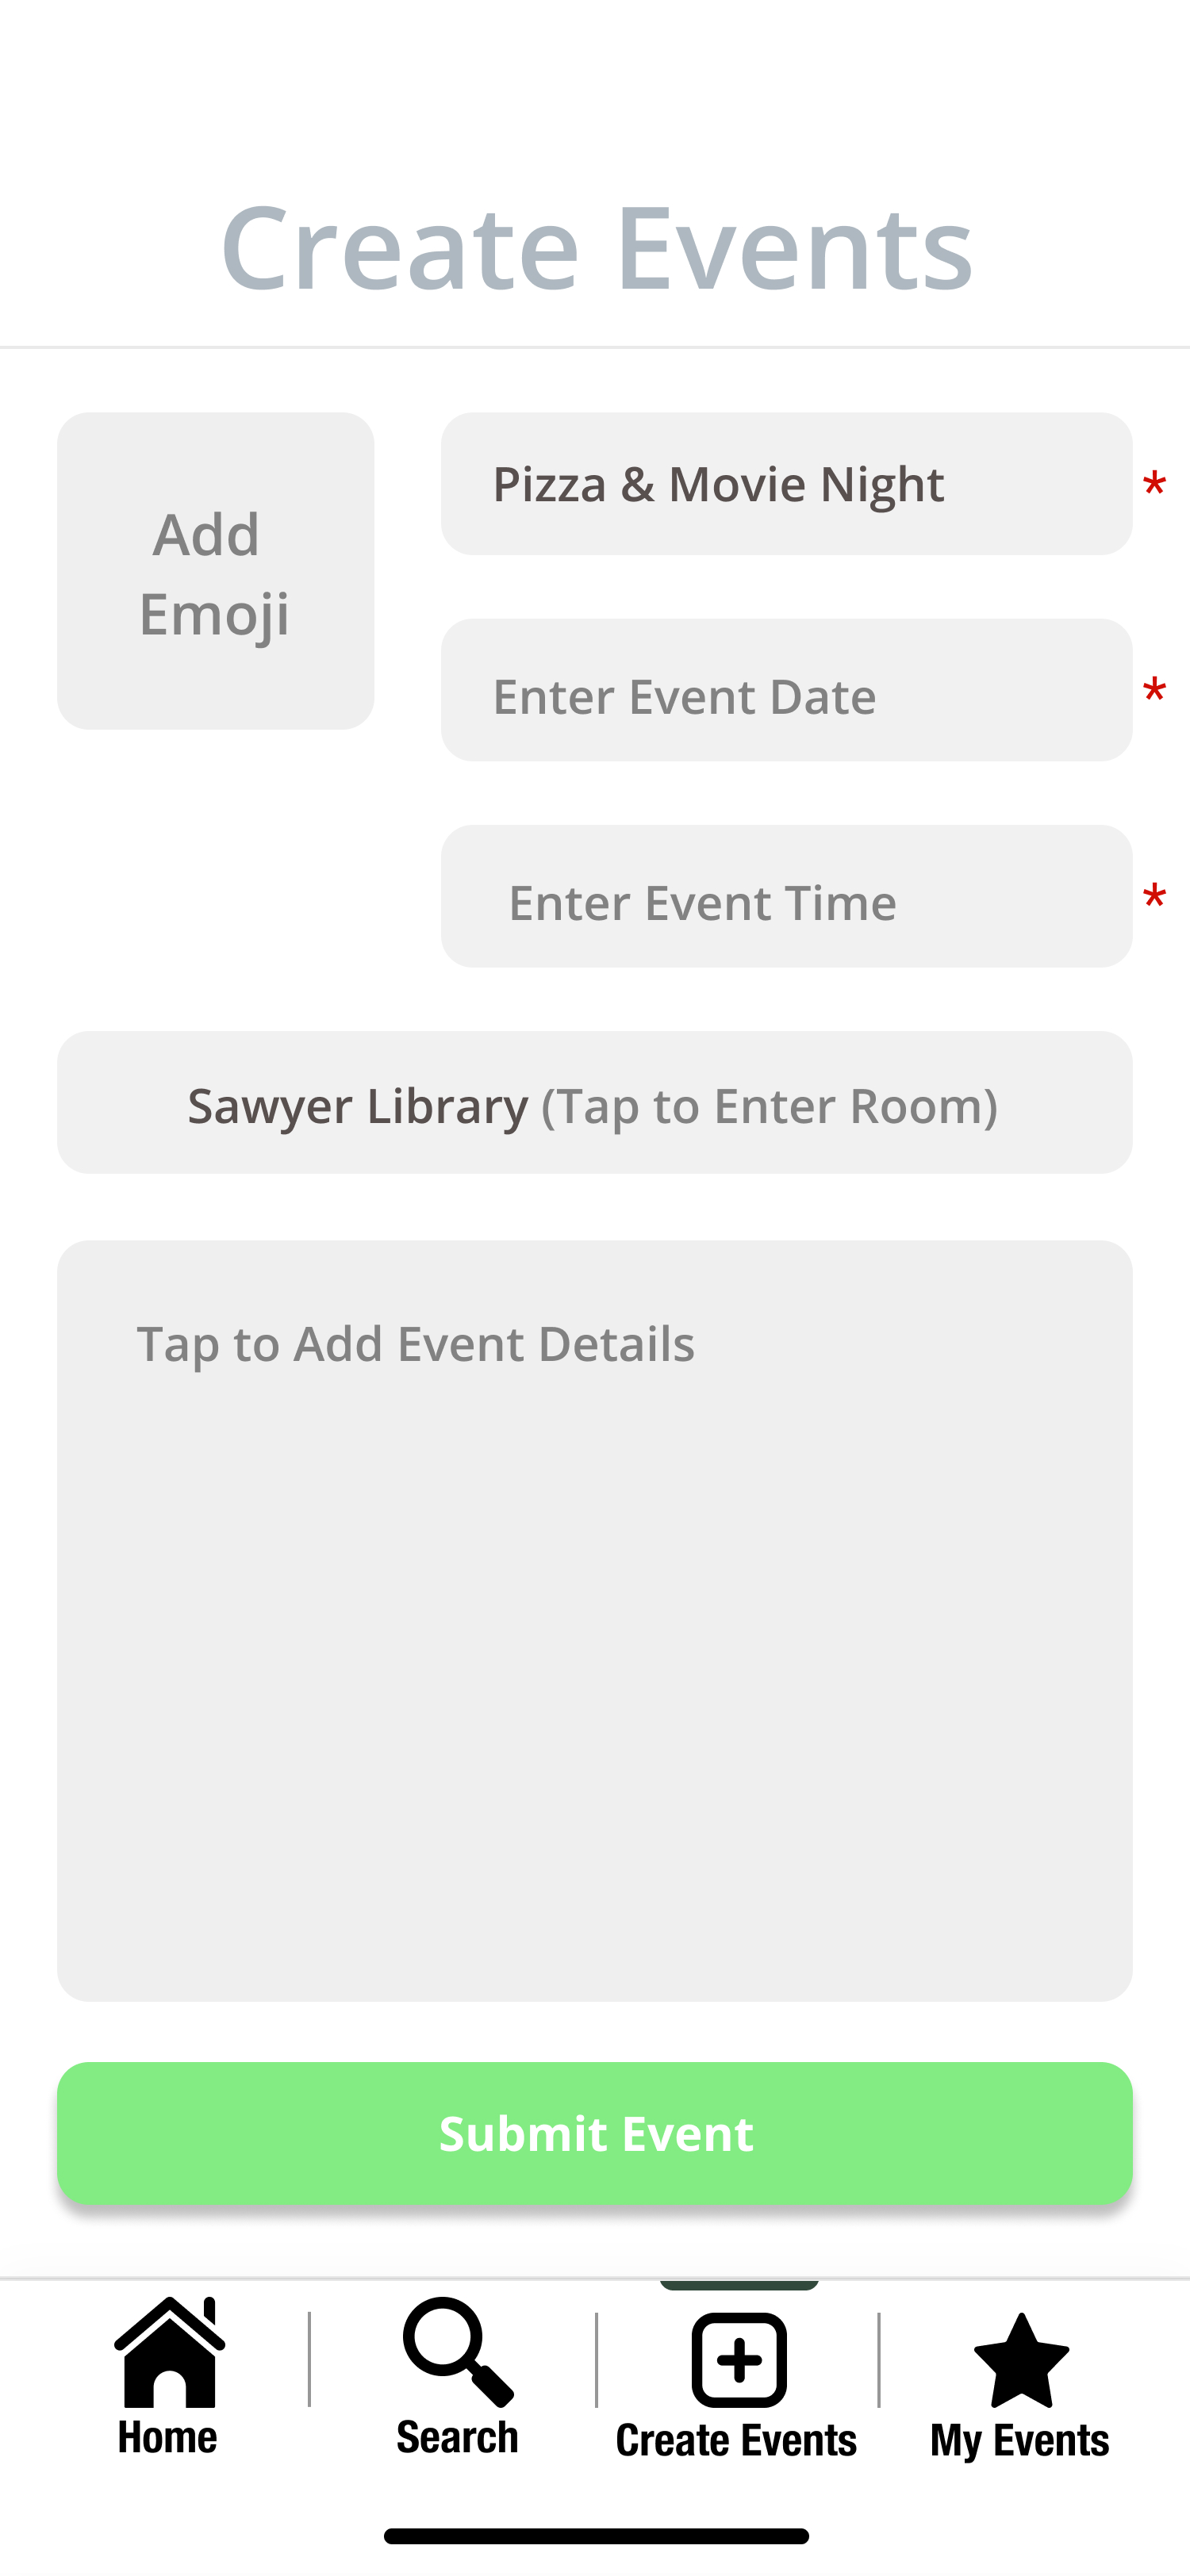
The user can type in the event name
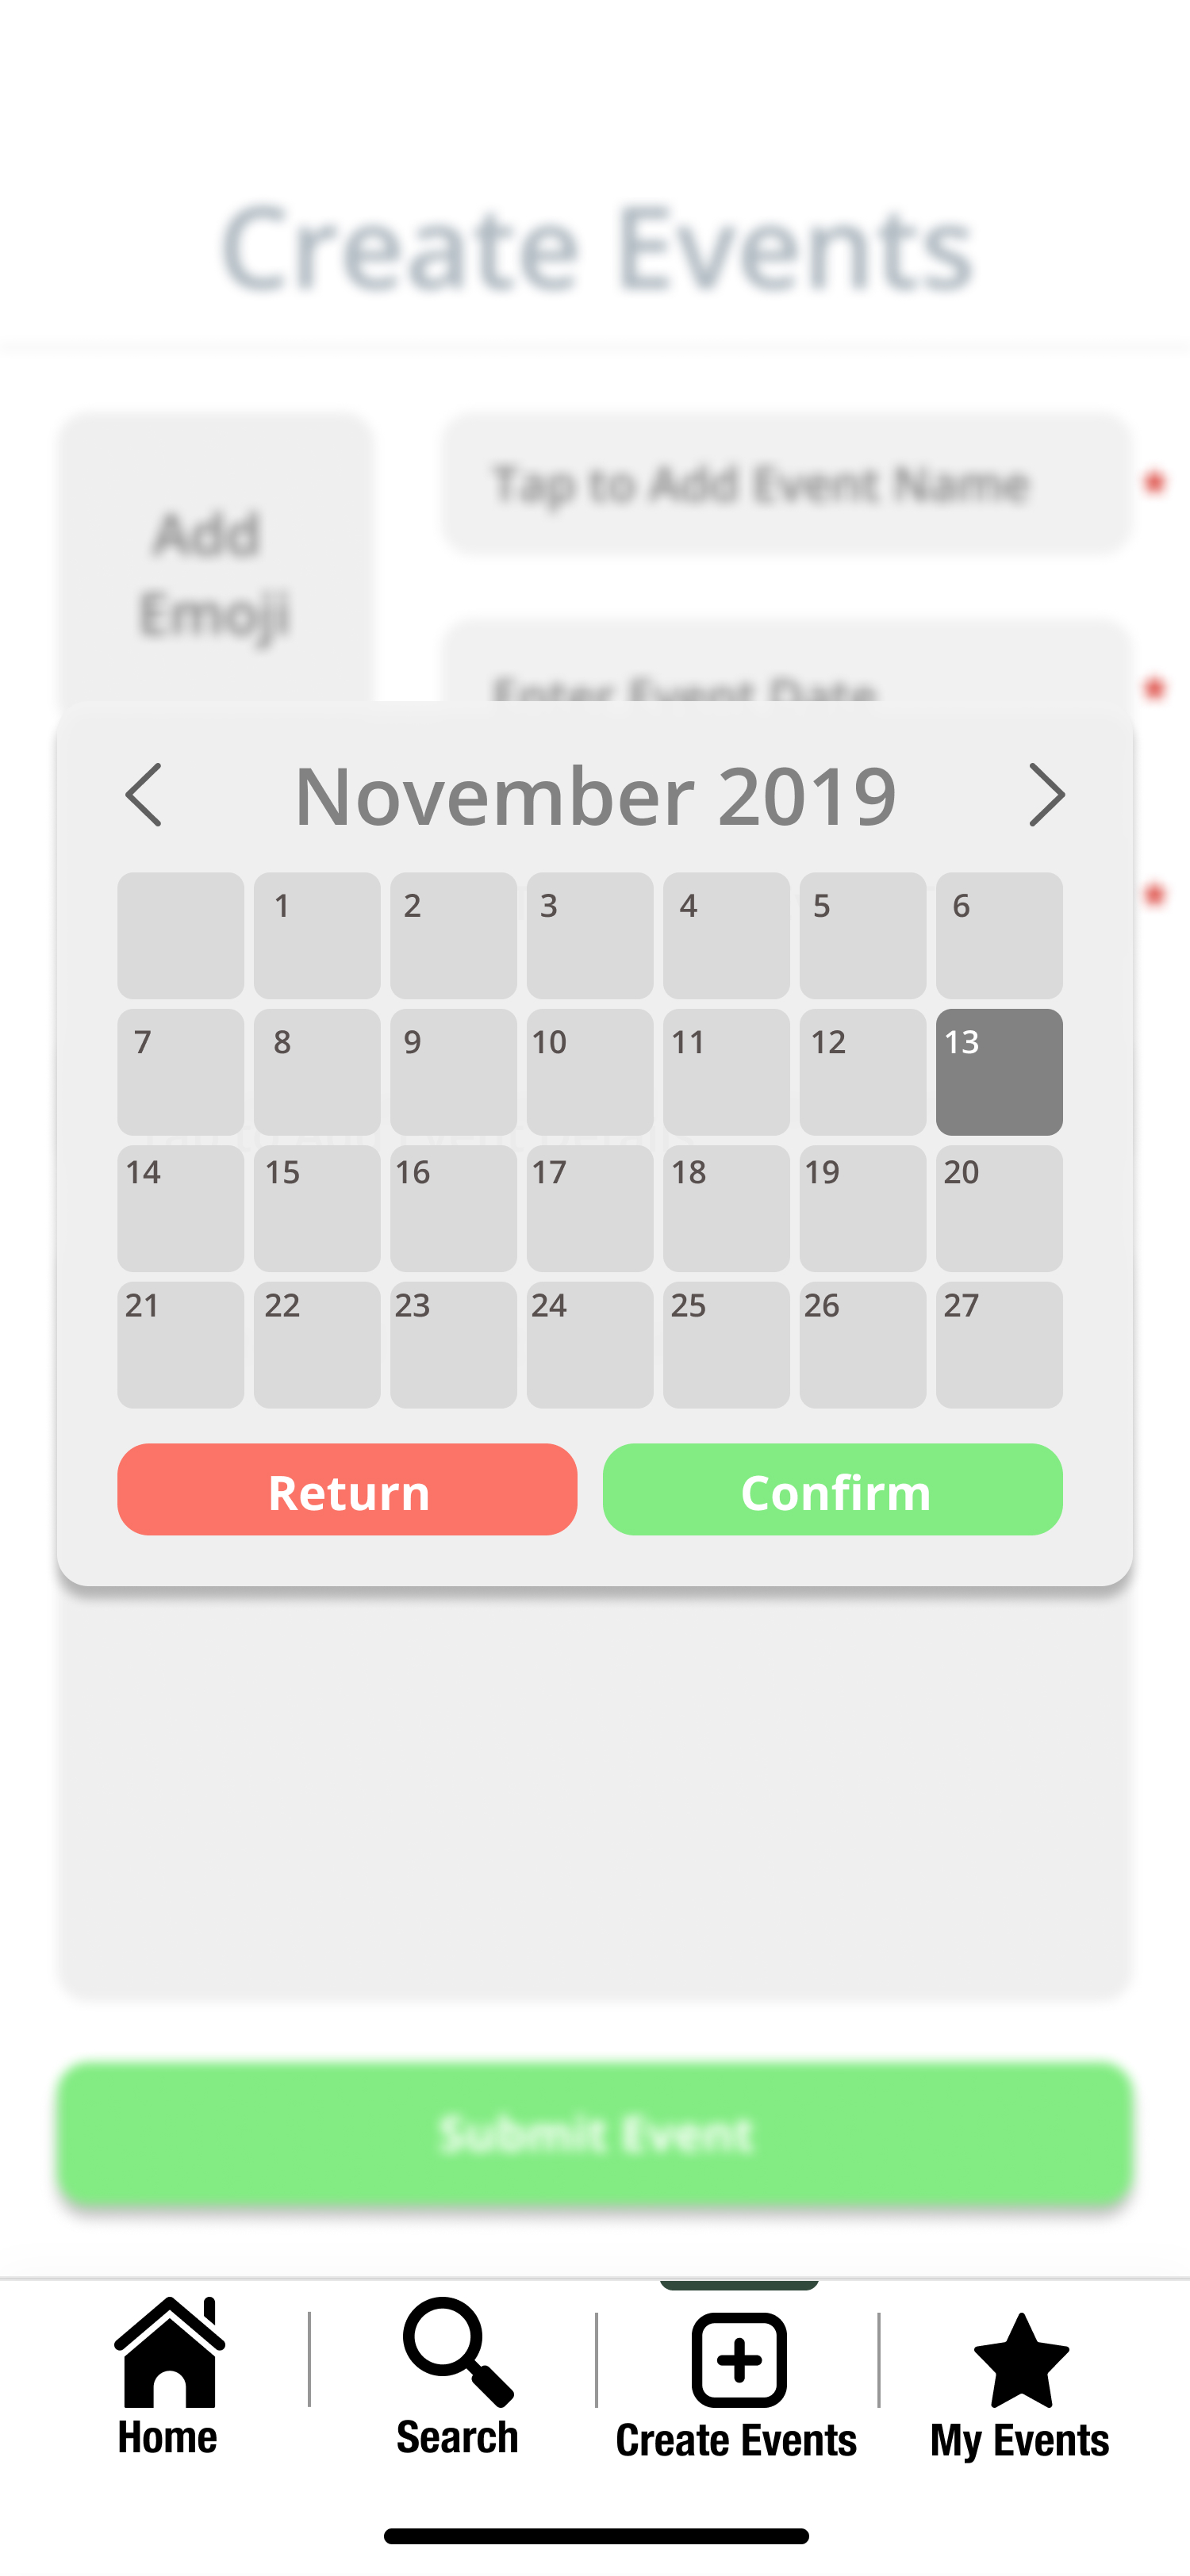
The user can use the calendar to input the desired date of the event.
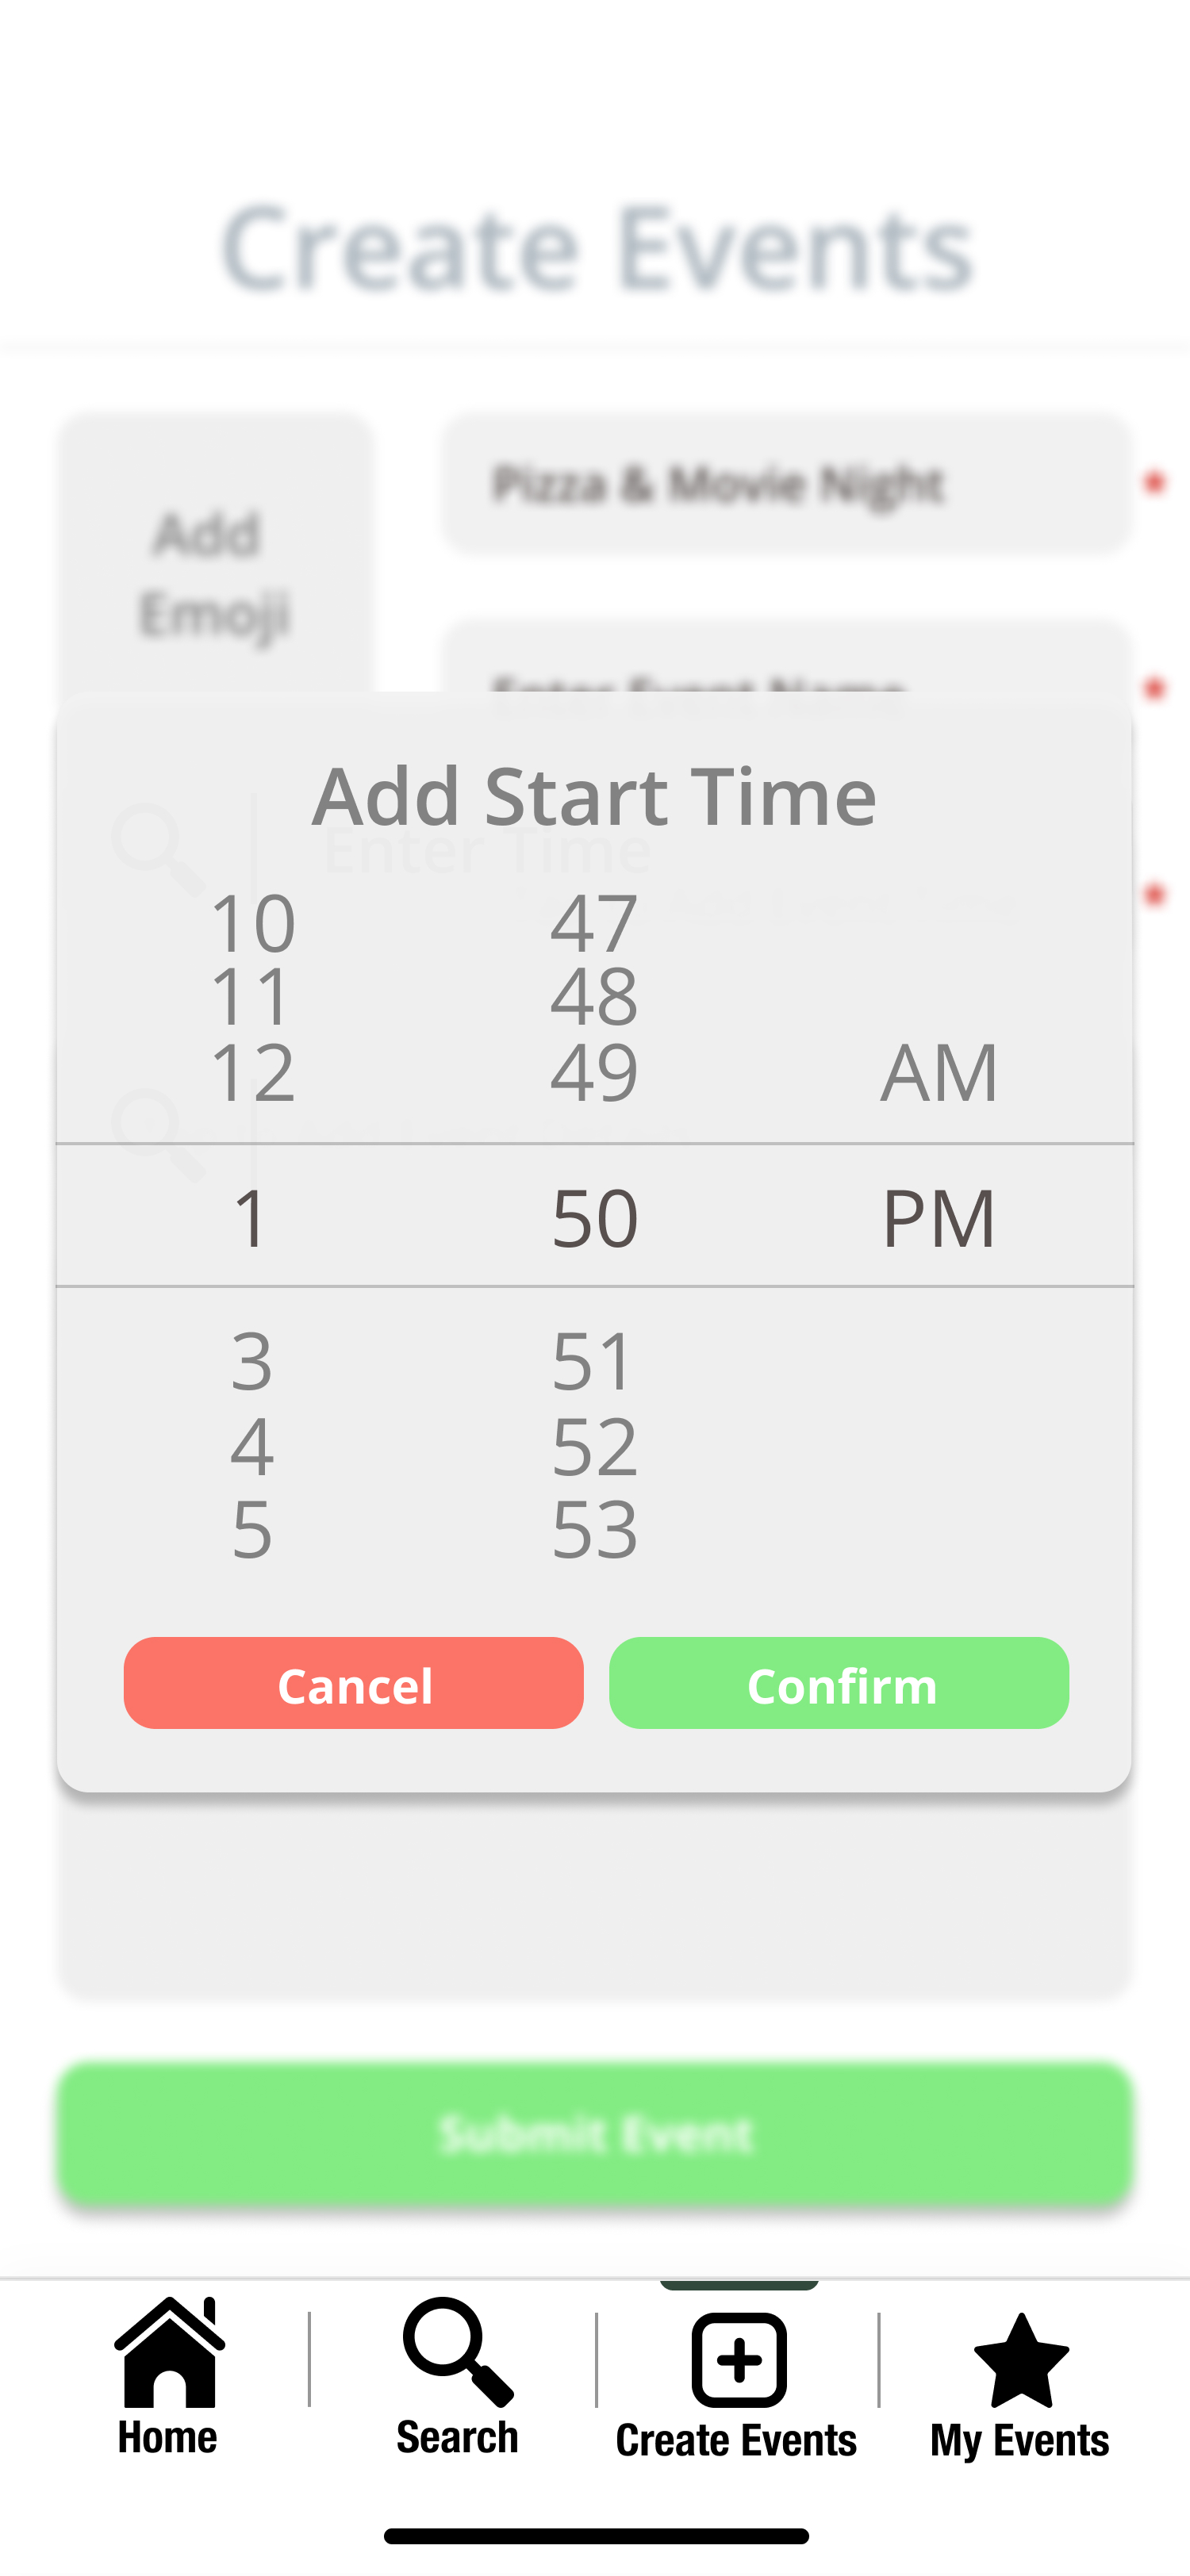
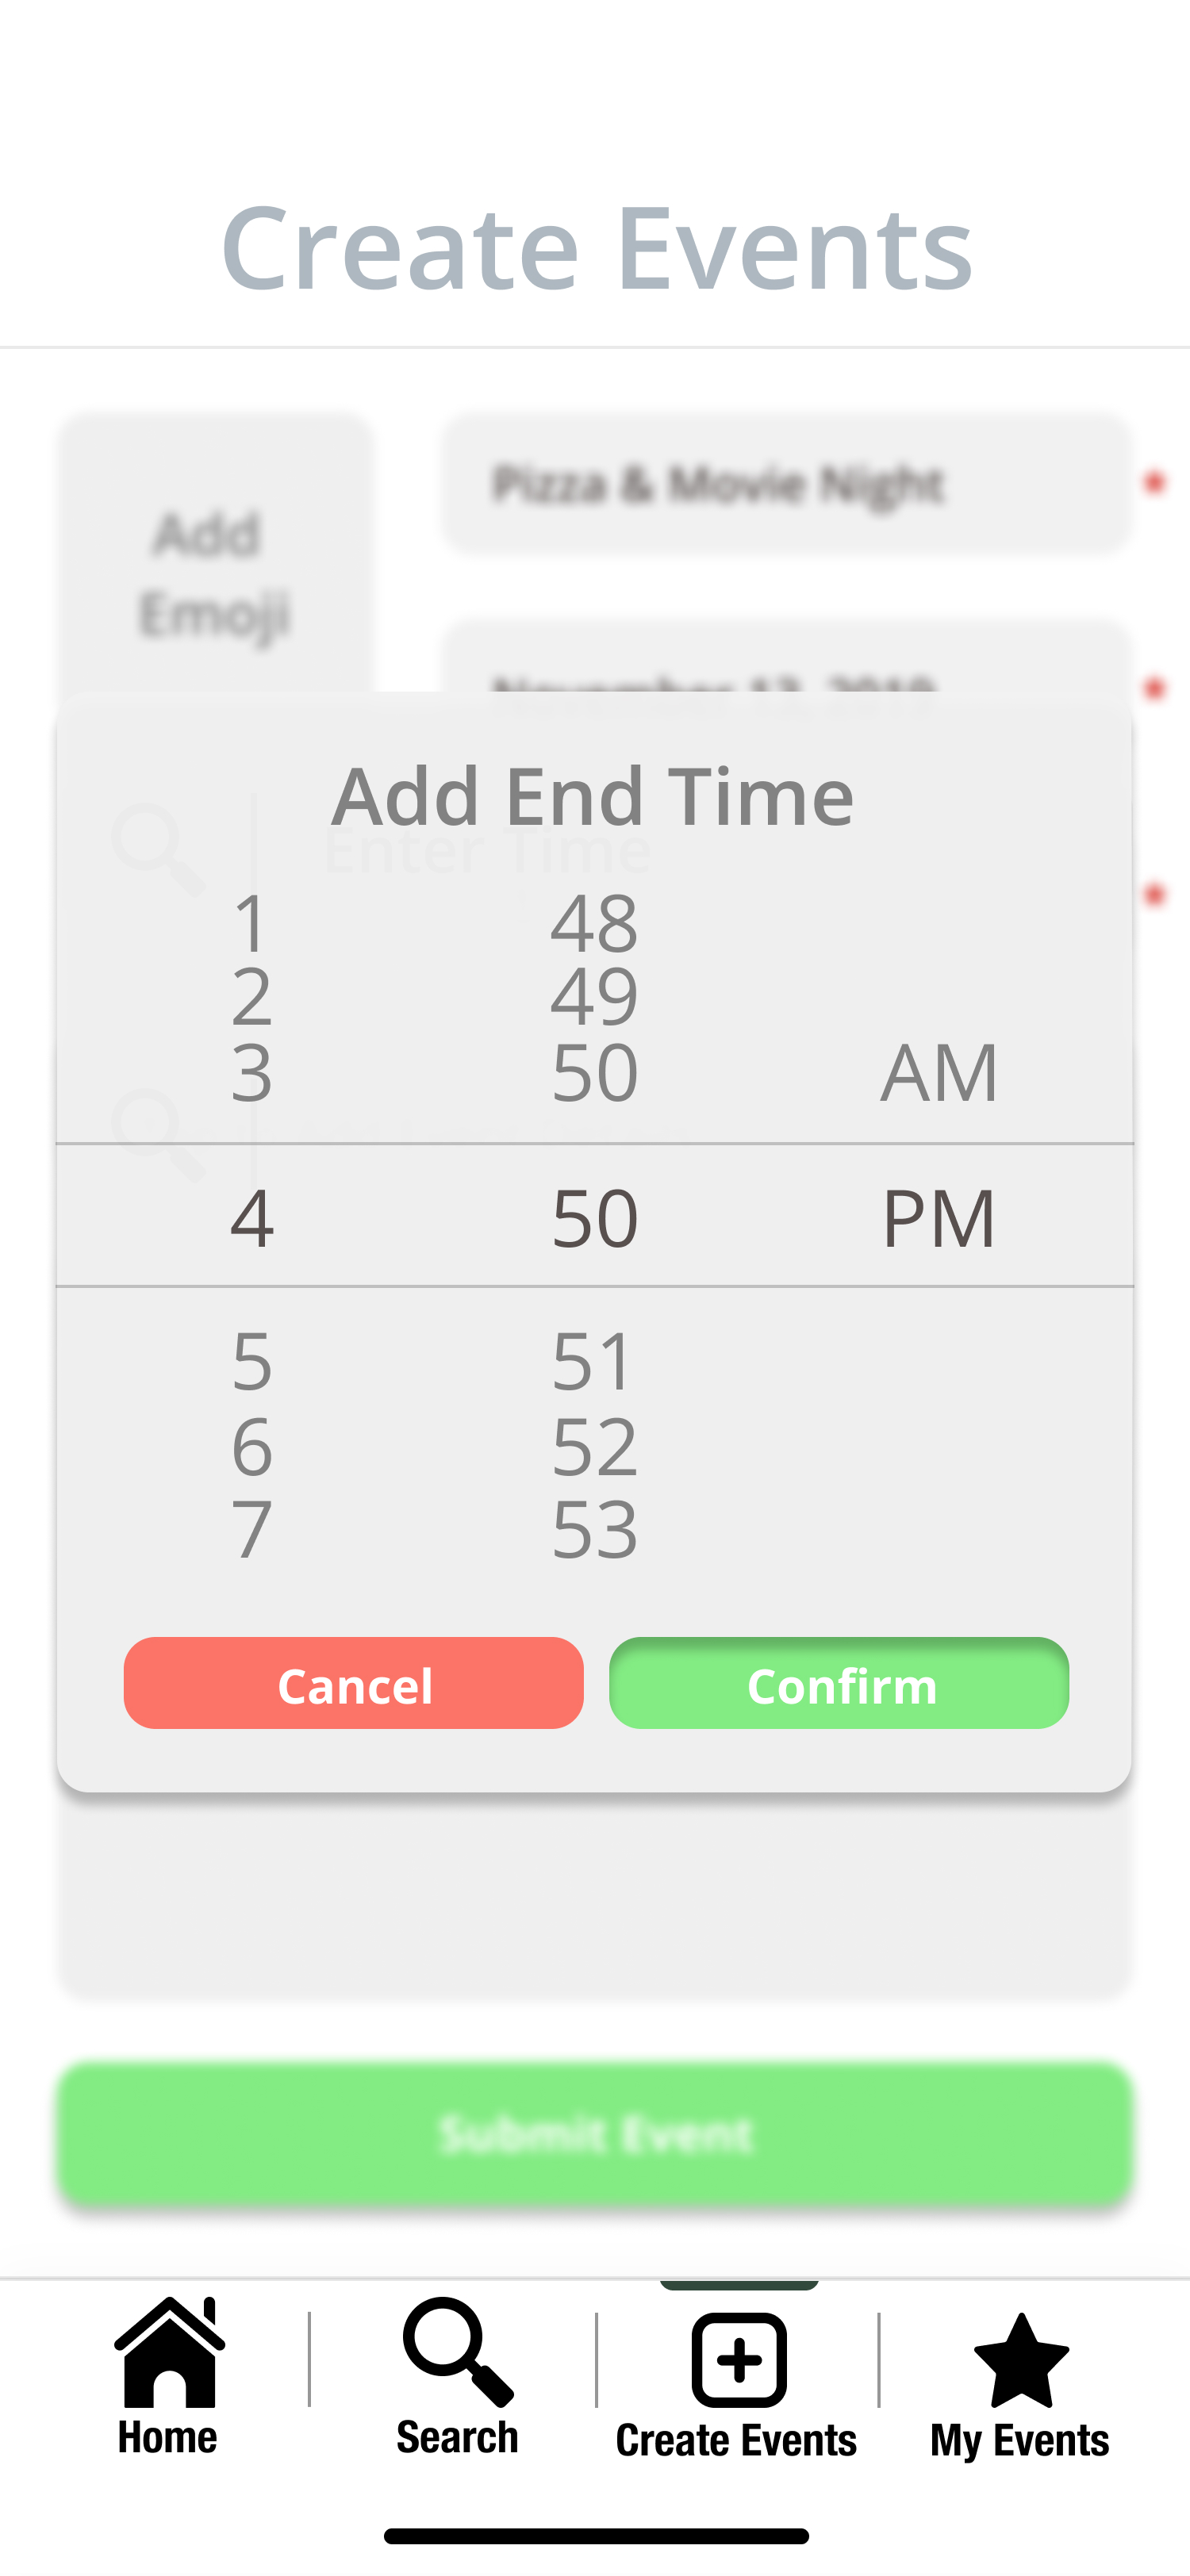
The user can insert the time by scrolling through the pop up screen once the appropriate text field is pressed
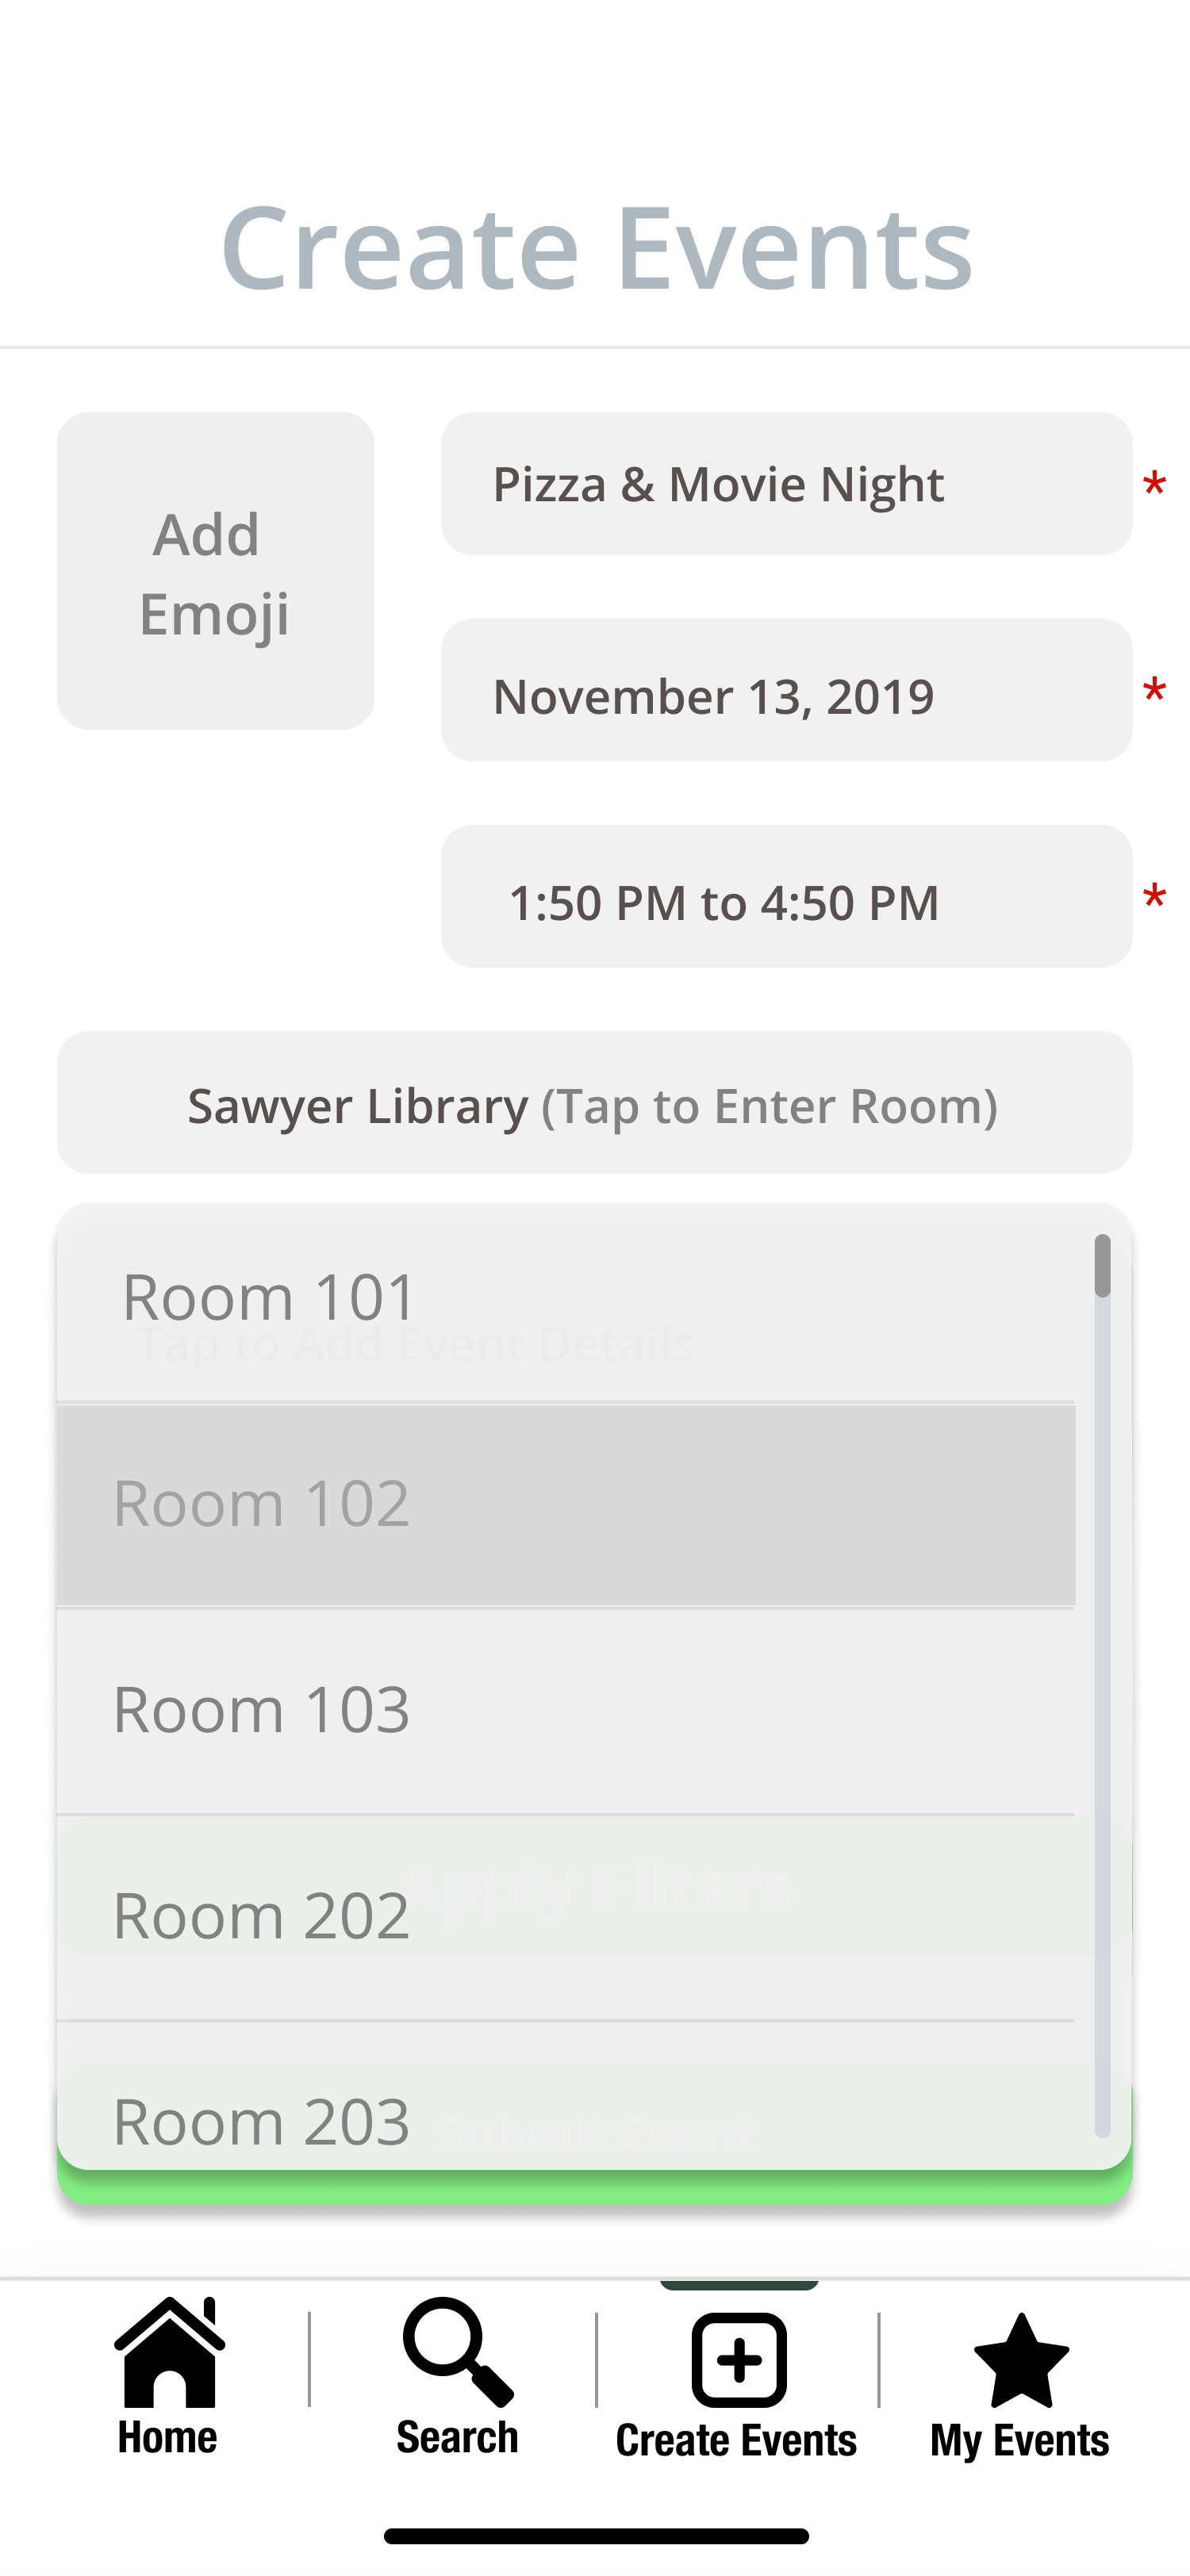
They can then specify more specifically the location of the event, such as a specific room, based on the pin that they dropped earlier specifying the building.
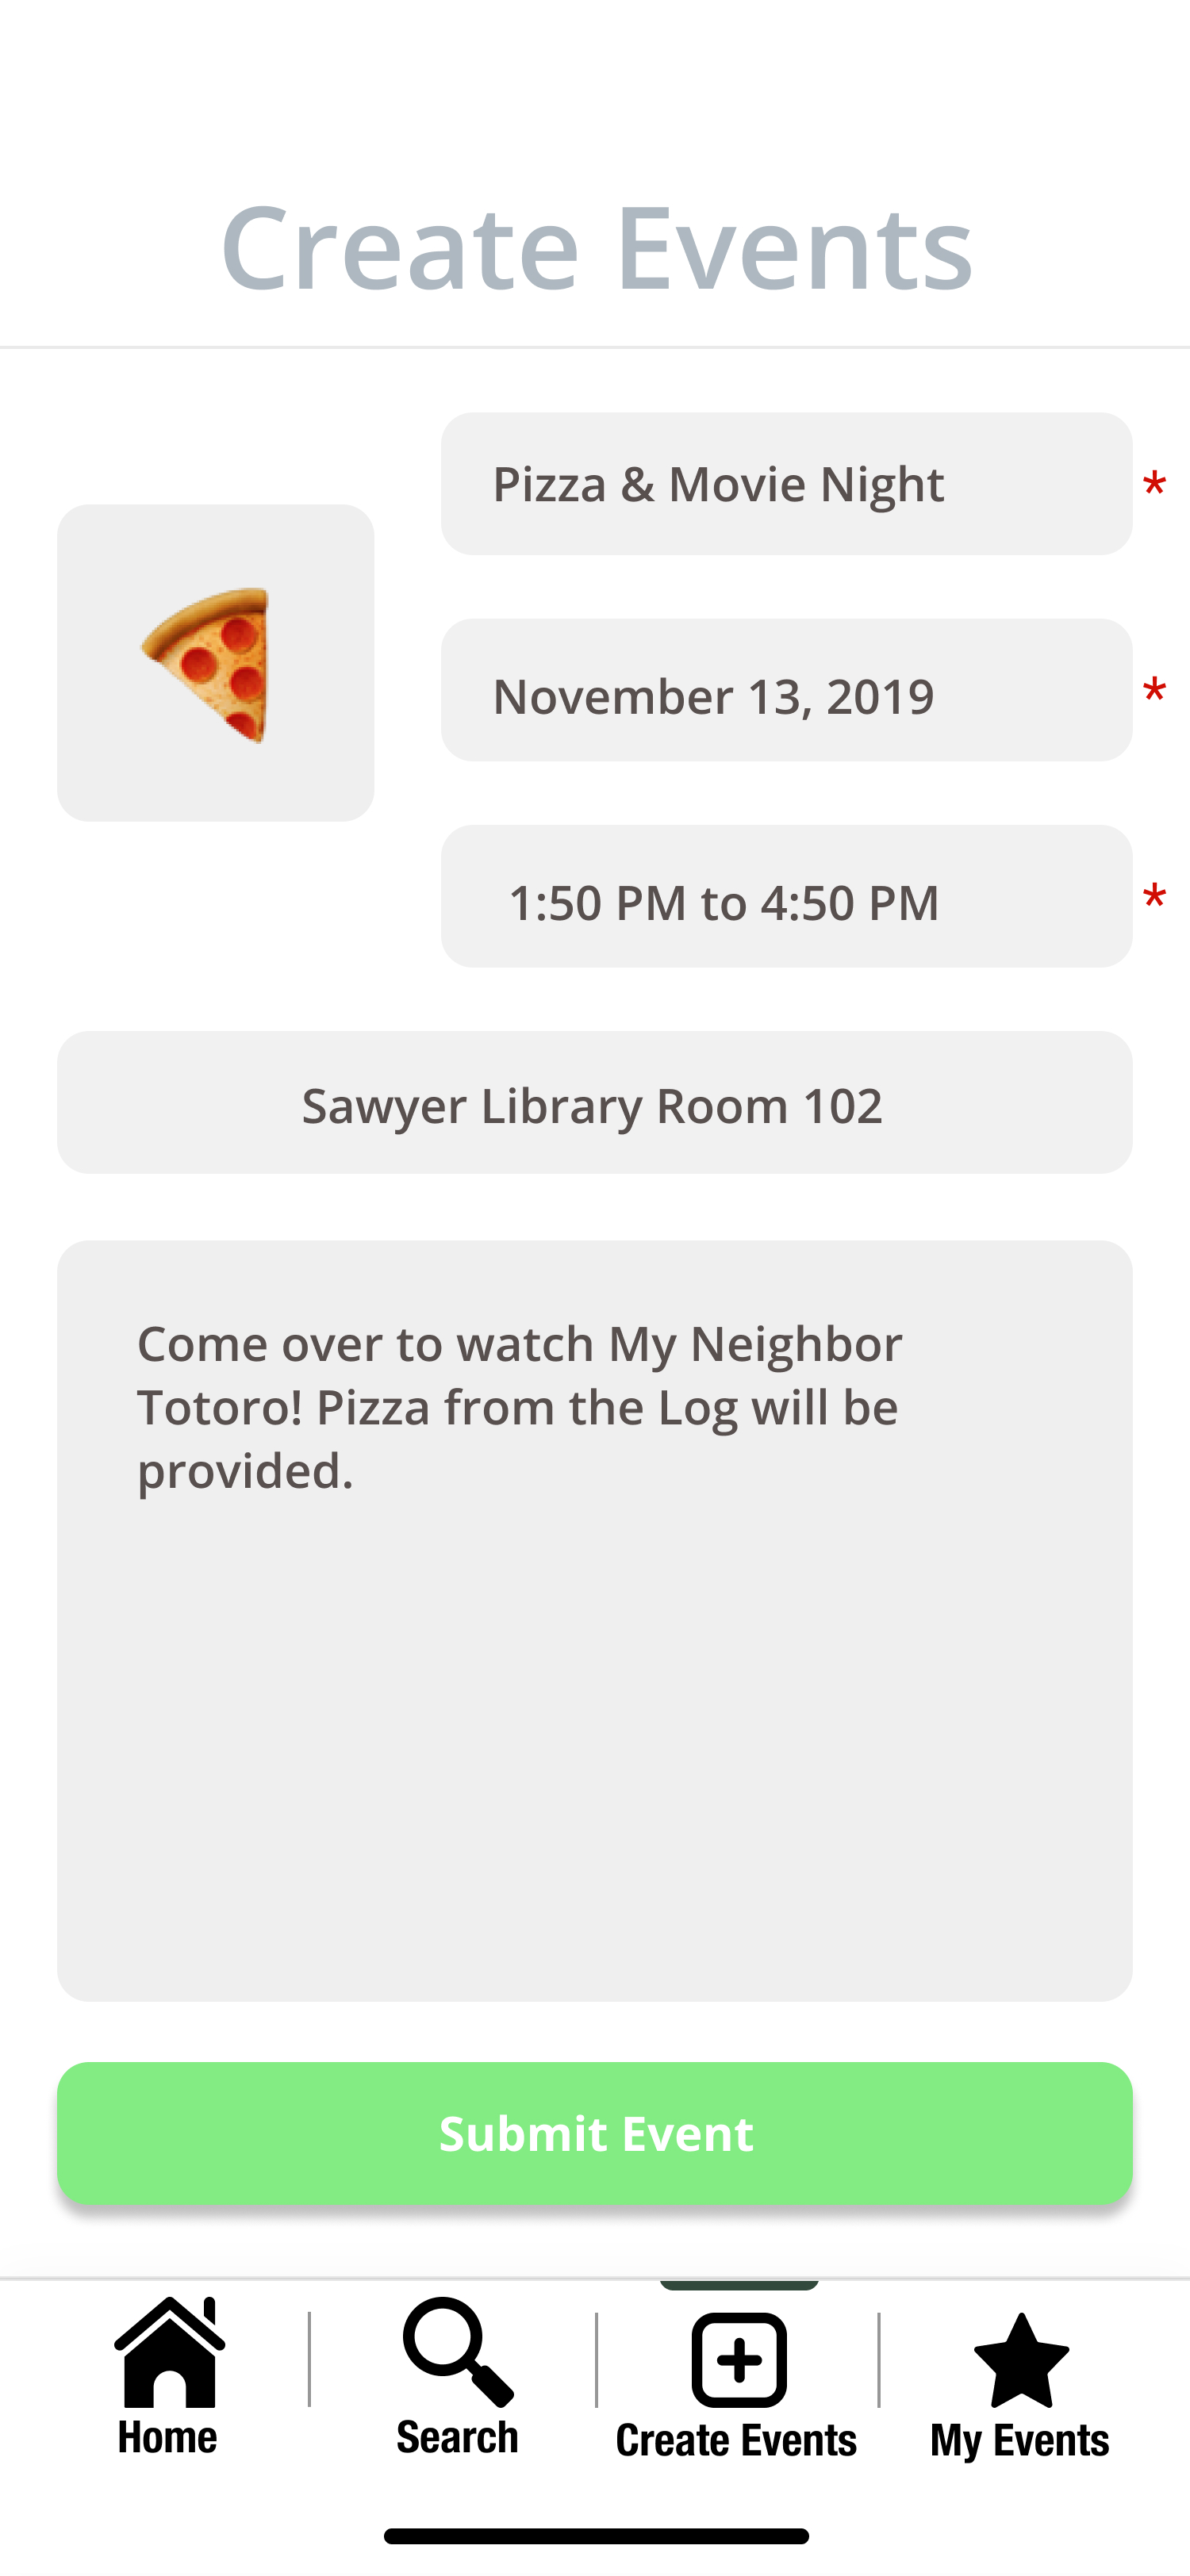
And lastly, the user can choose an emoji to represent their event on the RES map before proceeding to submit the event that they are creating by clicking on the “Submit event” button.
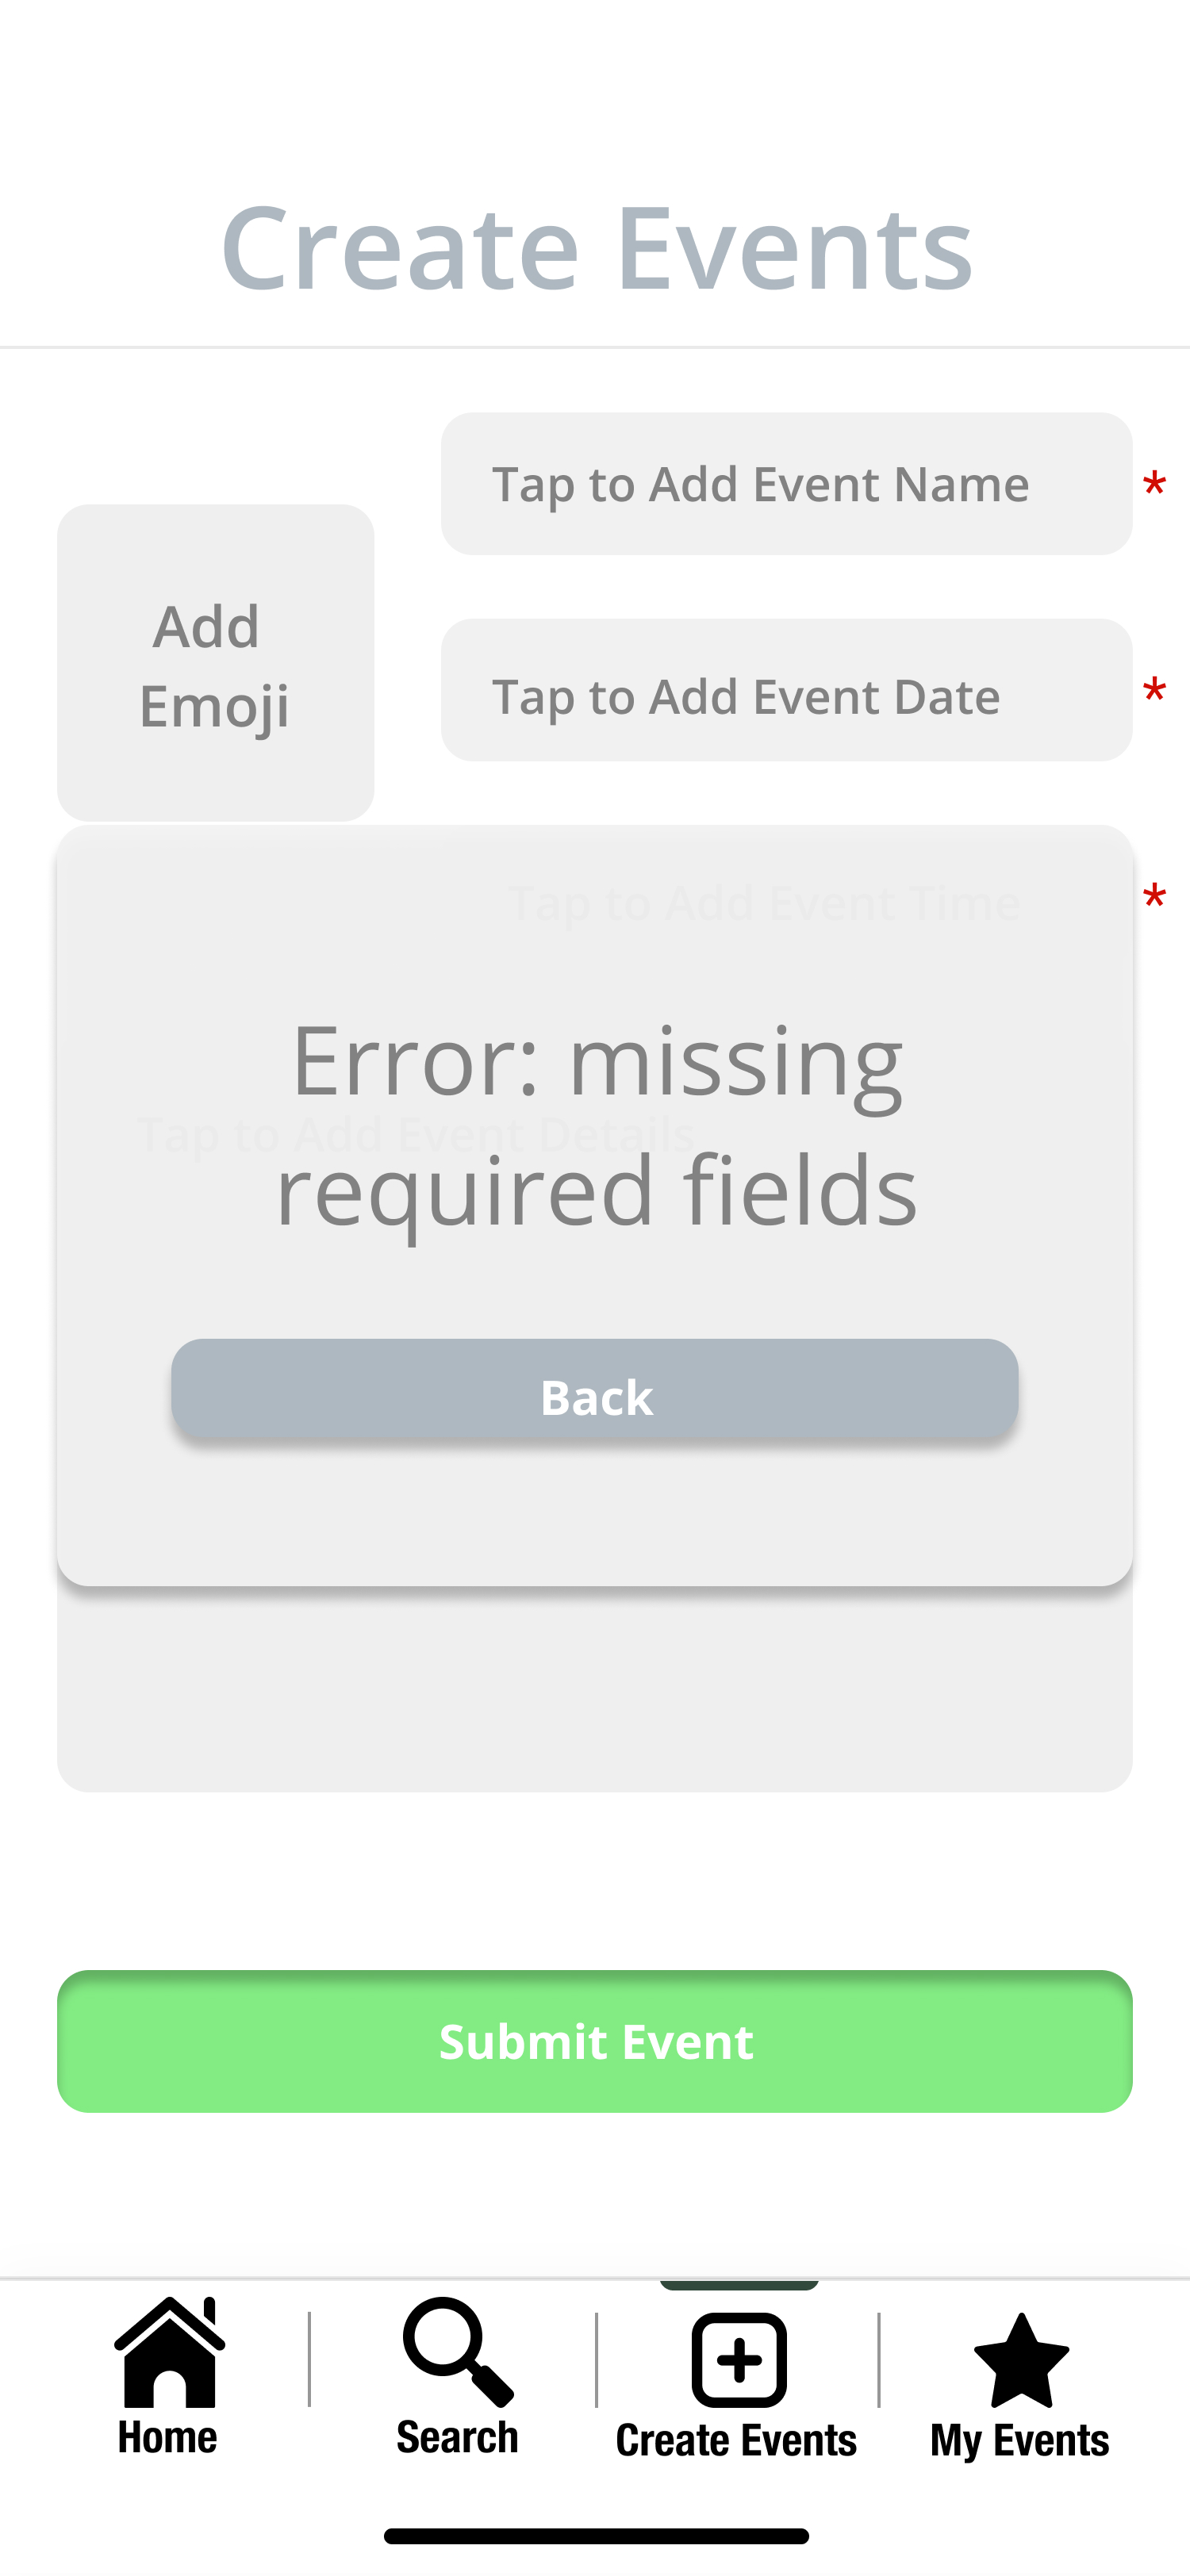
If the user does not input a required field, they will be sent an error message.
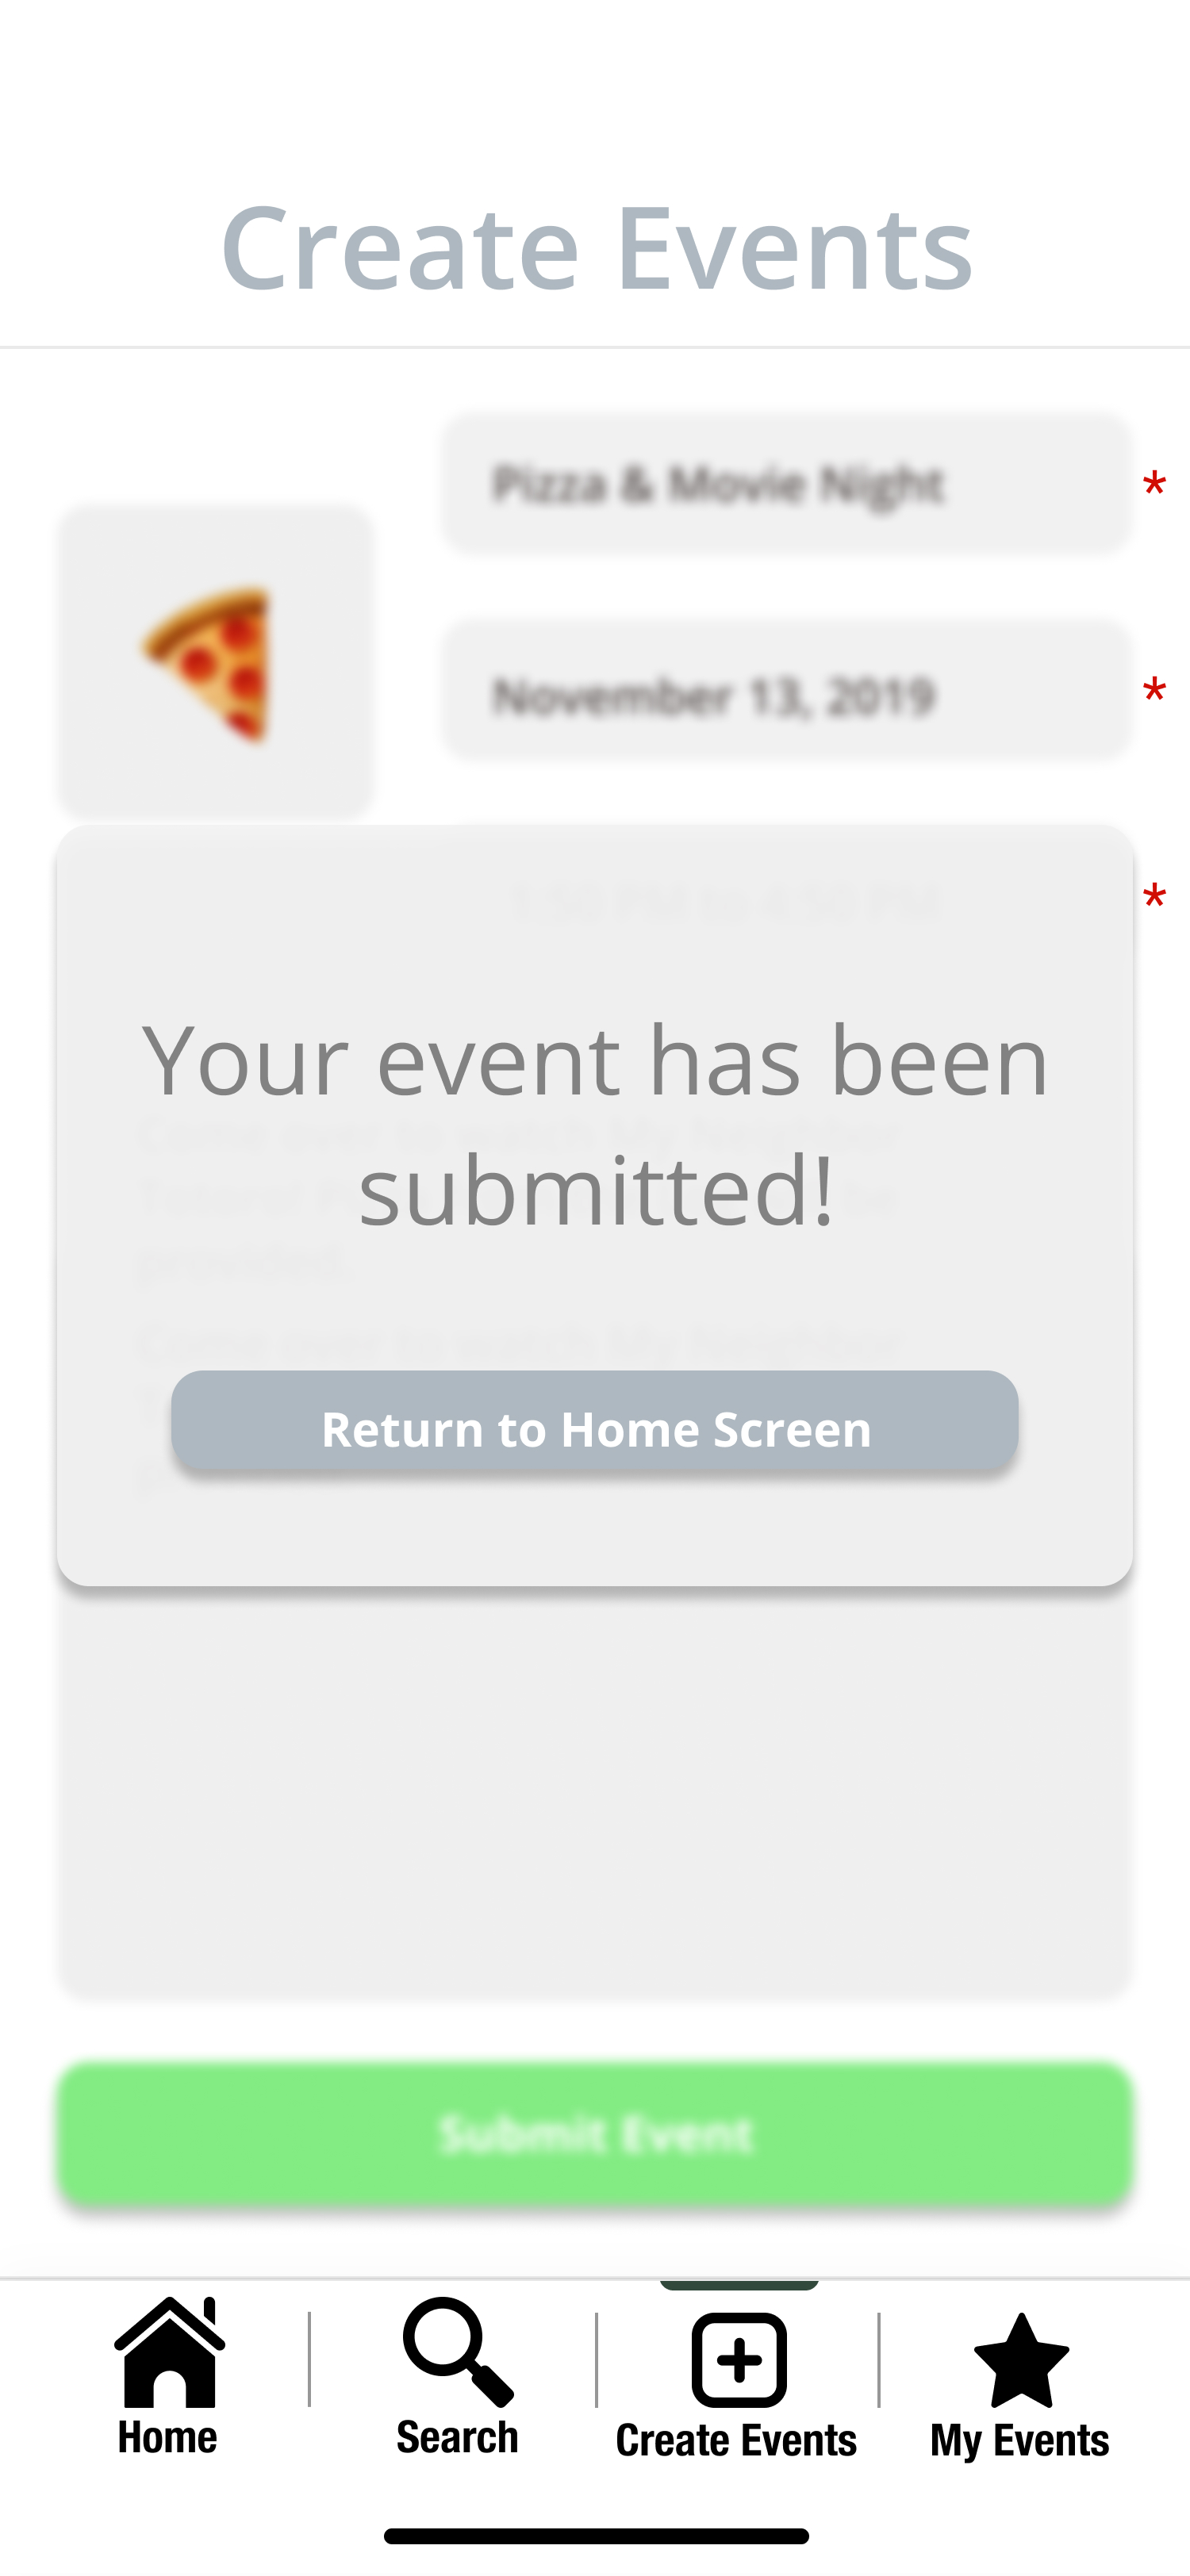
After the user submits information for the event that they have created, they will see a pop up indicating that the event has been successfully made and be prompted to return to the home screen.
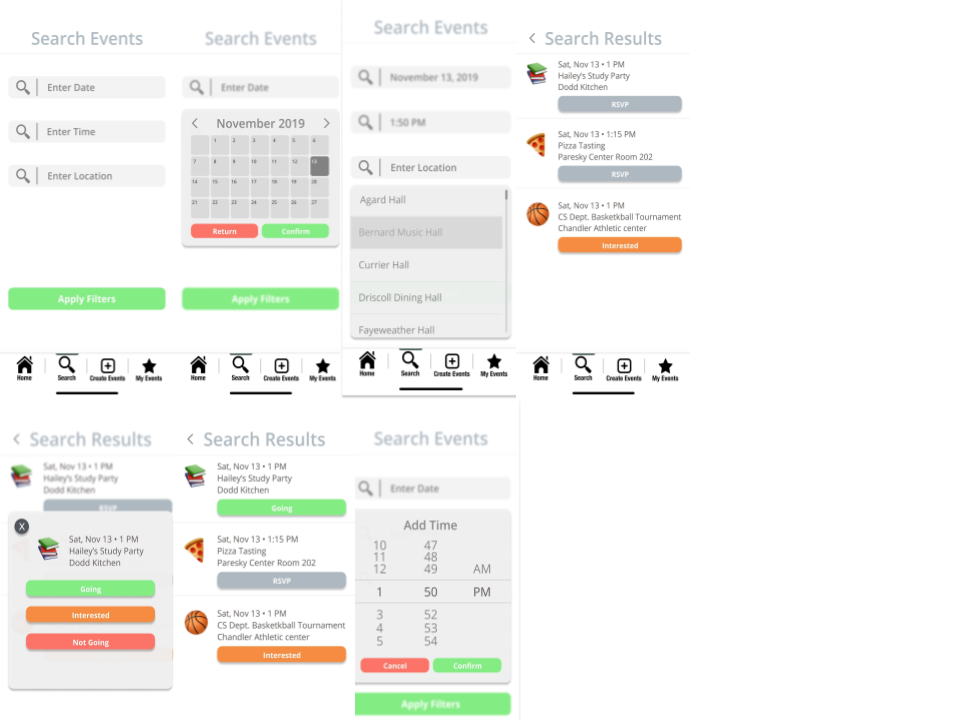
Task 2: Finding and responding to an event
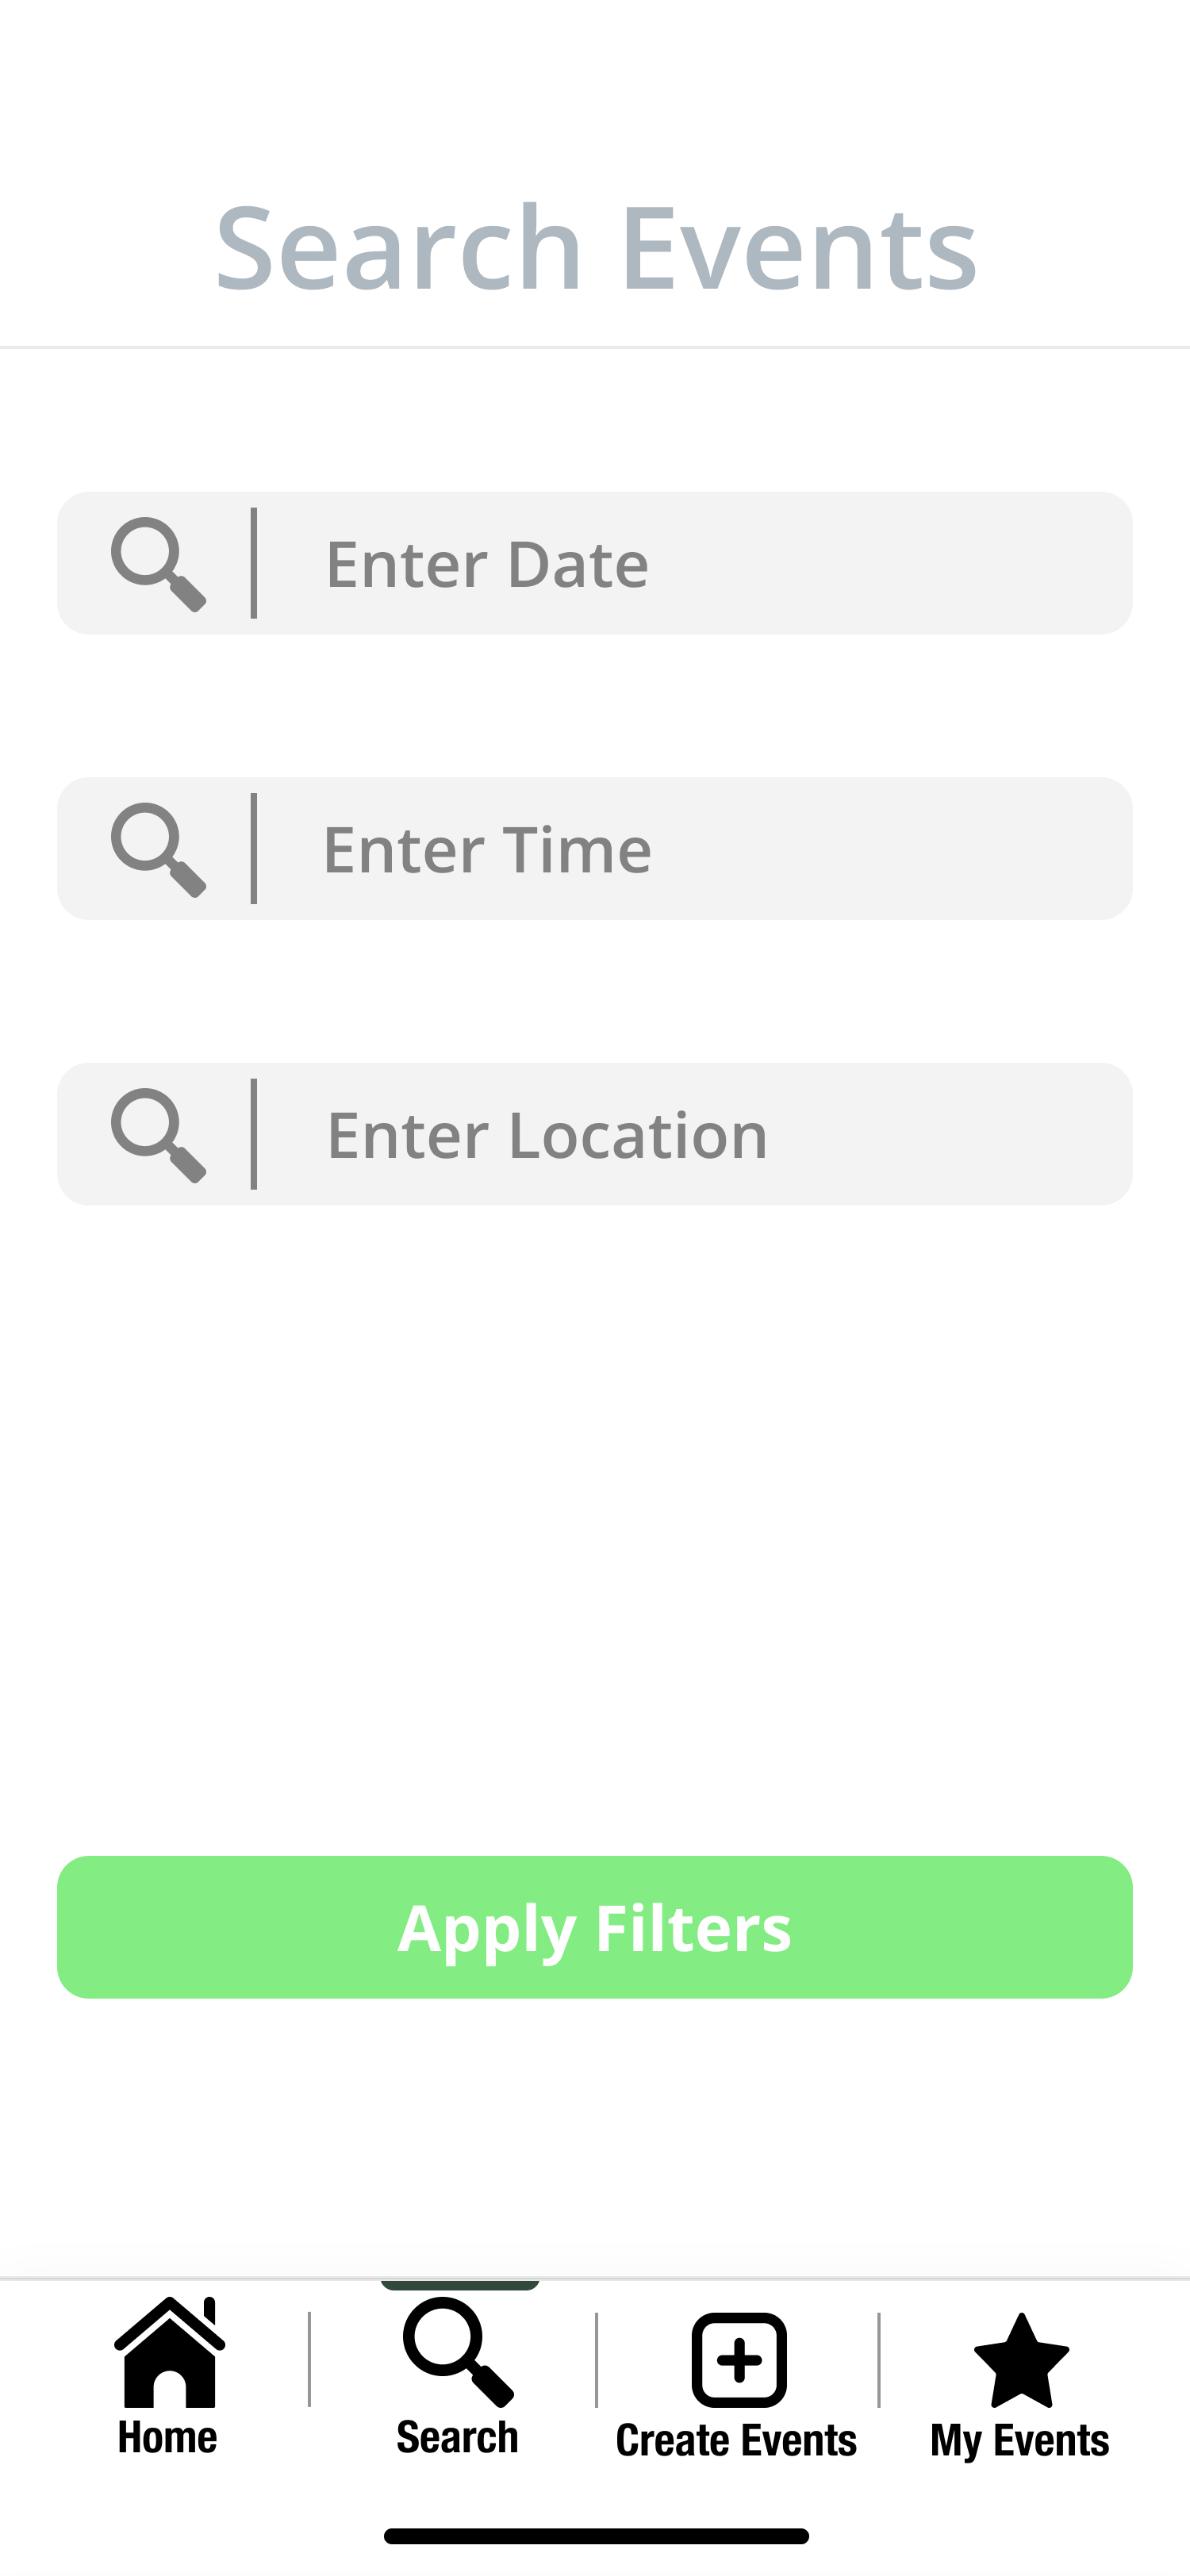
First, the user goes to the “Search Events” page in the bottom task bar. They are prompted to enter a date, time, and location. The user is able to enter details as specific as they want.

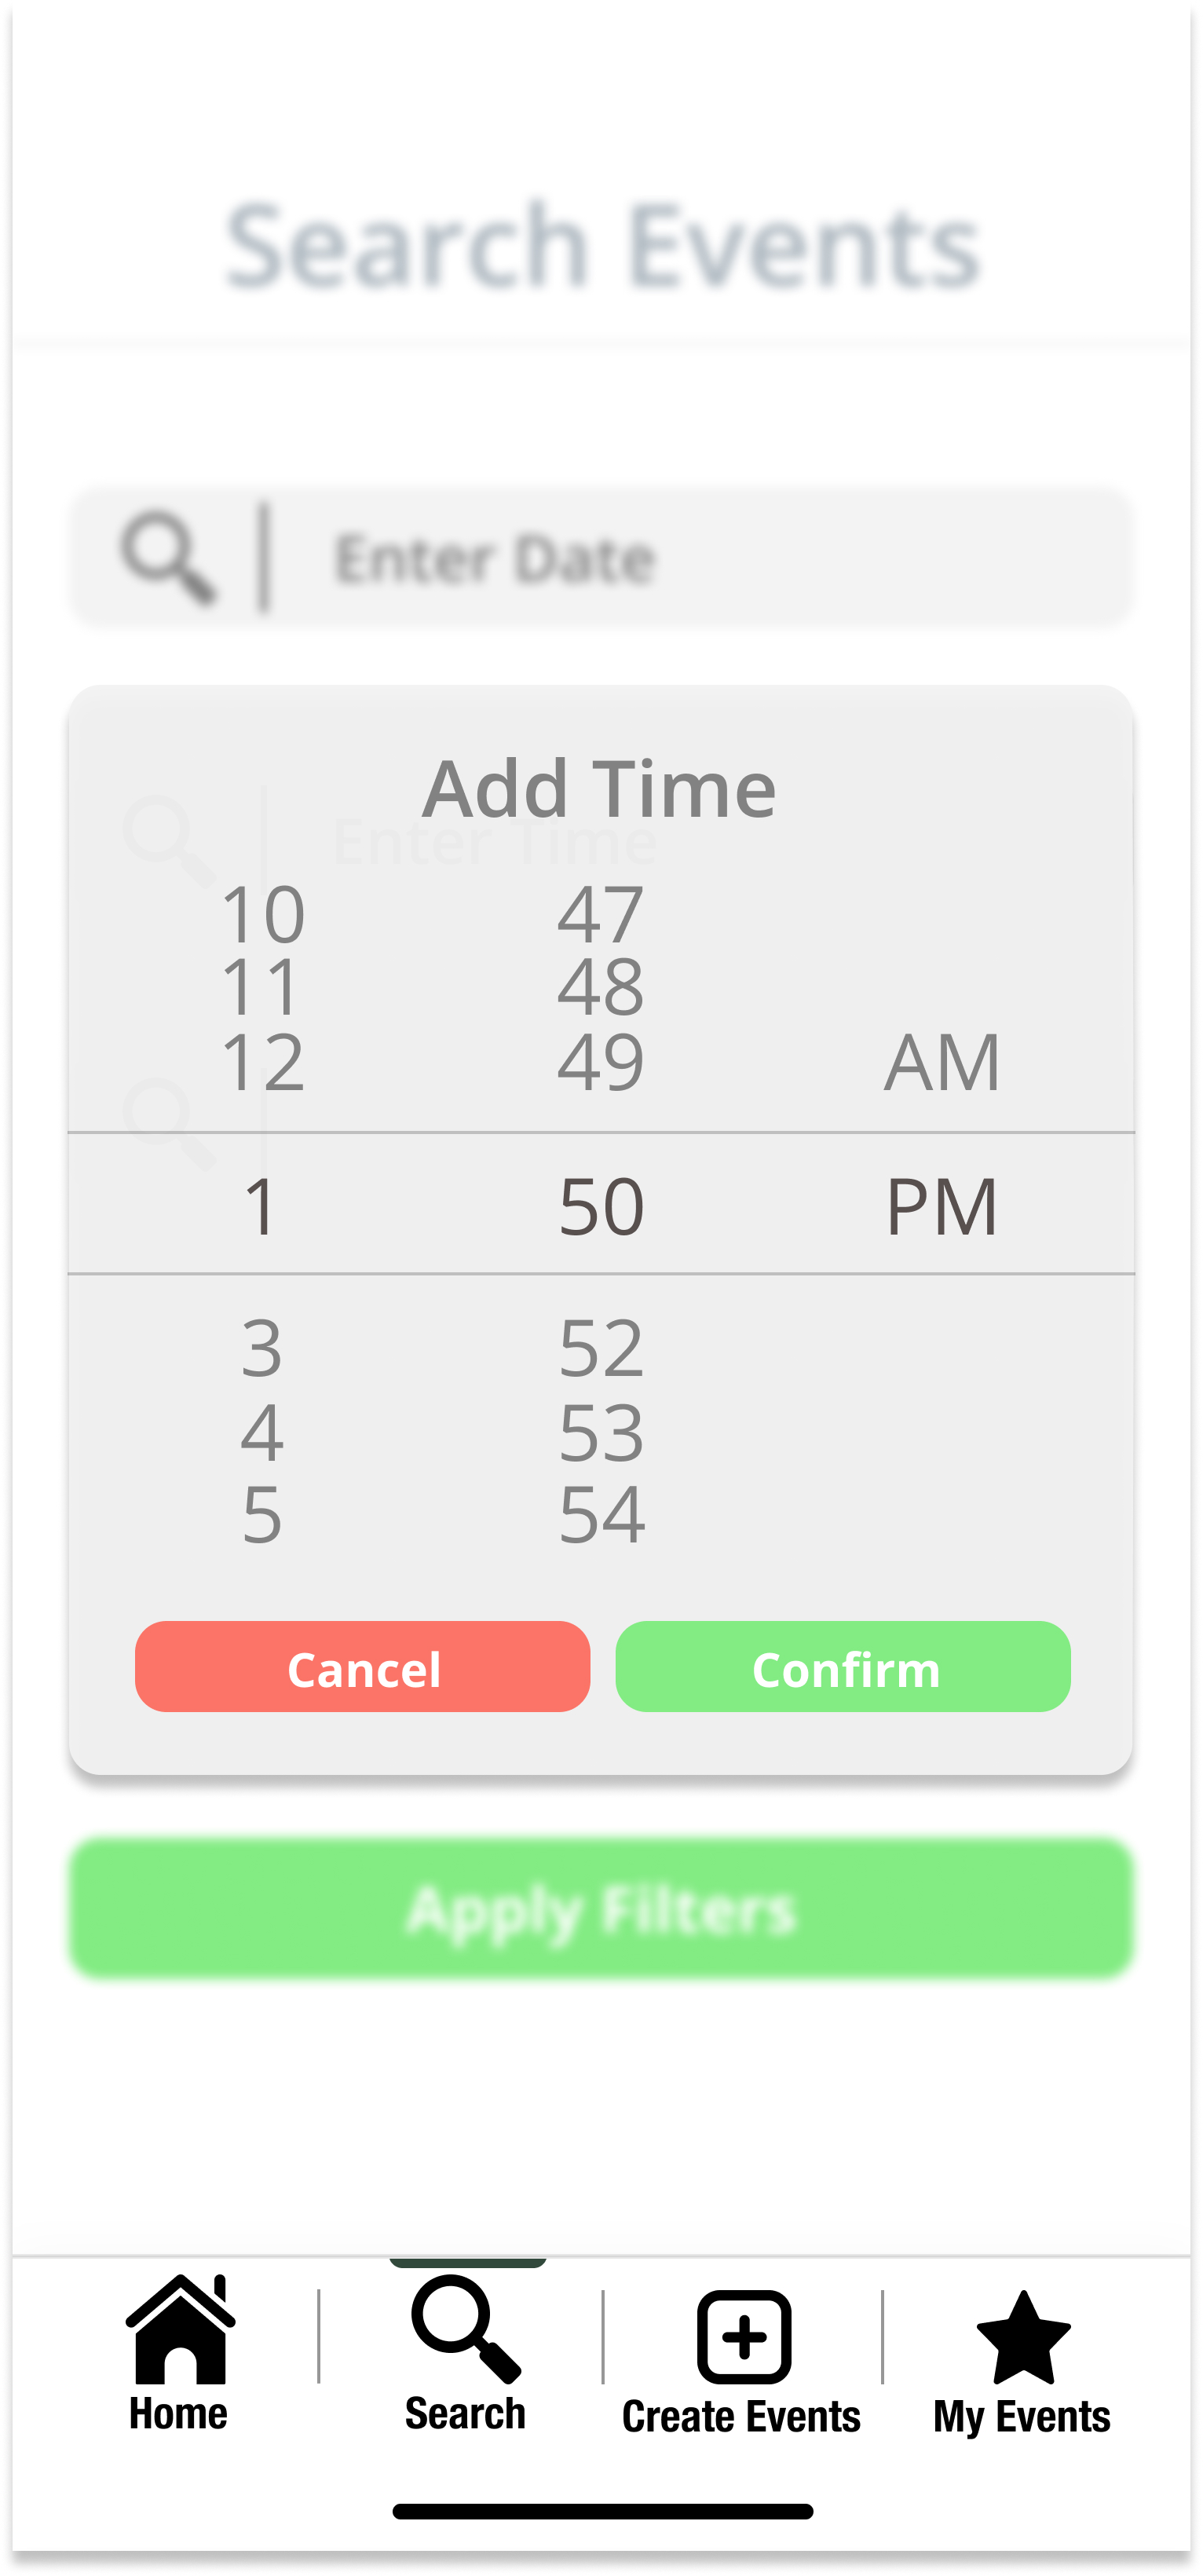
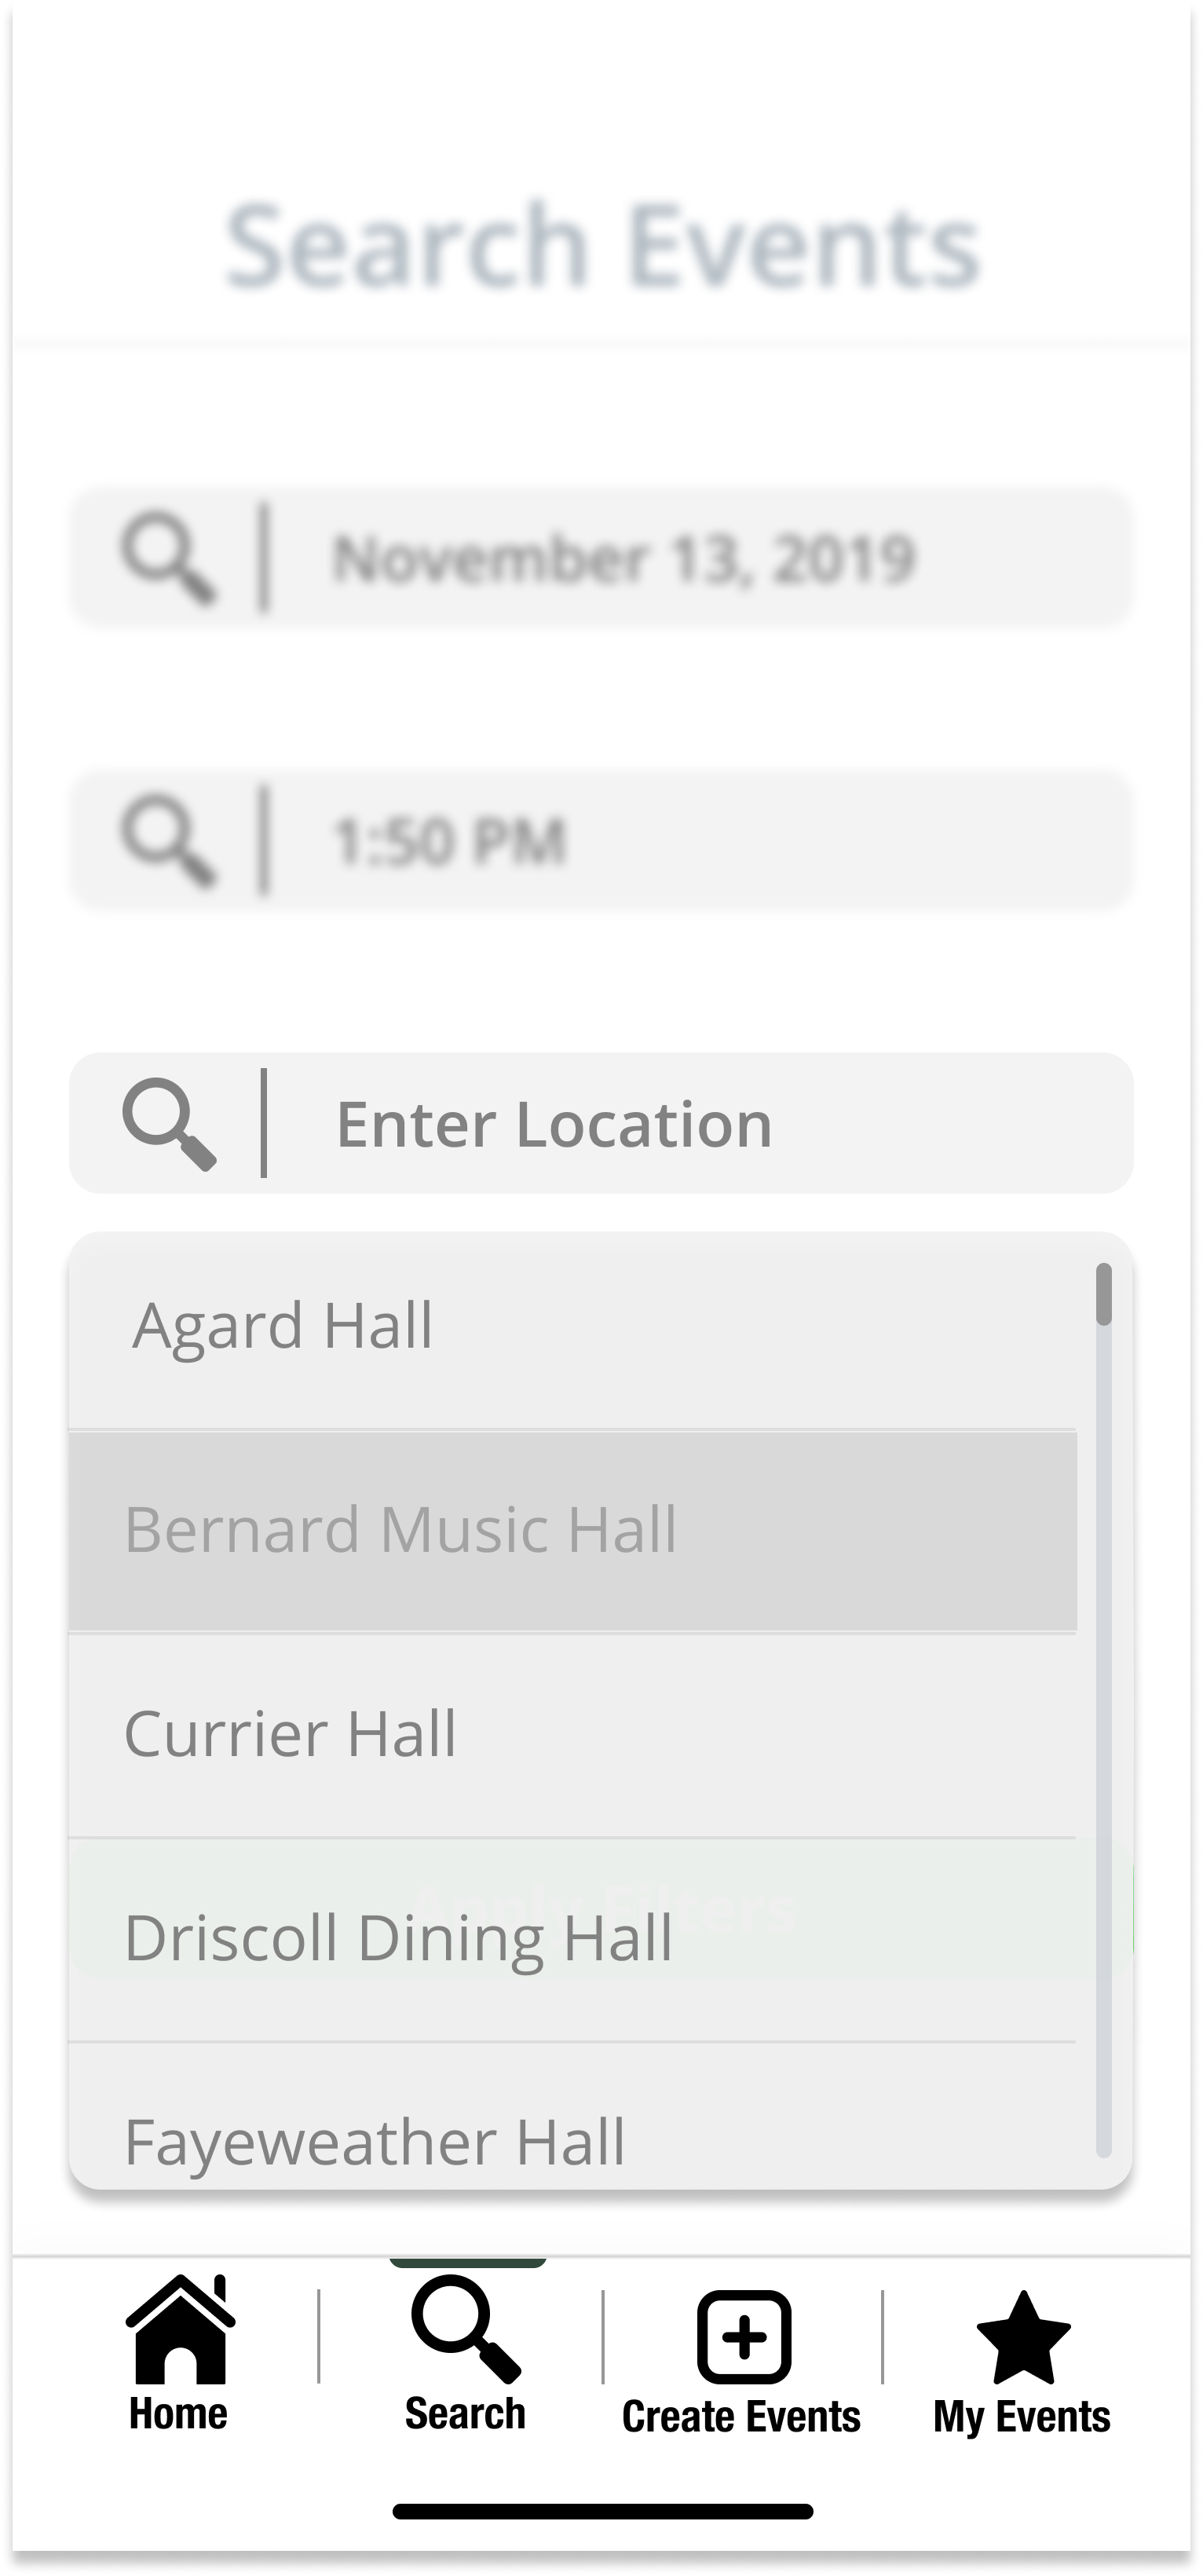
The user can select a date on the calendar, select a start time by scrolling through the list of times, and select a building location of preference.
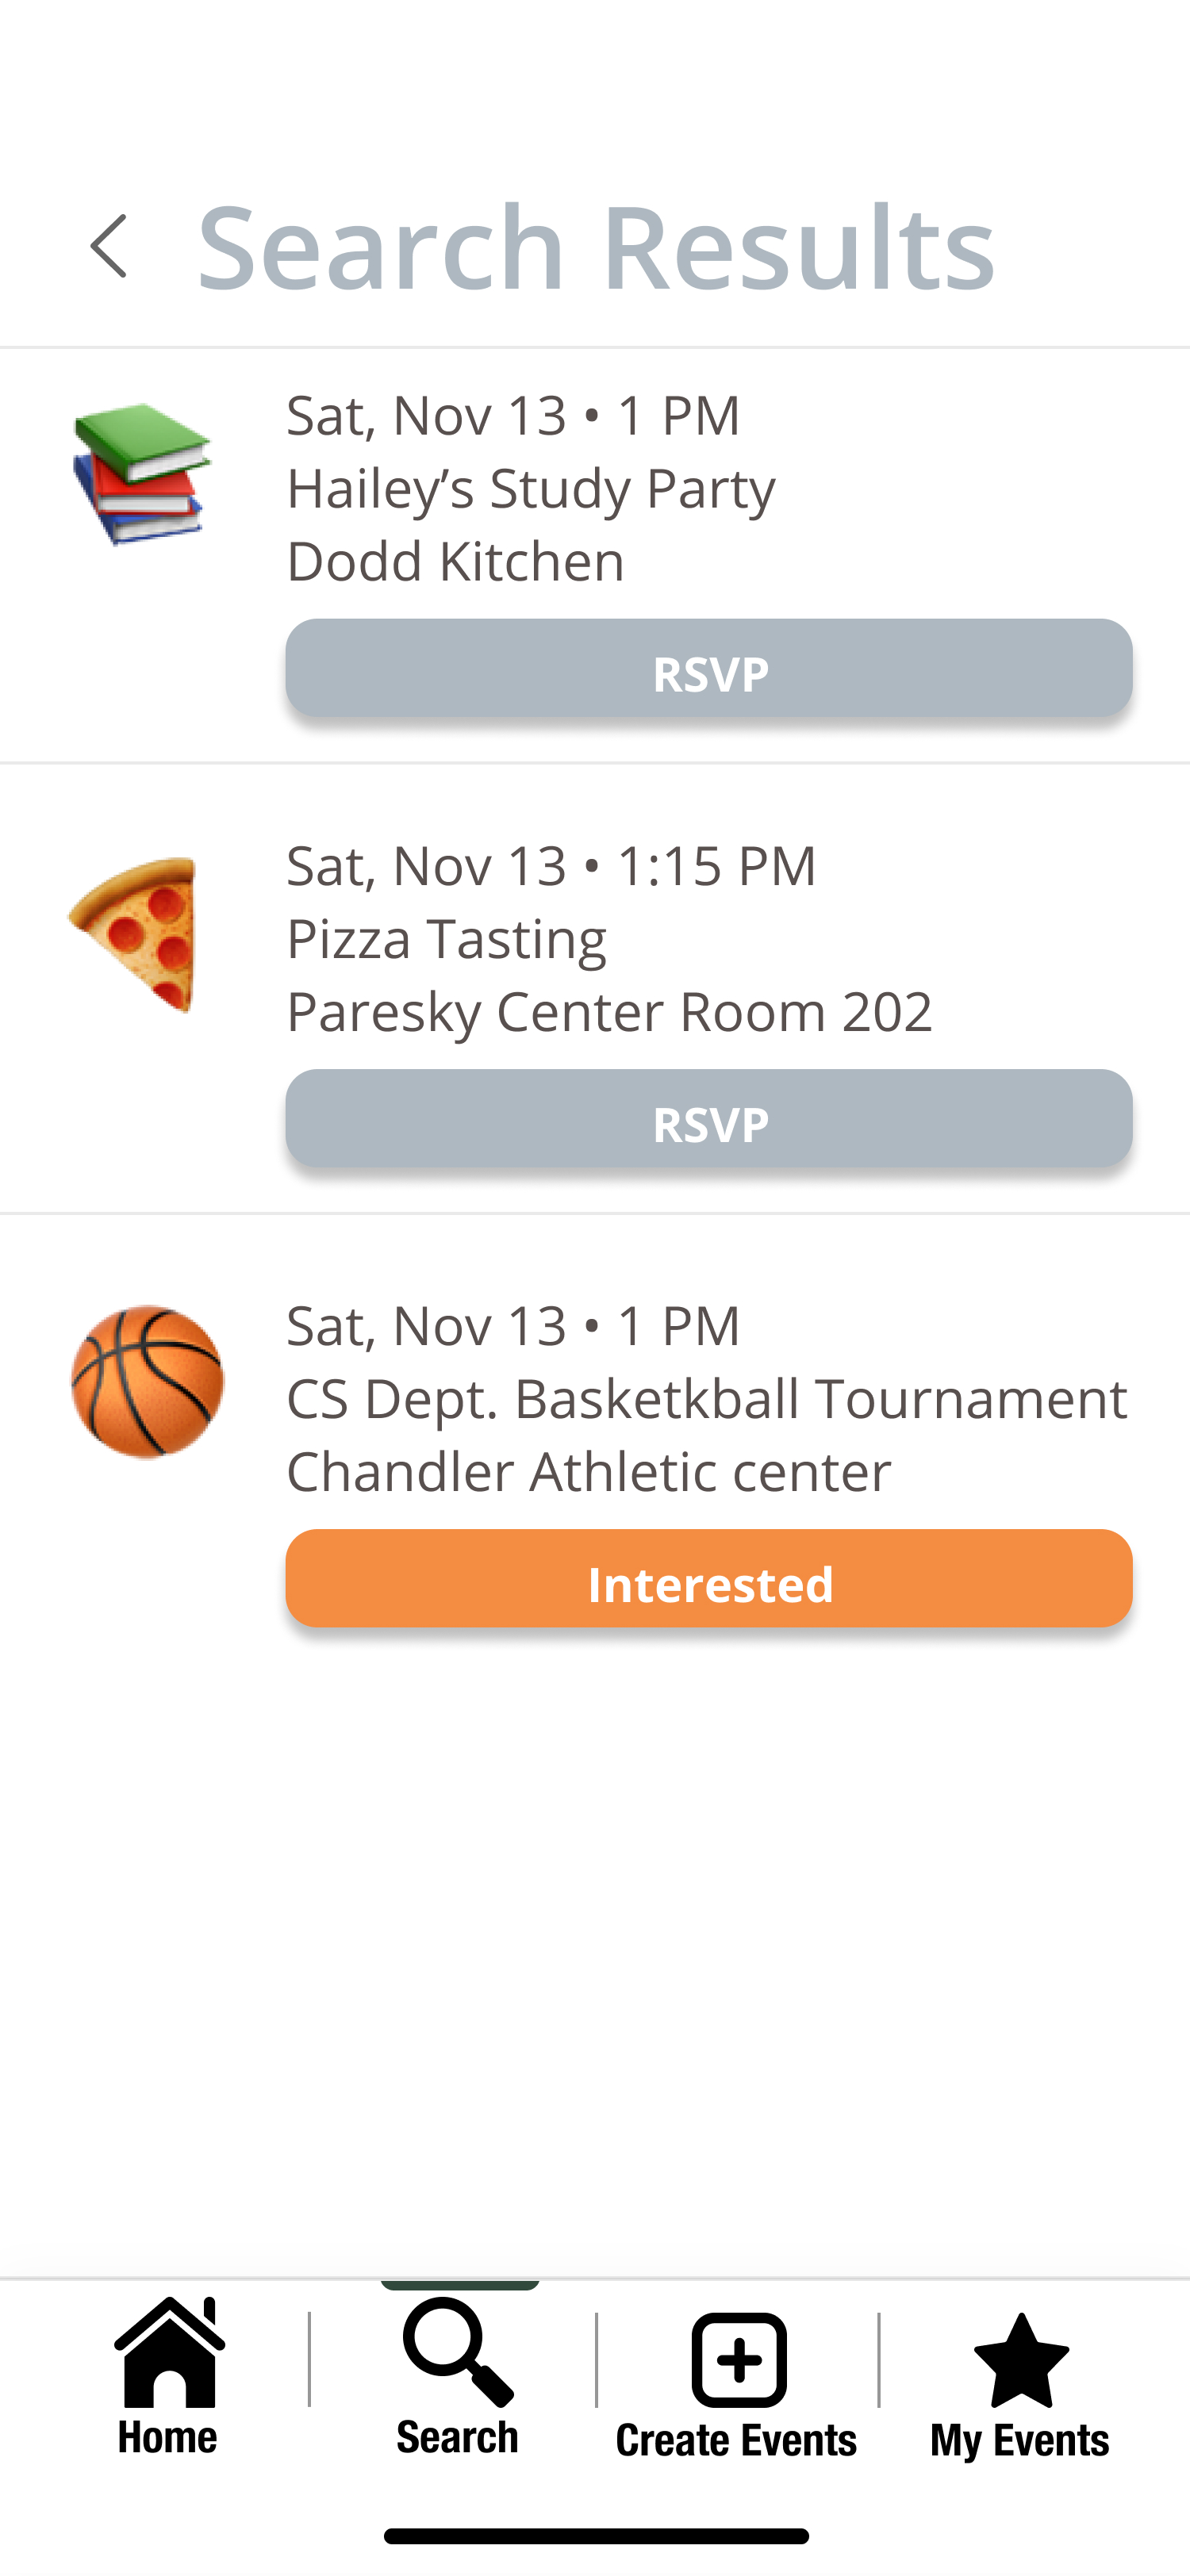
After the user fills out the details, a list of events that fit the criteria will load onto the page. They can scroll through this comprehensive list to see their choices.
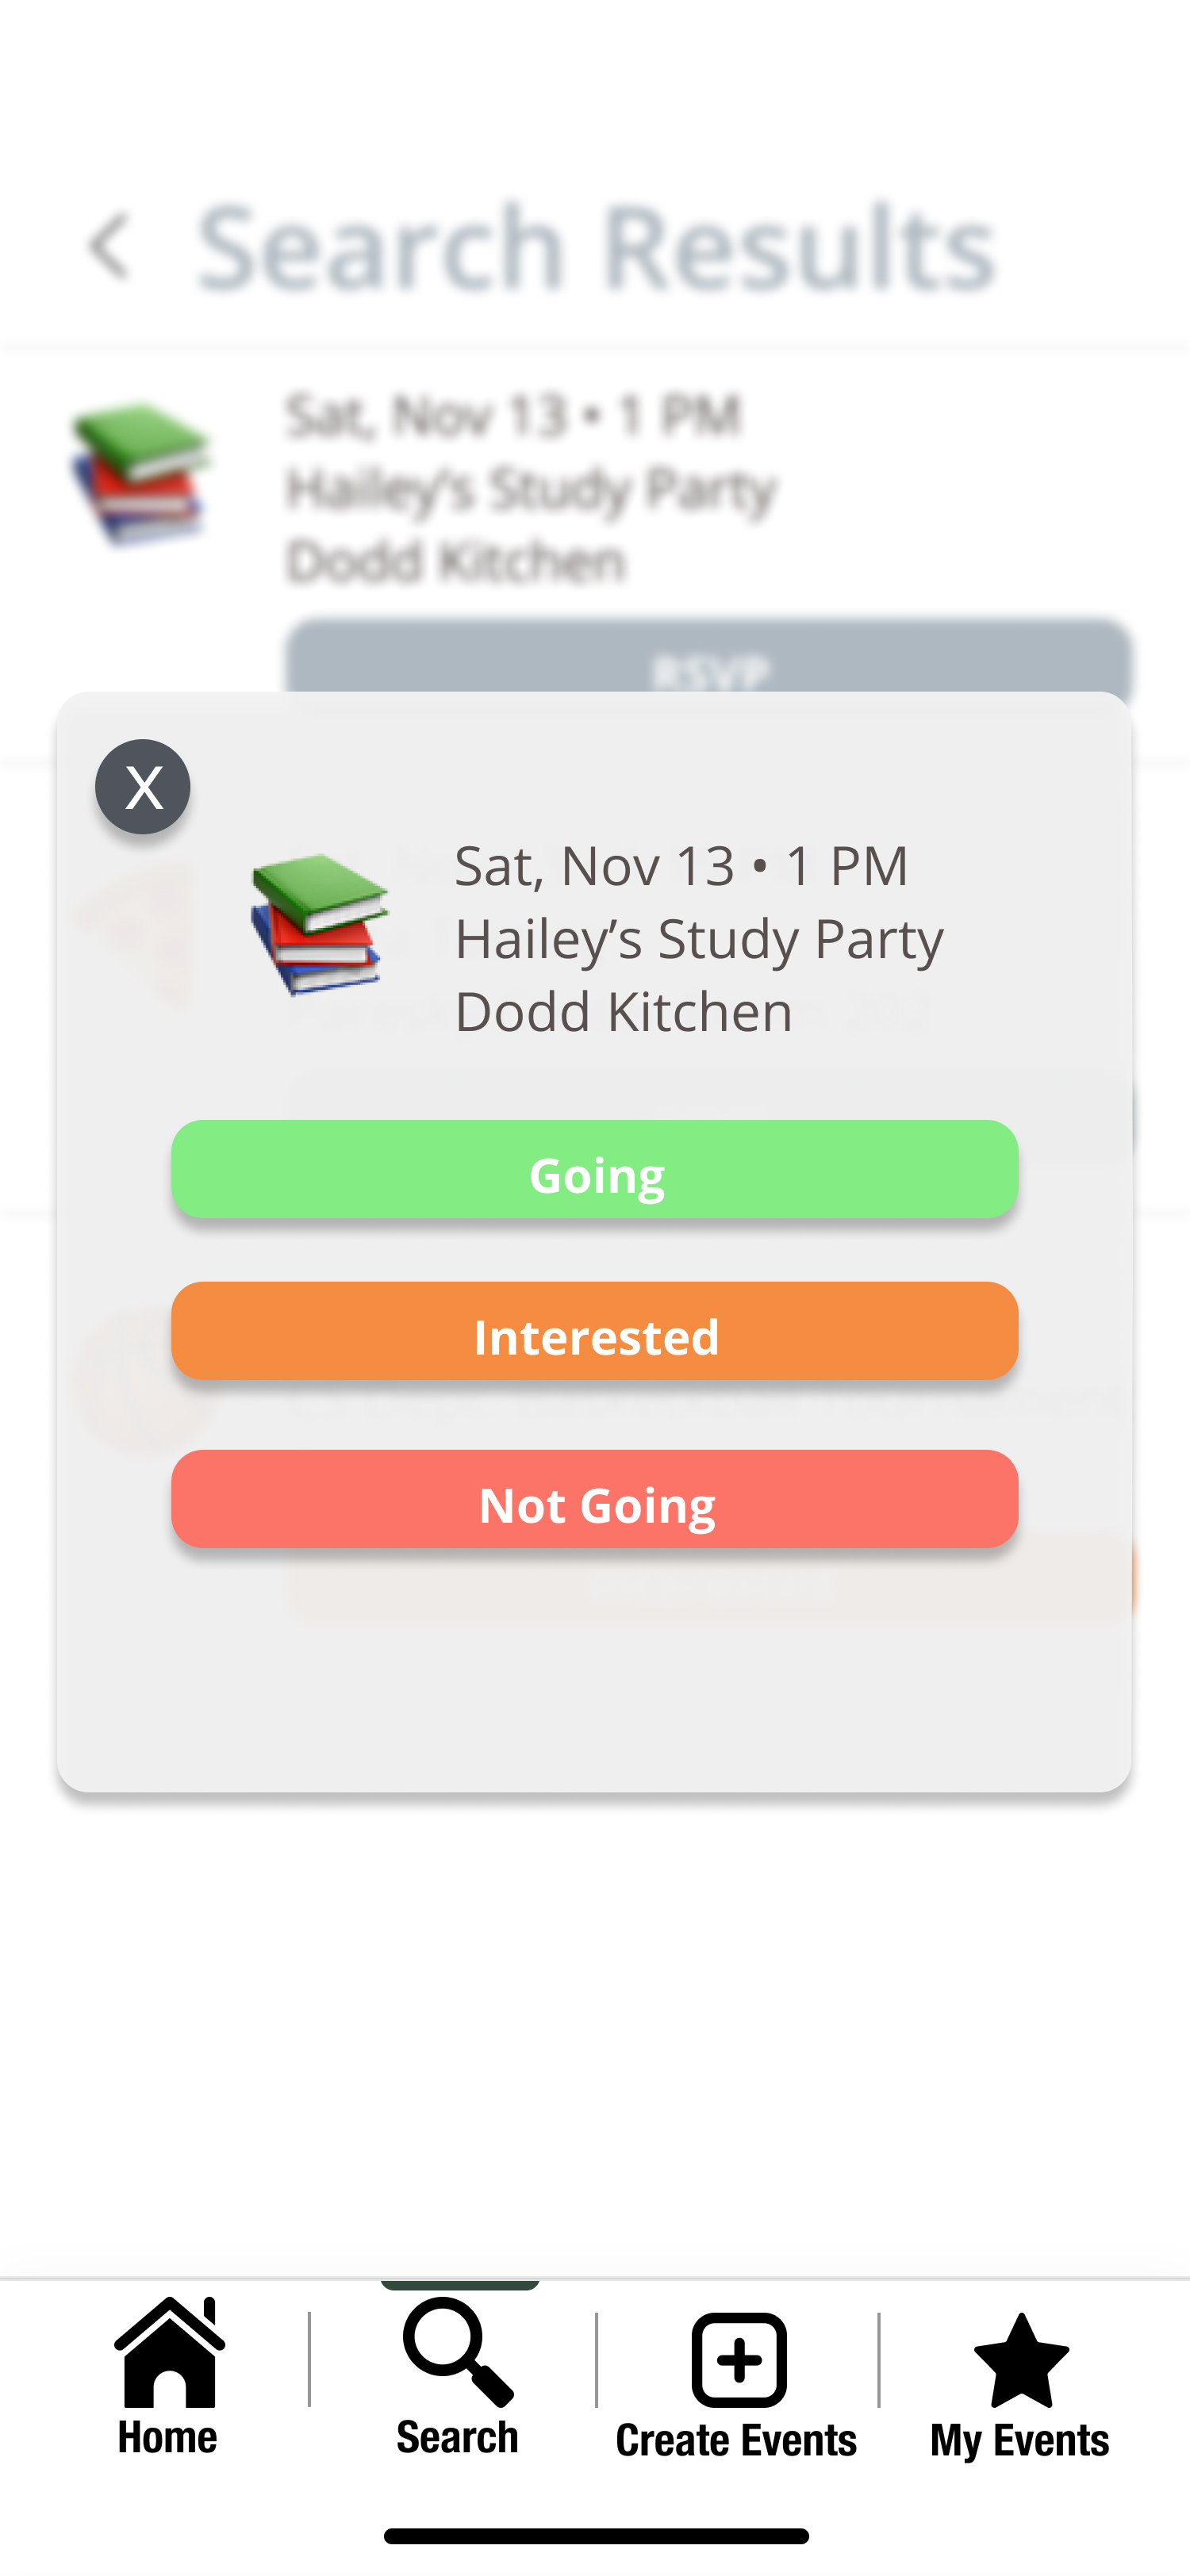
After finding an interesting event, the user is able to click on the event to find out more details.
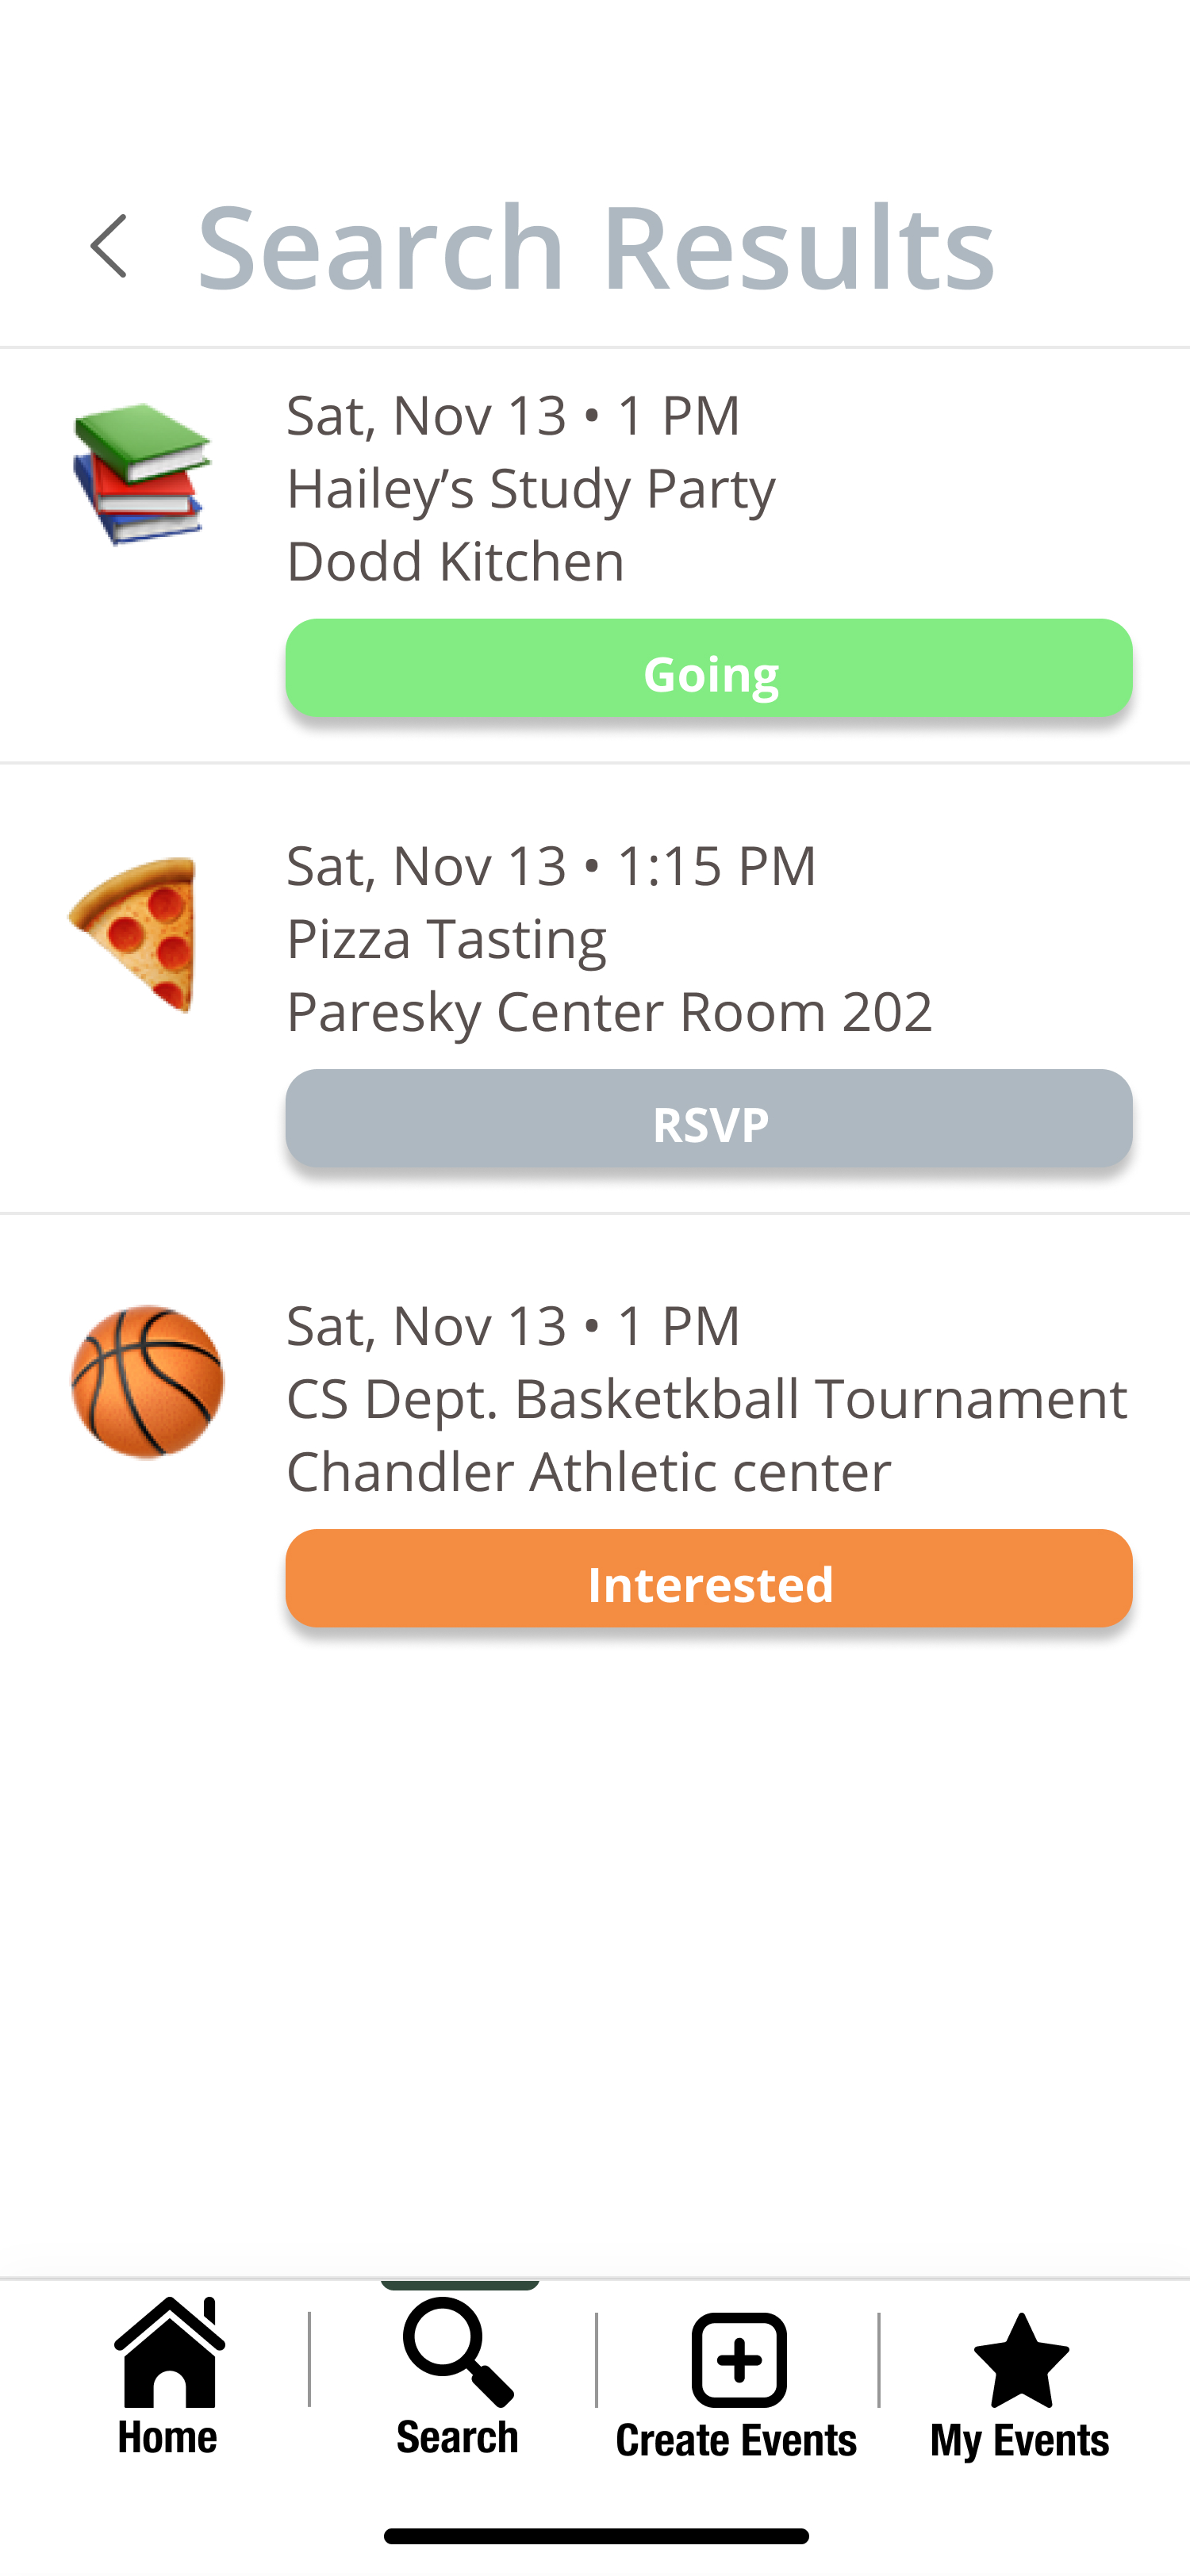
They can respond to the event by selecting “Going”, “Interested”, or “Not going”.
After the user has indicated the response of choice, they are referred back to the comprehensive list.
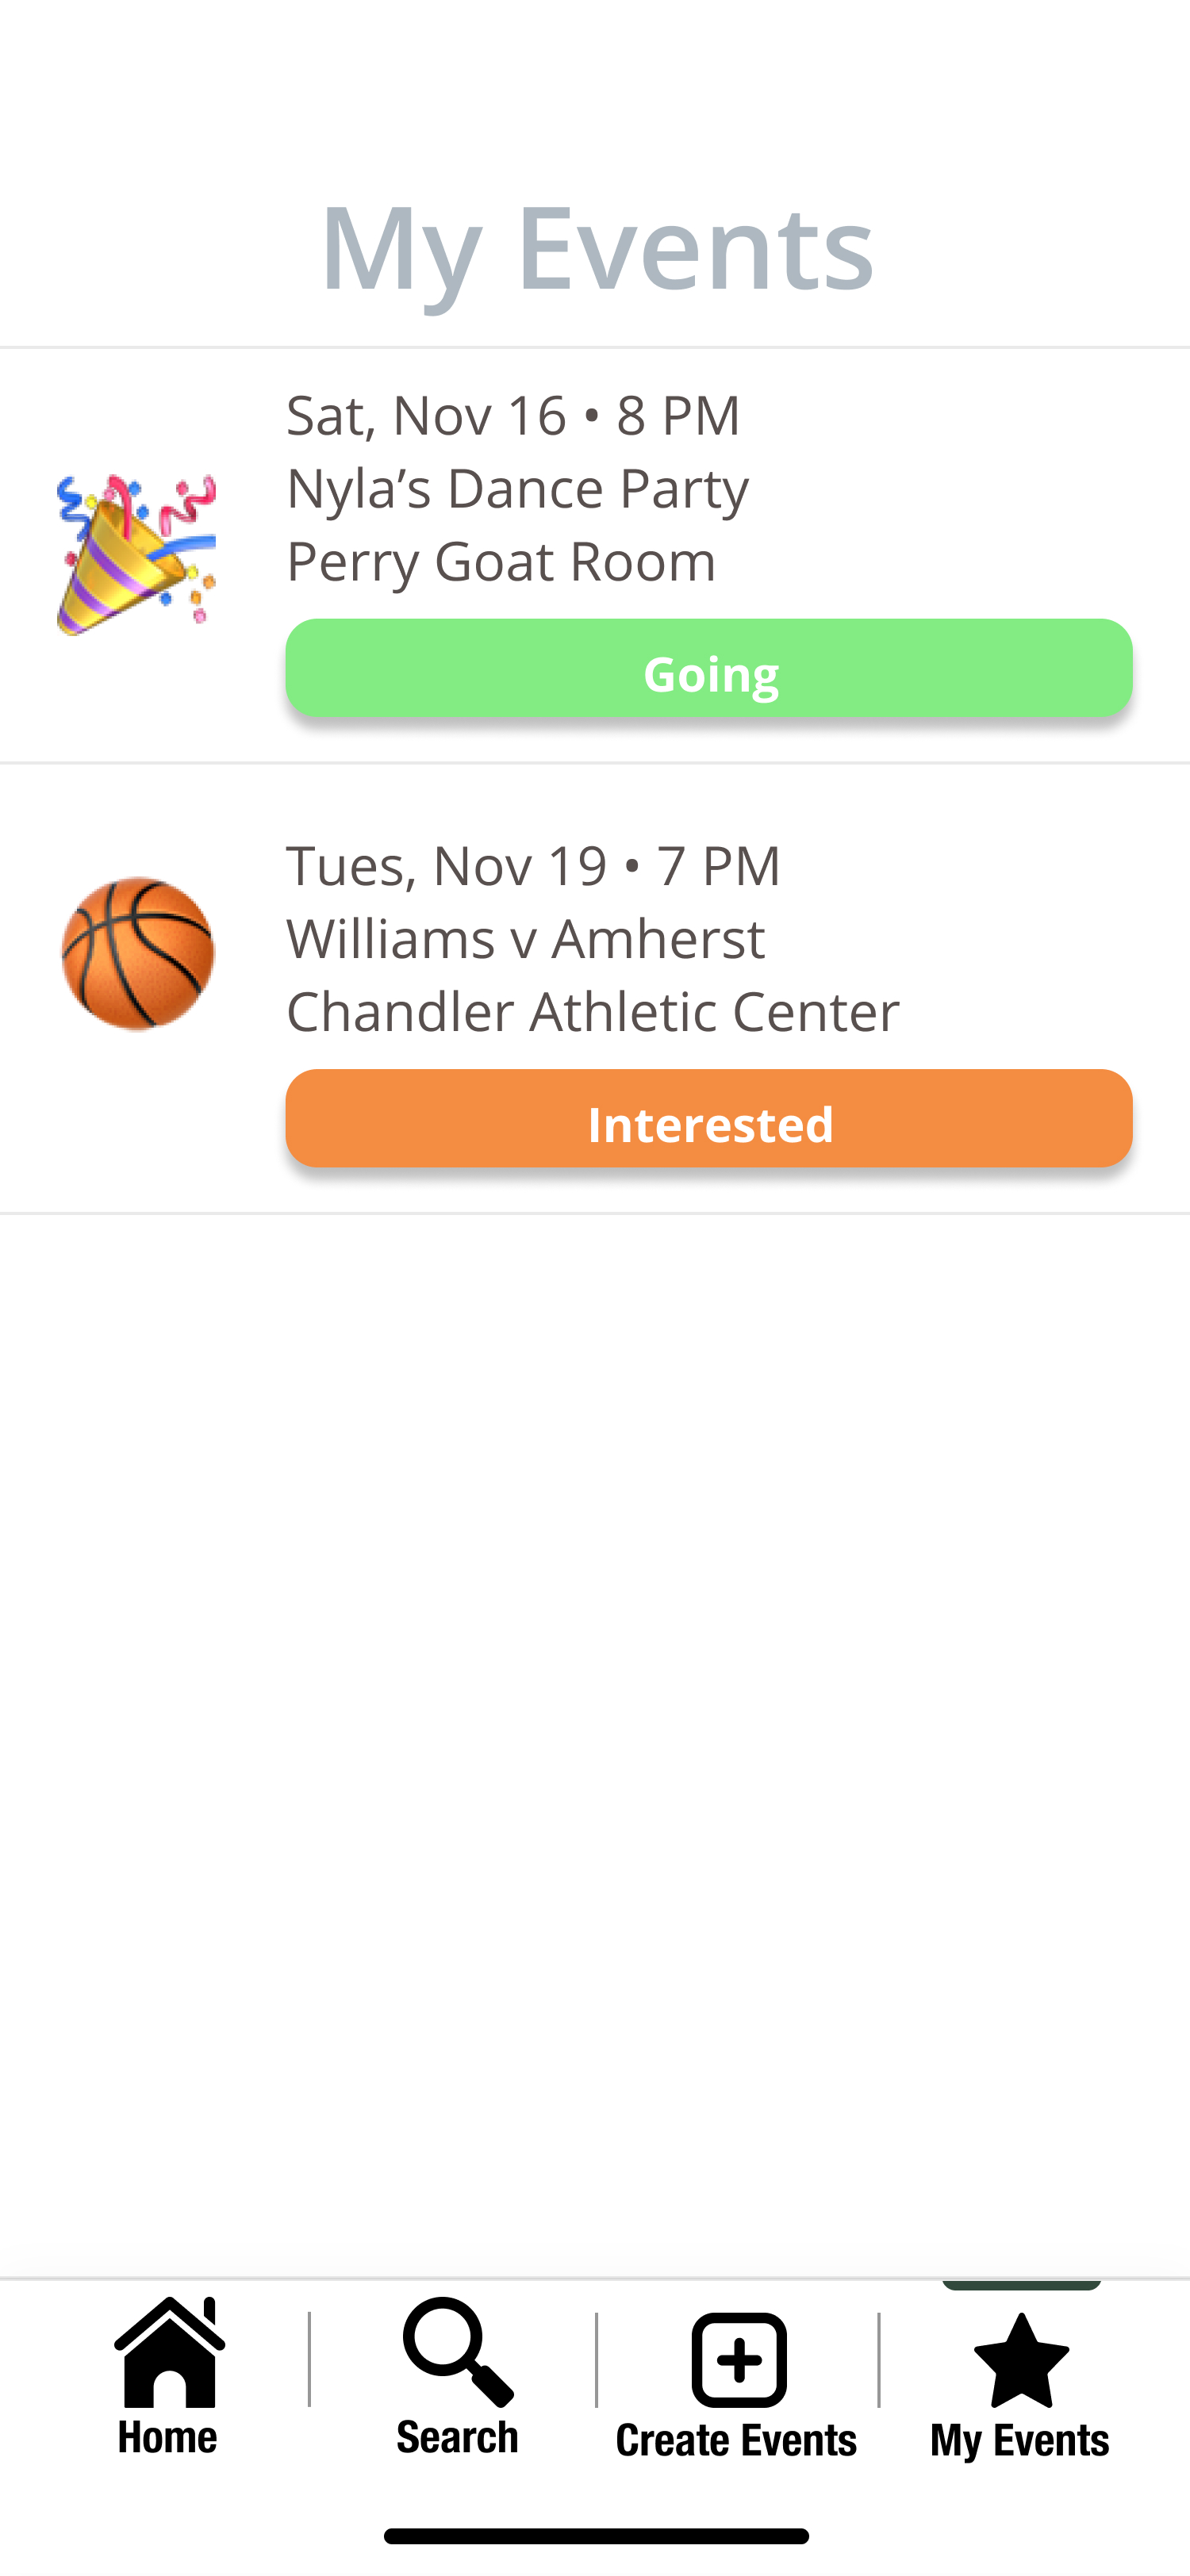
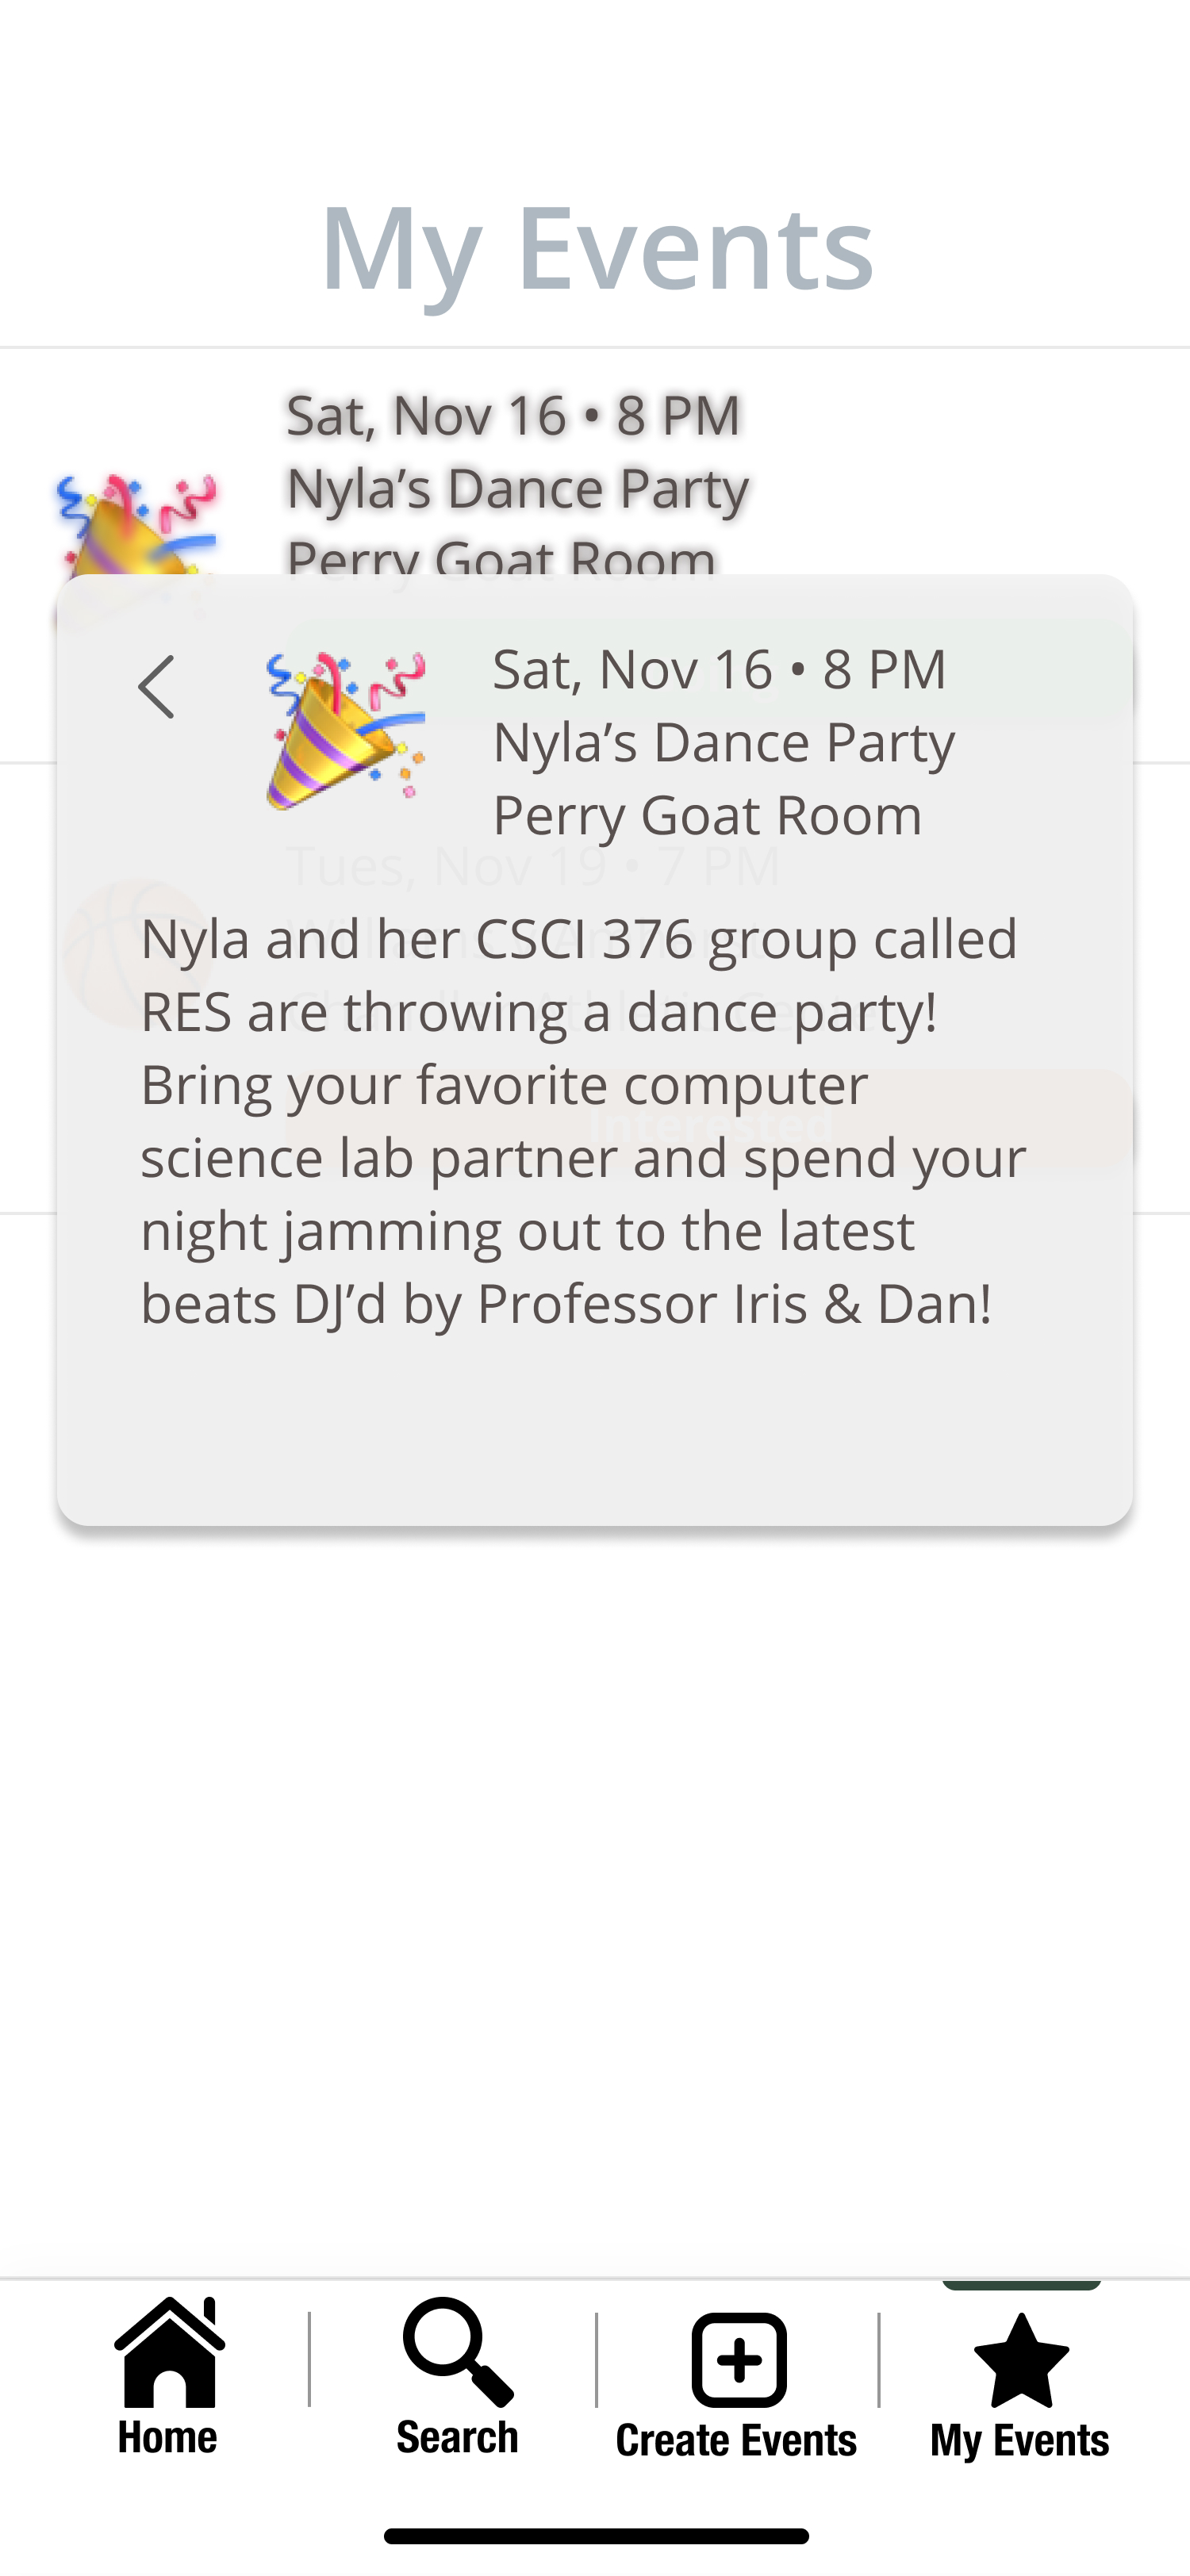
The user is then able to view the events they have responded as “Going” or “Interested” in the “My Events” page.