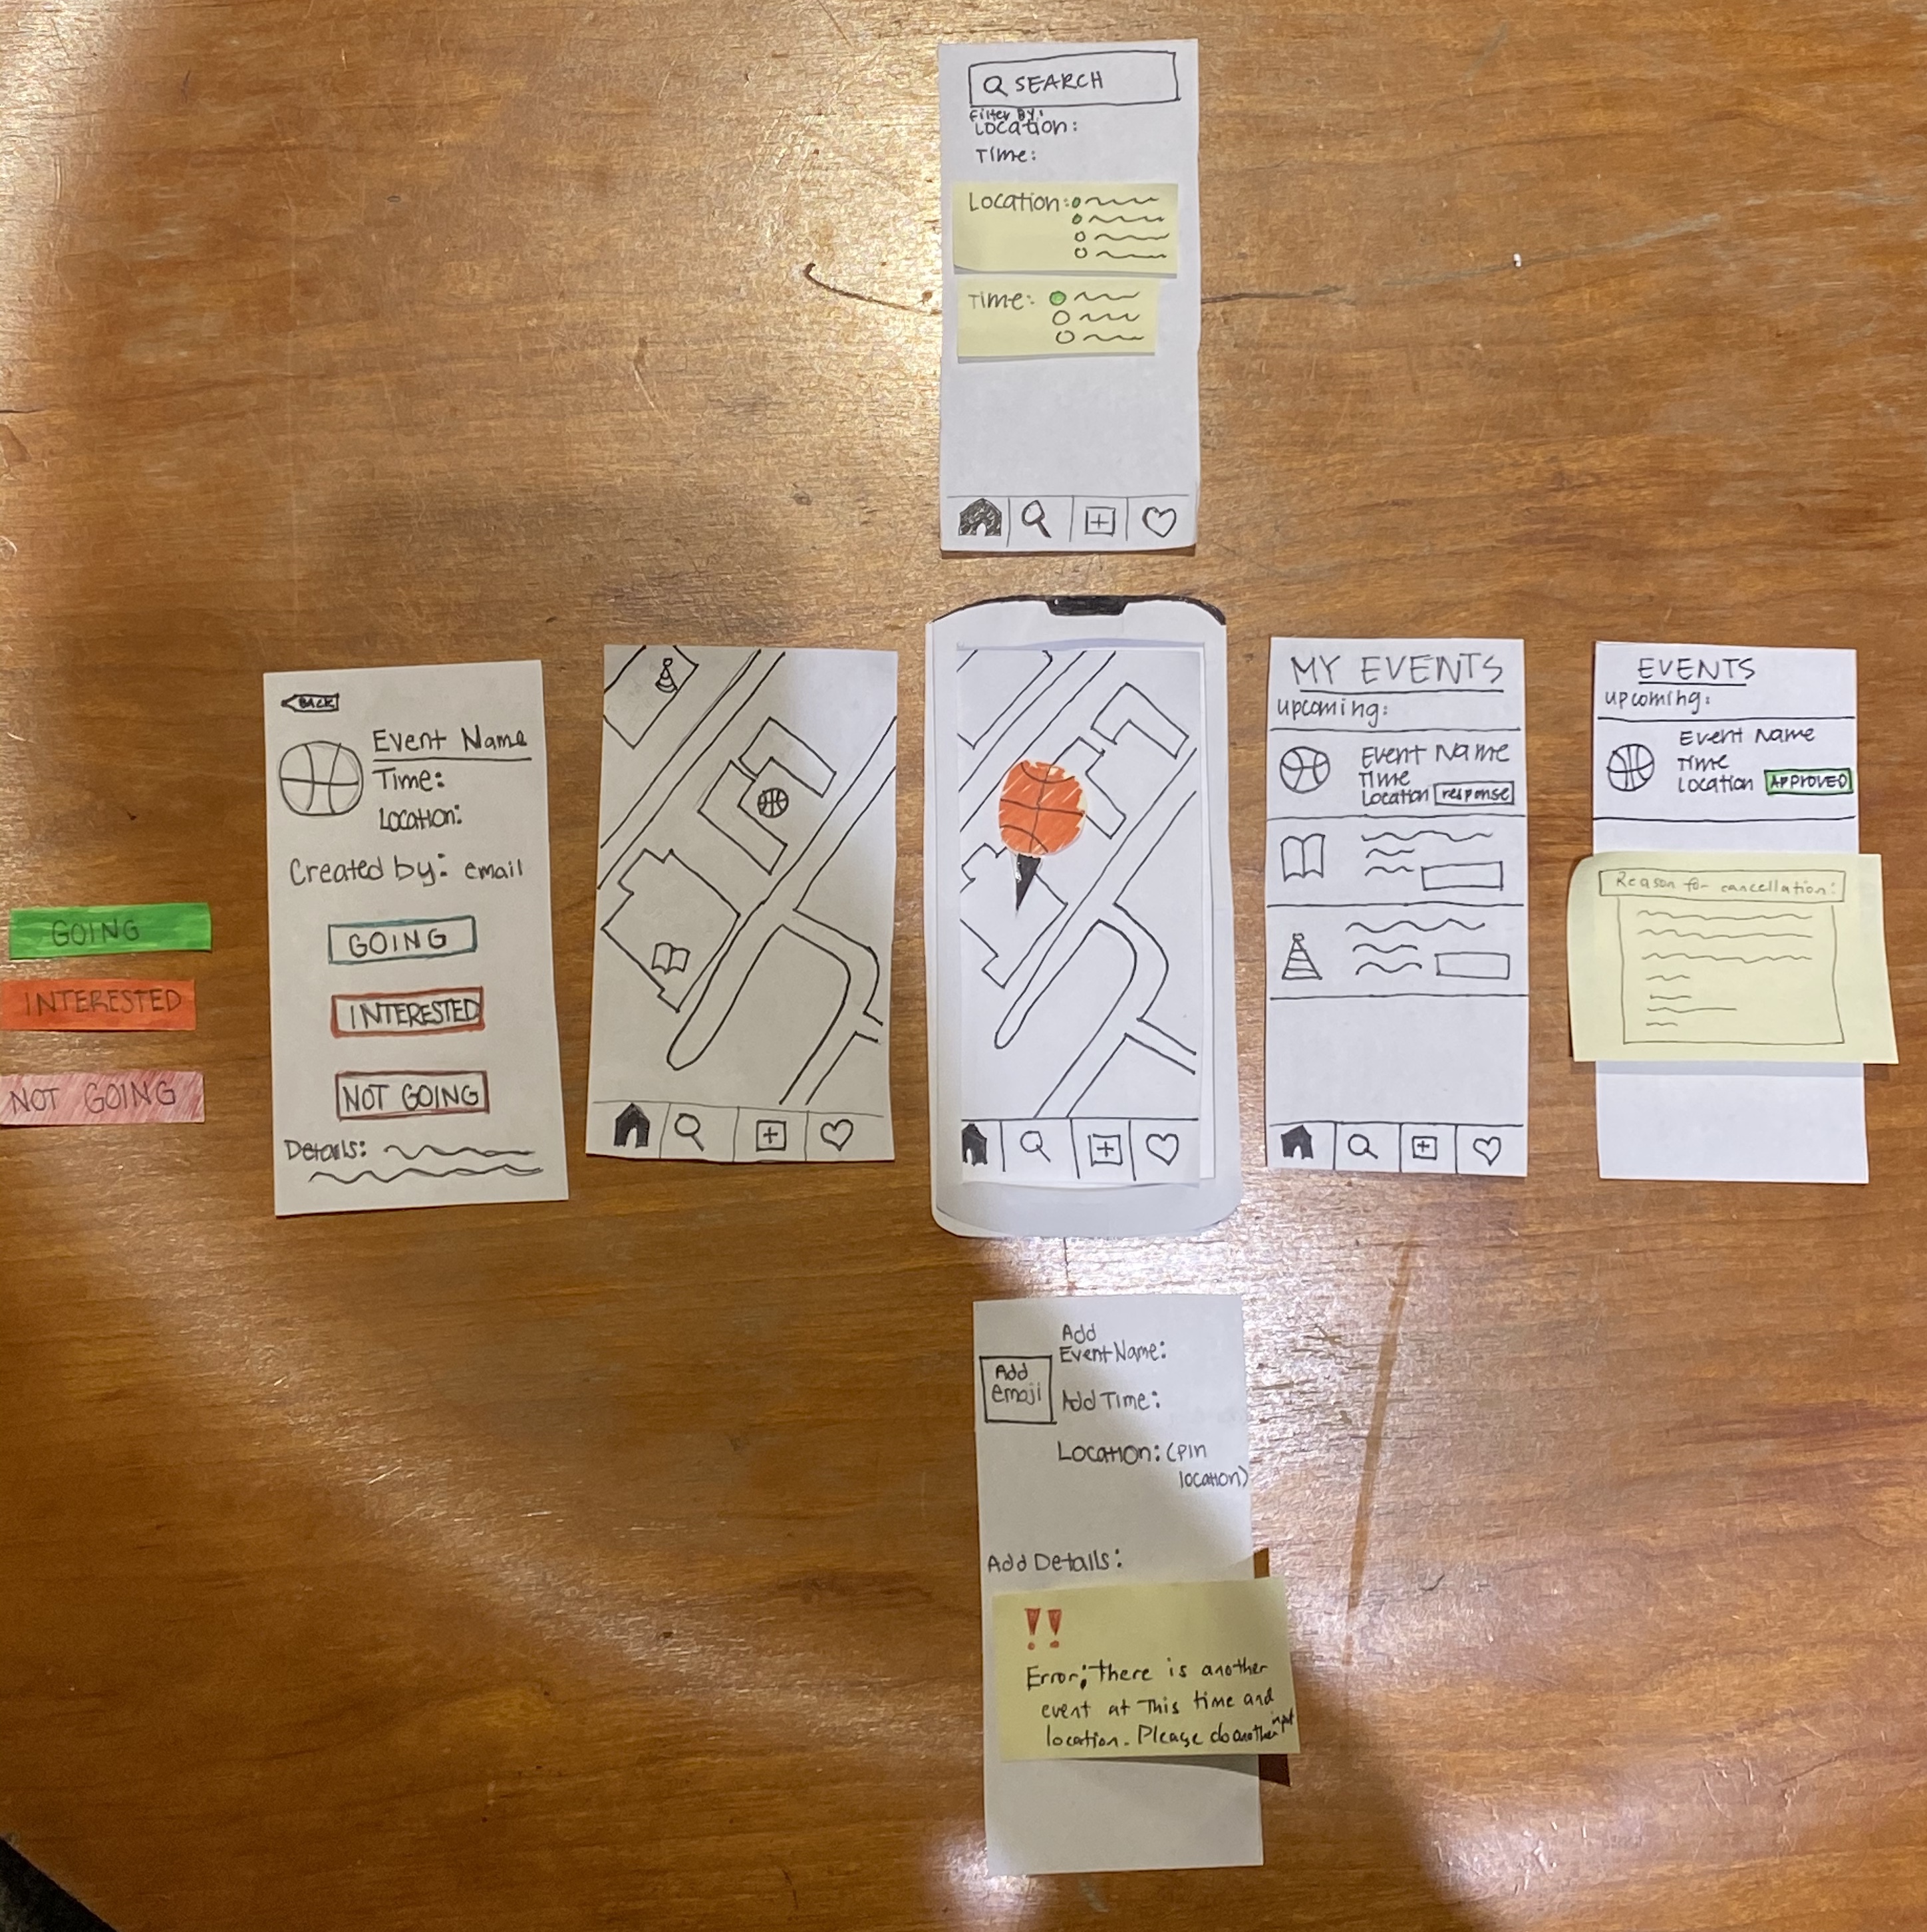
This is a photo including all the parts of our paper prototype.
Task 1: Browsing and responding to an event
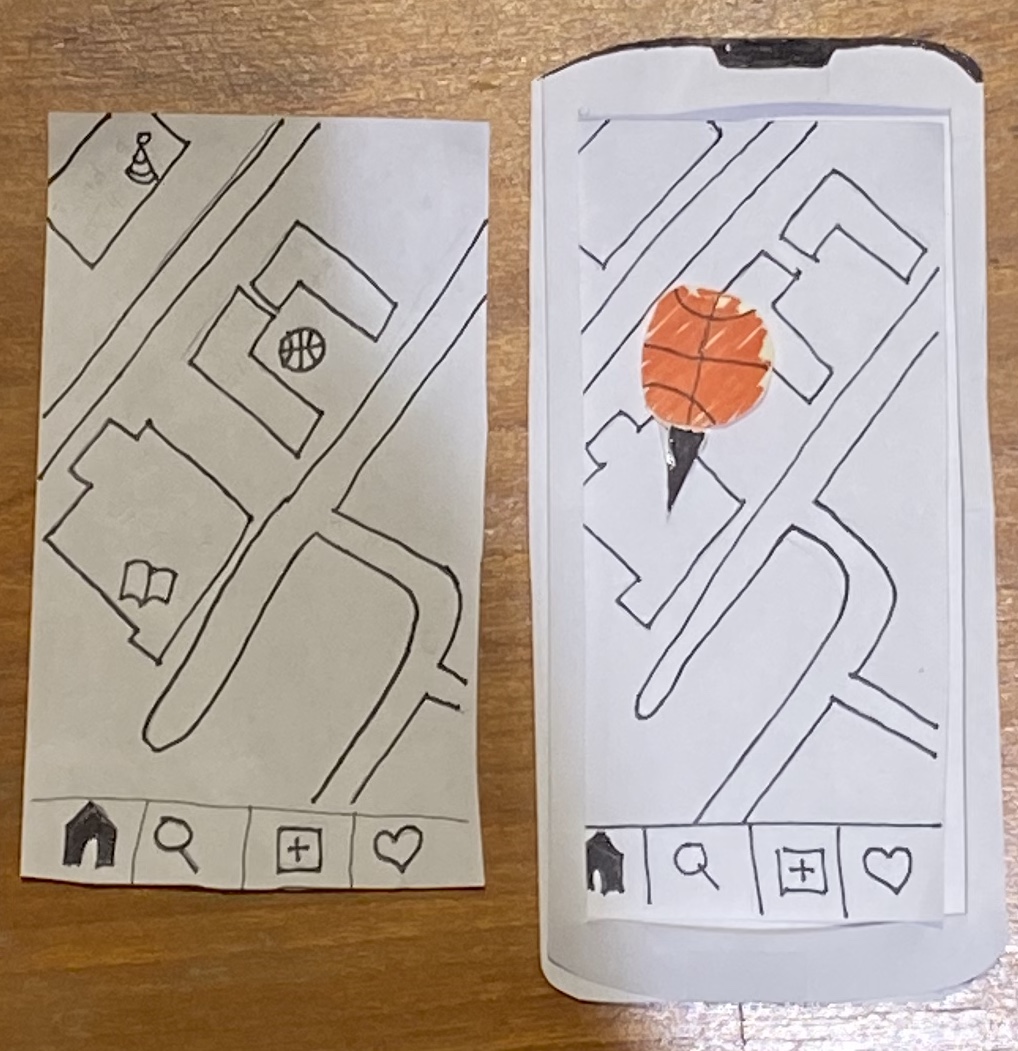
One way of browsing and responding to events is through the map displaying events that are currently happening on campus. When a user first opens the application, they will see a map similar to the display on the left where there are small icons (emojis) throughout it representing different current events. As the user zooms in, these emojis will appear larger like the display on the right, allowing the option of more easily clicking on it
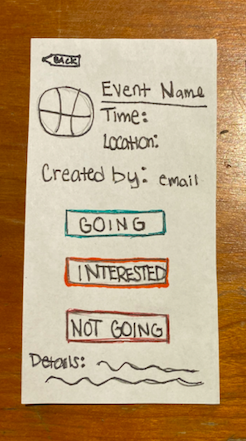
Once an emoji is clicked on, the user can see the corresponding event name, time, location, details, and creator (displayed through their email contact). On this page, users will be able to respond “Going”, “Interested”, or “Not Going”.
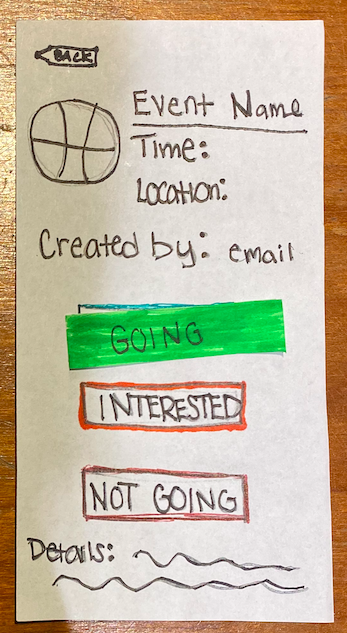
Once the user indicates their response by clicking on the appropriate button, it is highlighted with a corresponding color. If the user clicks “Going” or “interested”, the event will be displayed on their “My Events” page. If the user clicks “Not Going”, the event will be deleted from their personal map and can only be found if searched for.
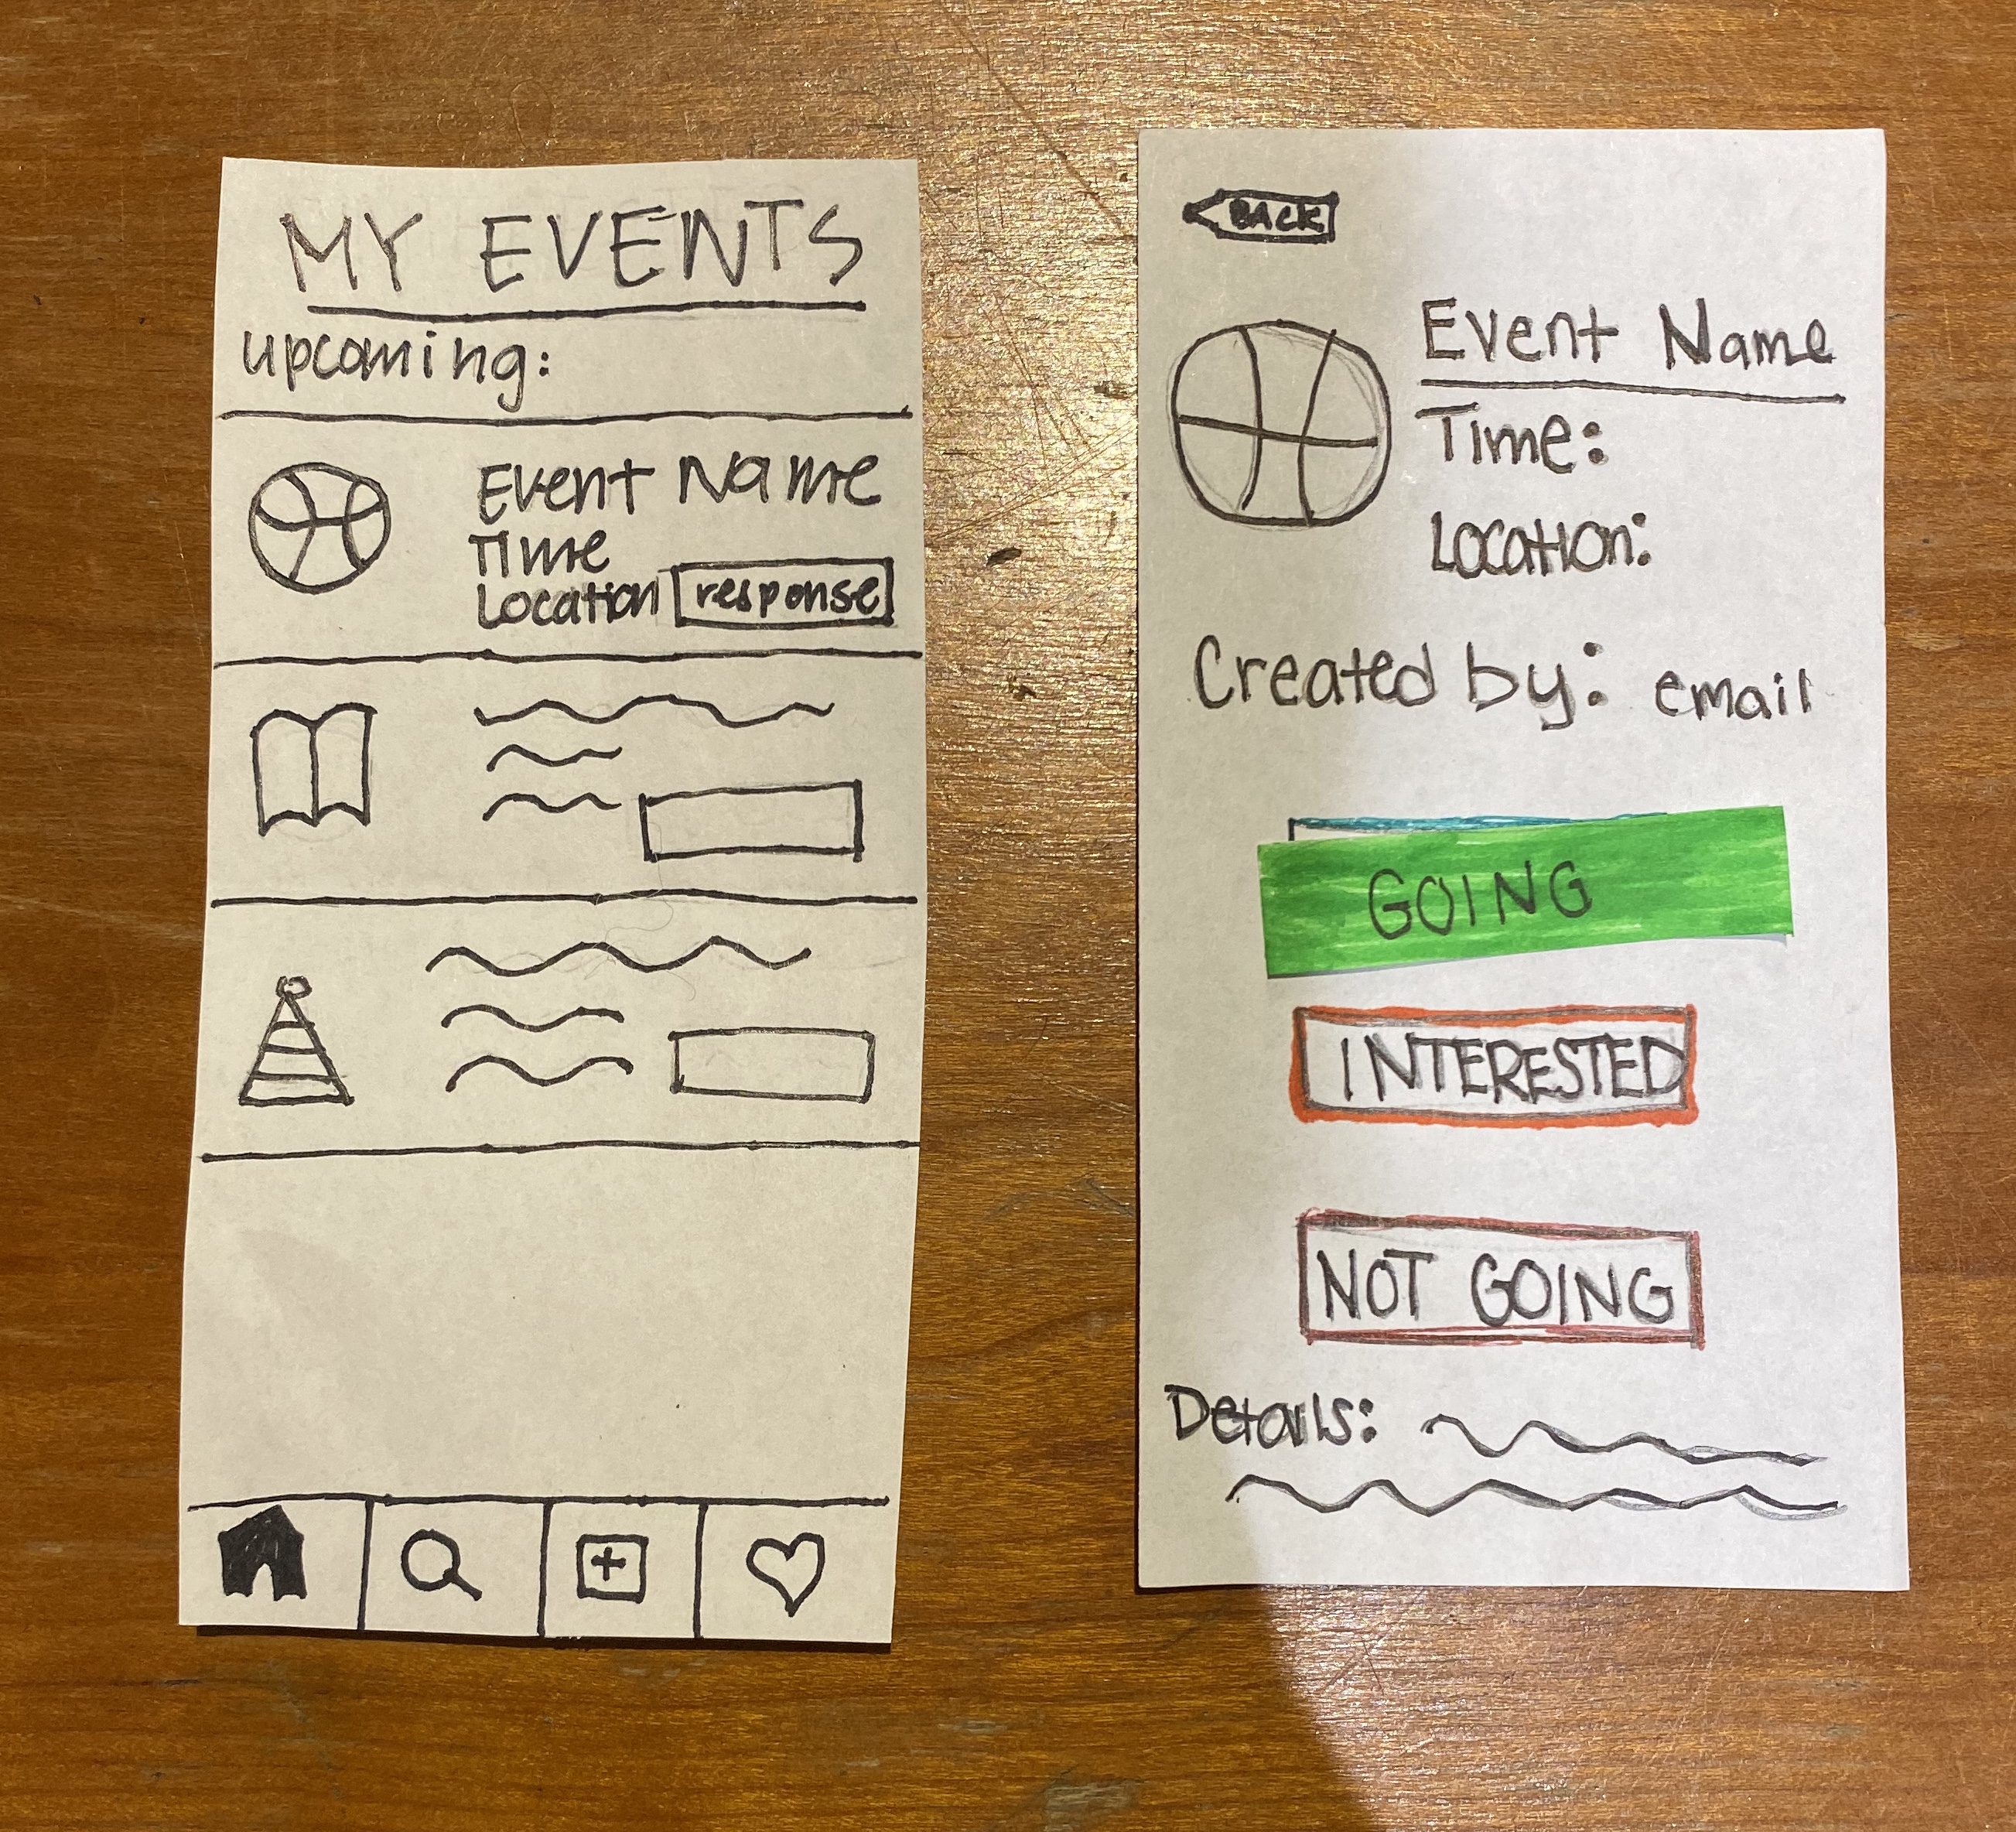
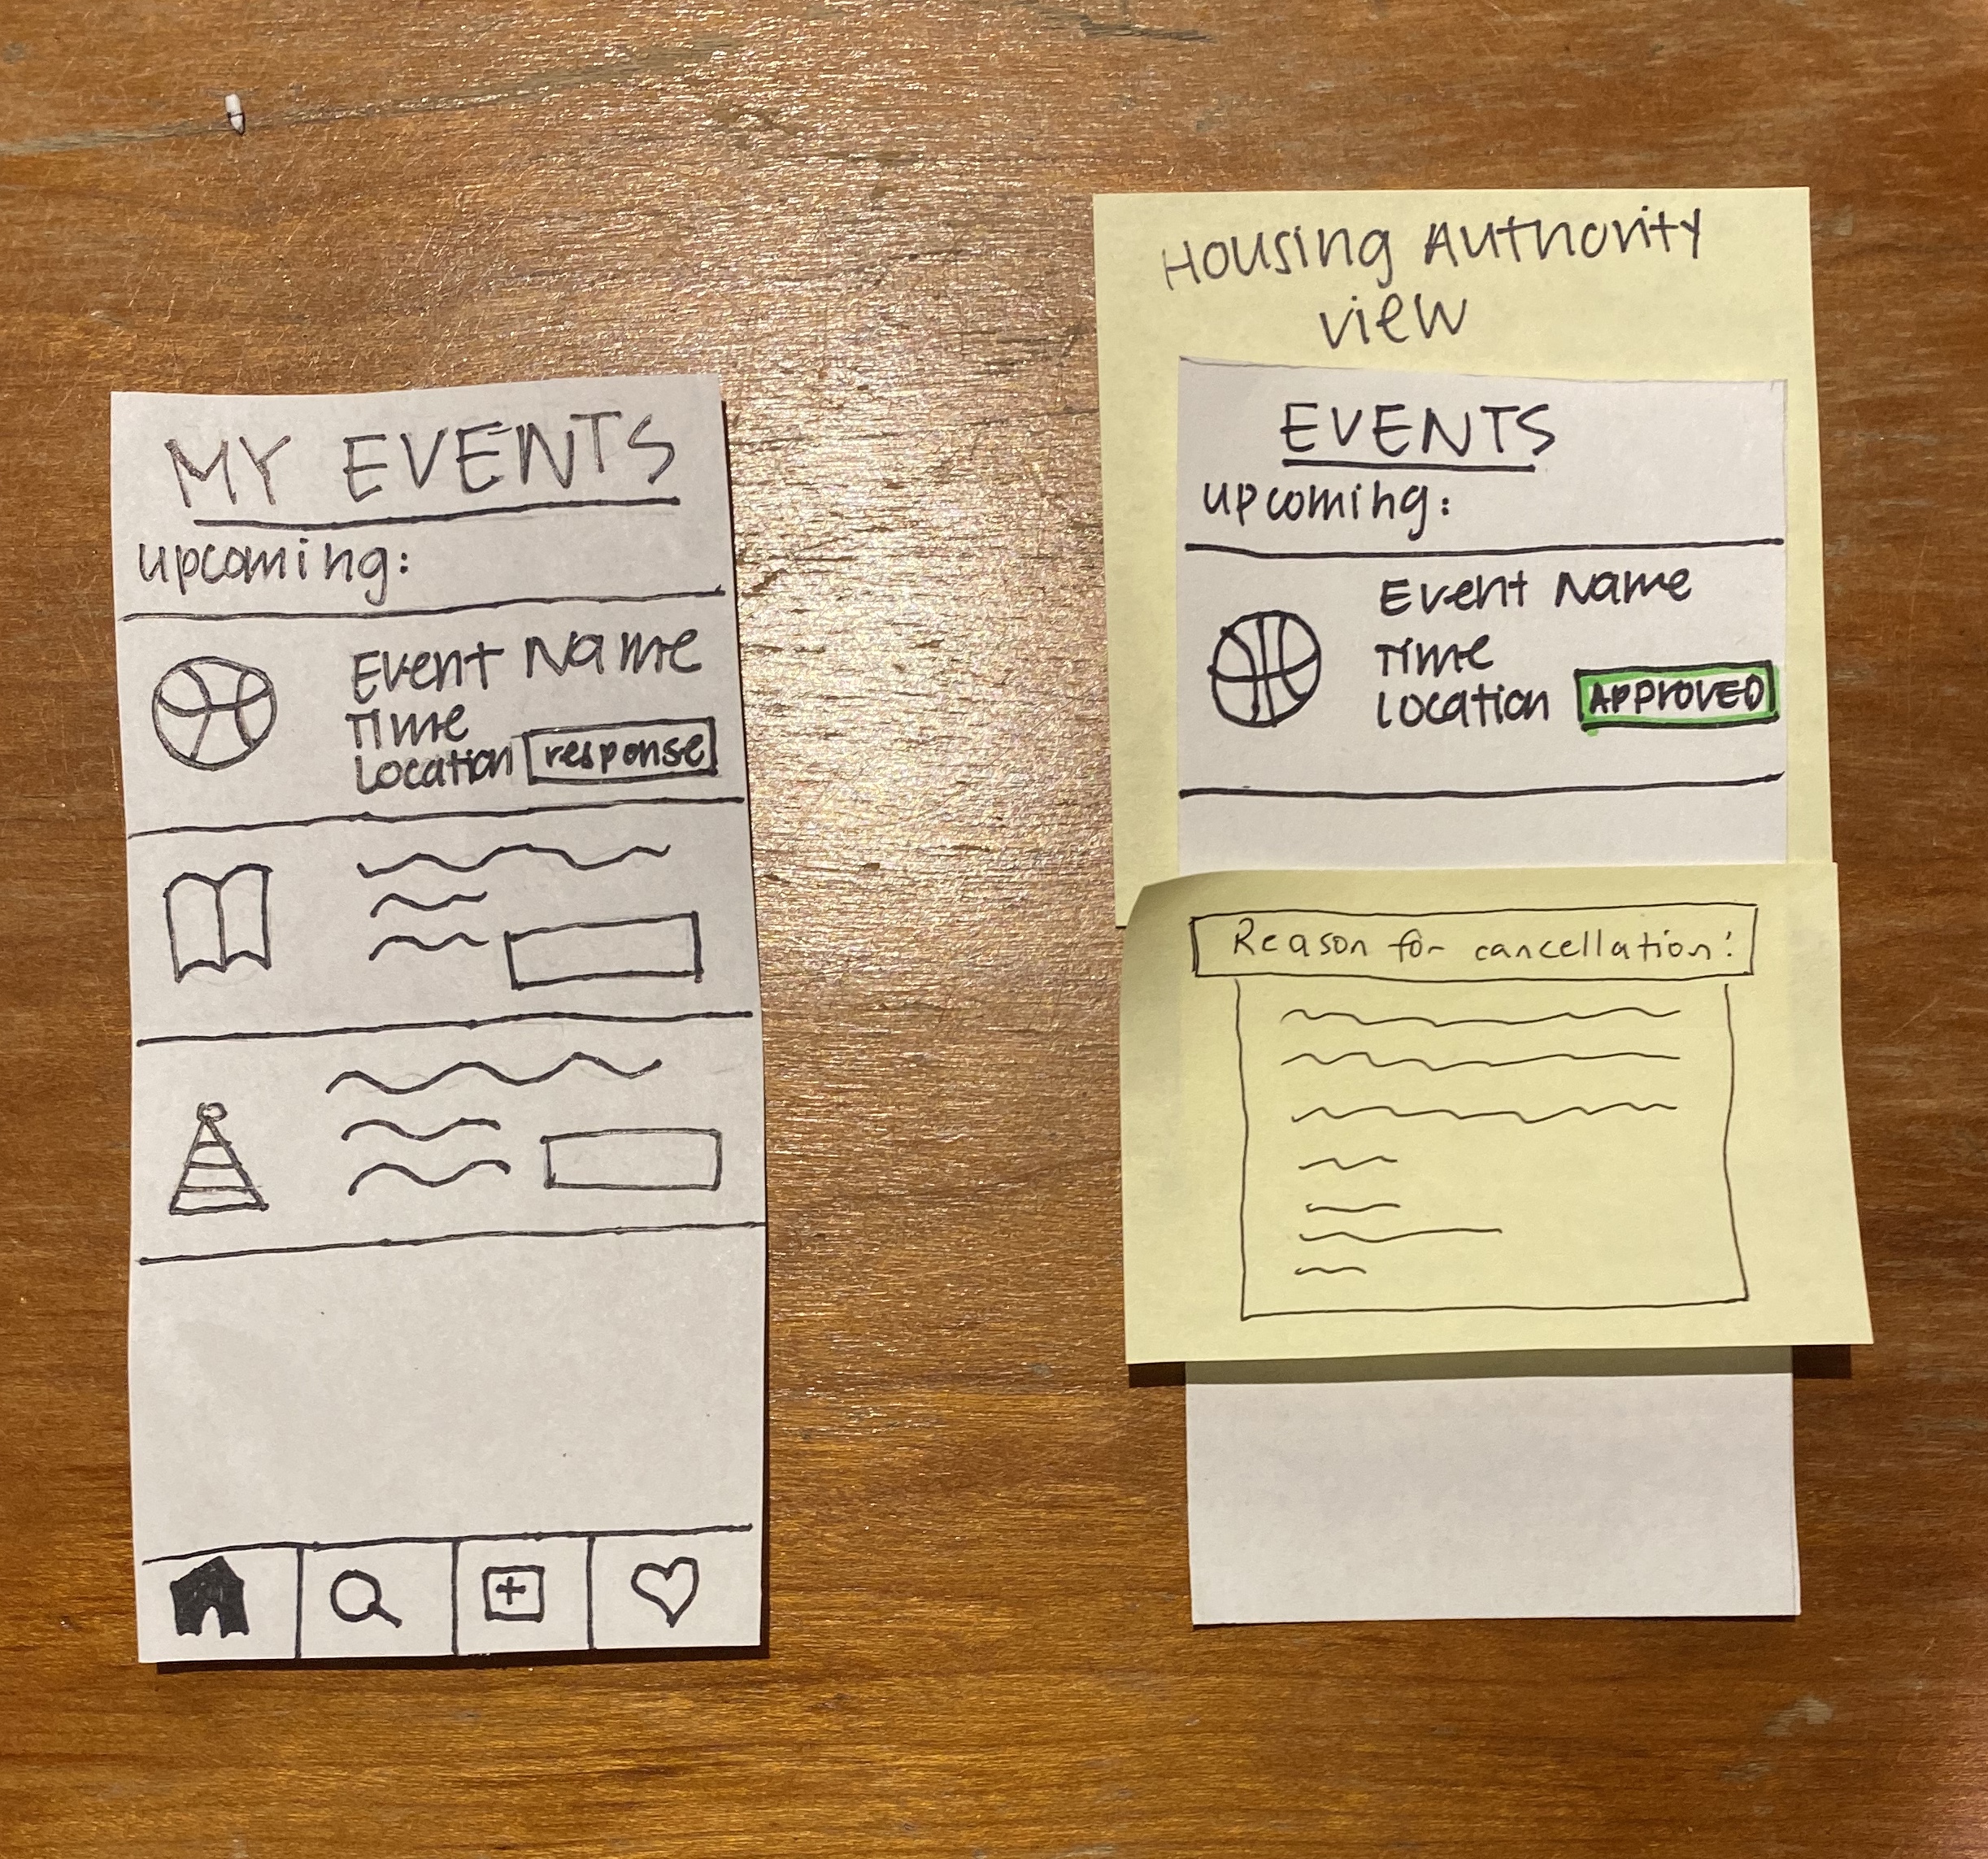
The “My Events” page lists the events that the user has indicated as “interested” or “going”. It displays the events according to time. The event’s name, icon, date, time, location, and response are shown. When a user clicks on an event on this page, it shows more information about the event and allows them to edit their responses. This page can also be accessed through the heart icon on the bottom of the application home screen.
The housing authorities have a different view on their interface and it is labeled as “Events”. It displays all the events that are upcoming in time order. The approval status of the event is also shown. When the user clicks on the status of the event, they are able to disapprove of the event by submitting a reason for cancellation.
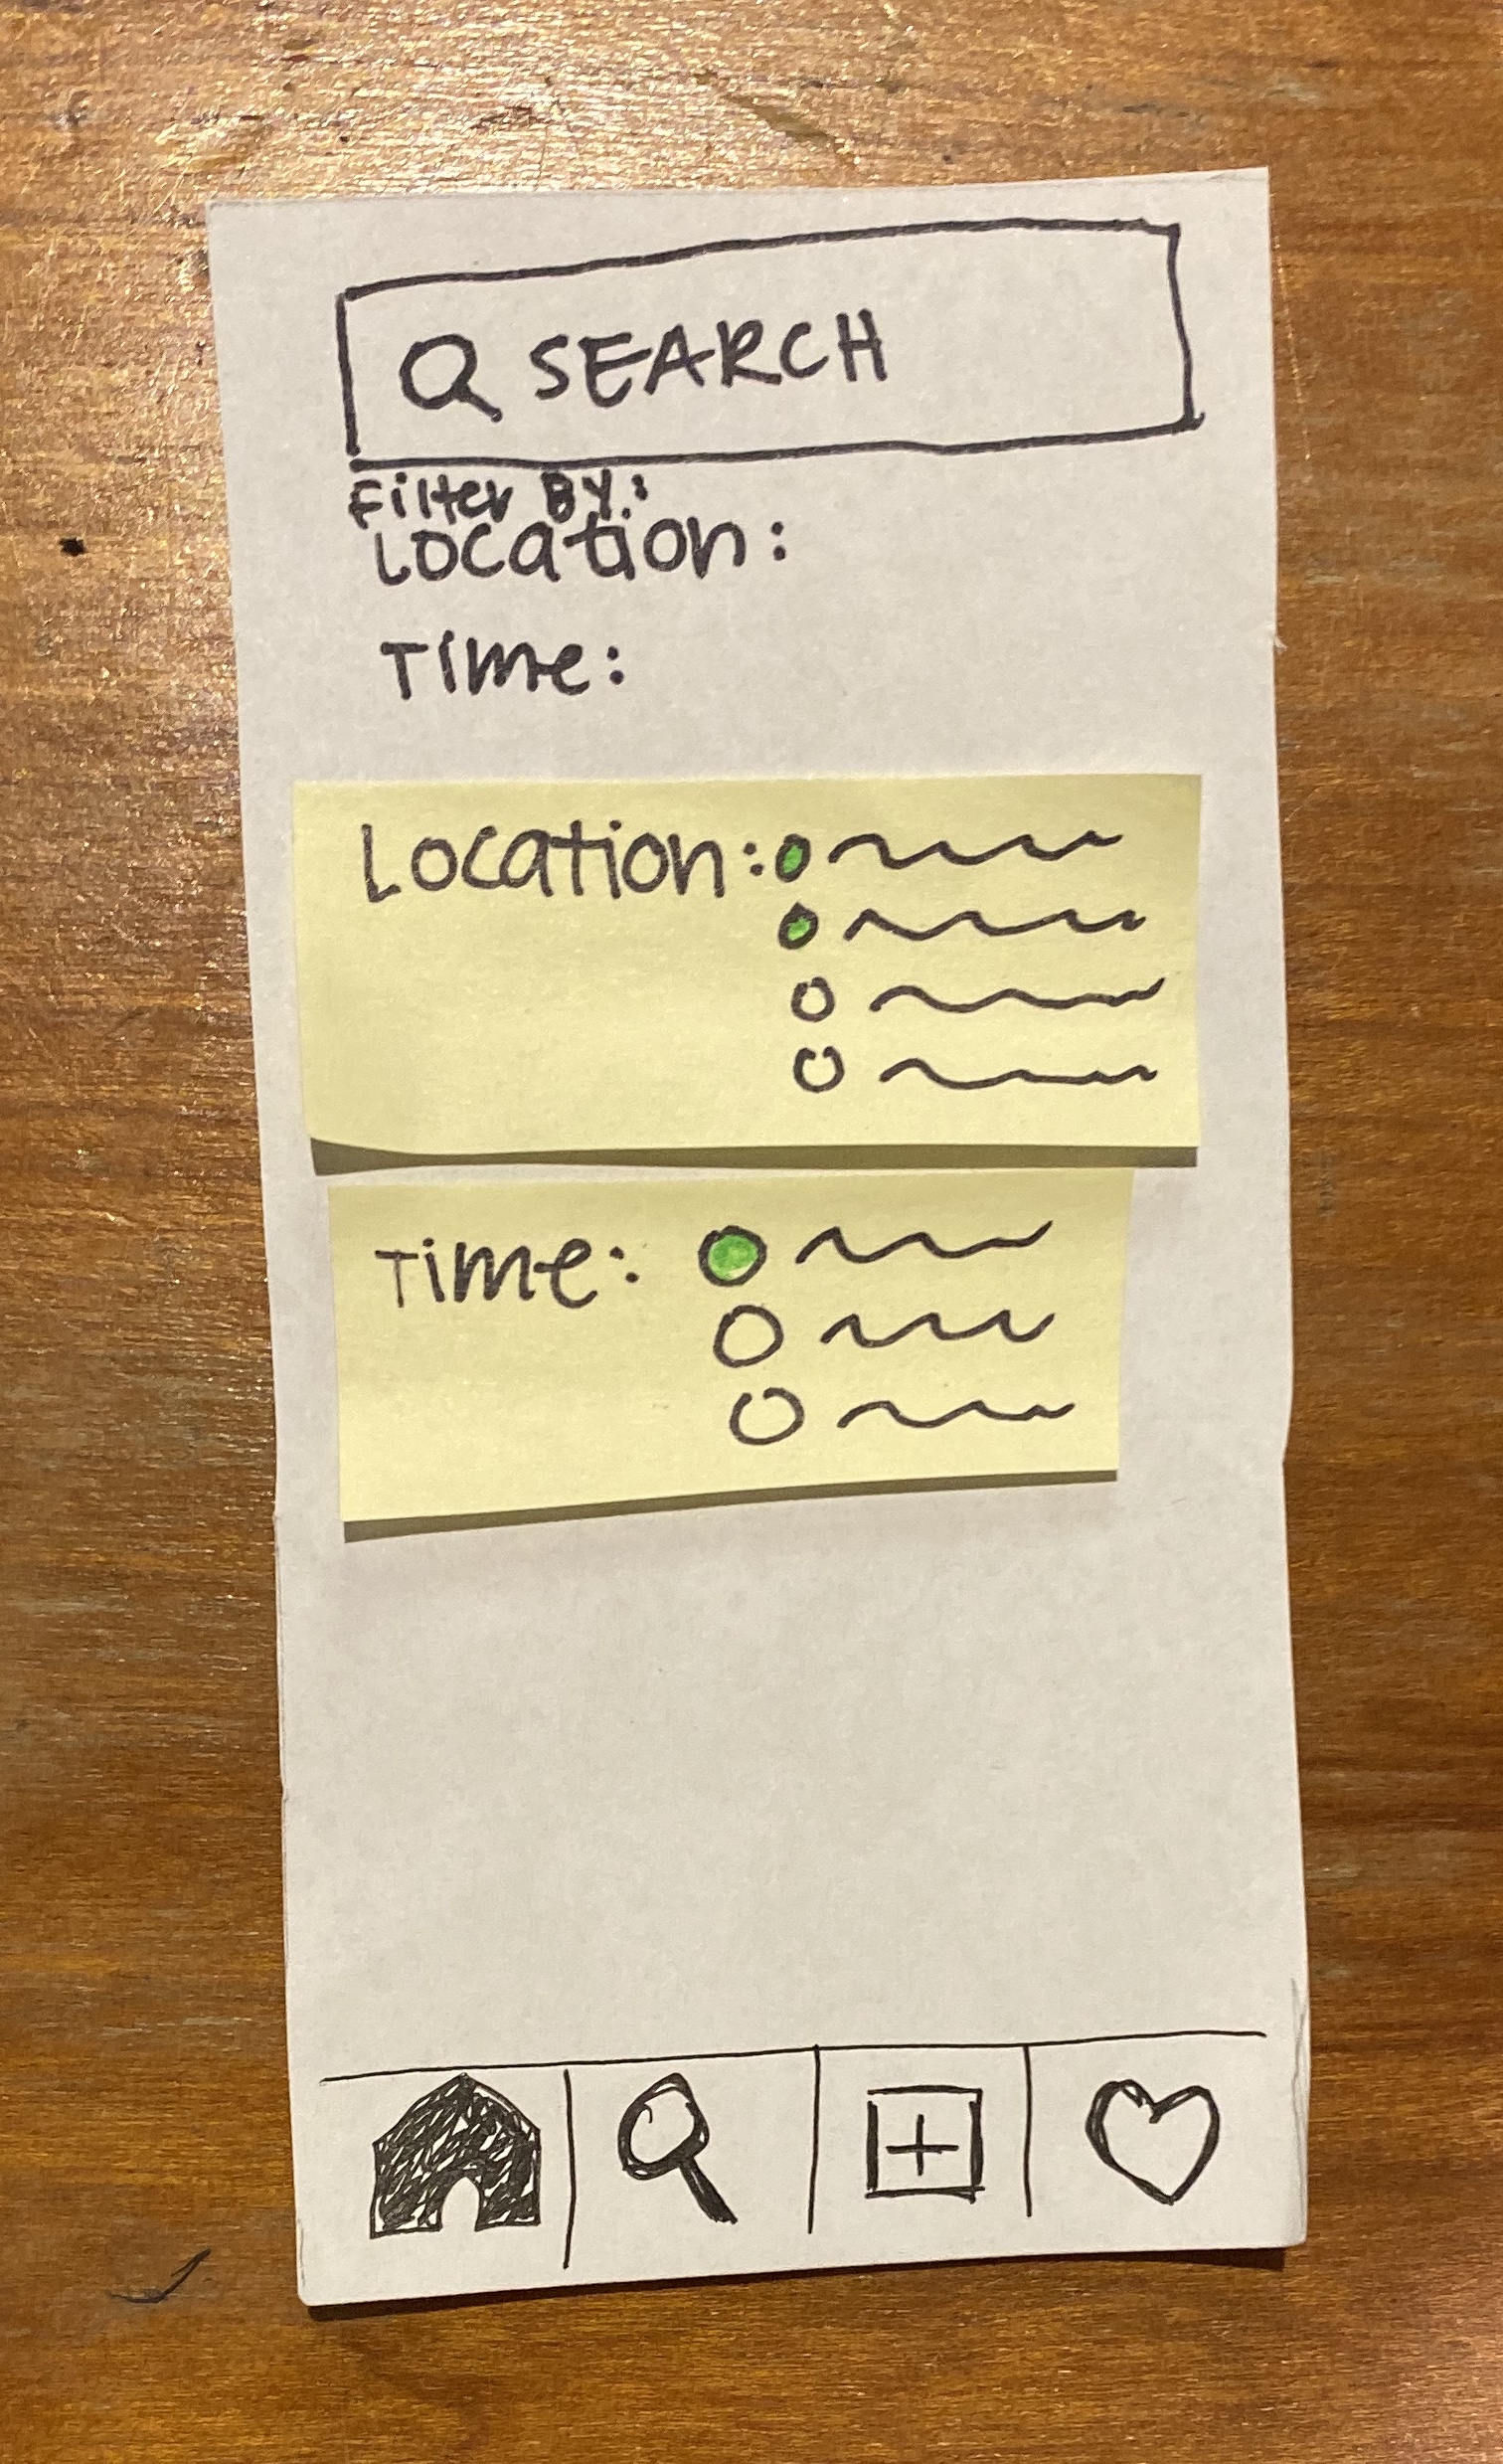
The user can alternatively browse through the “Search” page by entering the location, icon, or event name. There is an option to filter through all the upcoming events by location and time. After clicking on the desired filter category, the user can check all the filters they want to add.
Task 2: Creating a Social Space

Within the home screen you can access the event creator by the boxed plus sign in the icon bar on the bottom of the screen.

You enter a map once you tap on the +. Here, you have a pointer that you can drag and drop onto the location of the event you are trying to create.
After dropping the pointer icon you are immediately redirected to a blank event template where you can enter in the title of the event, time, details, and add an emoji related to the theme of your event (e.g. basketball game will have a basketball emoji).

When the user tries to create an event at the same time and location as an existing event, the user will be confronted with an error message instructing them to pick a new location or a new time.
